


May Arts is a ribbon company with a very nice selection of lovely ribbons. They also have a great design team and a blog full of wonderful ideas.
A few weeks back they posted a challenge and I decided to enter. They would send out several ribbons to use and asked us to create a project with all of them and the theme “Sentimental Journey – Vintage Valentine.”
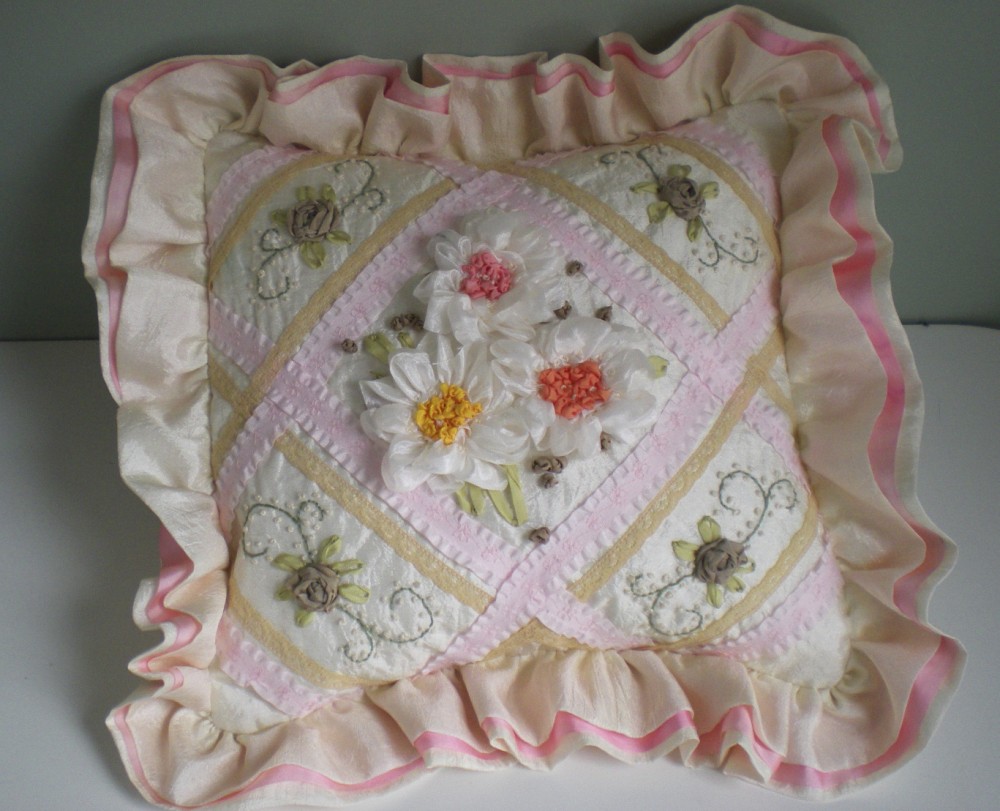
I immediately had an idea and decided to enter. Of course, my project looks nothing like my original idea, but that’s ok, I just needed a place to start. 🙂 This is what I came up with, and I’d like to show you how to make your own.
(Click on any of the photos to see a larger image. Click on the square with an arrow to go even bigger.)
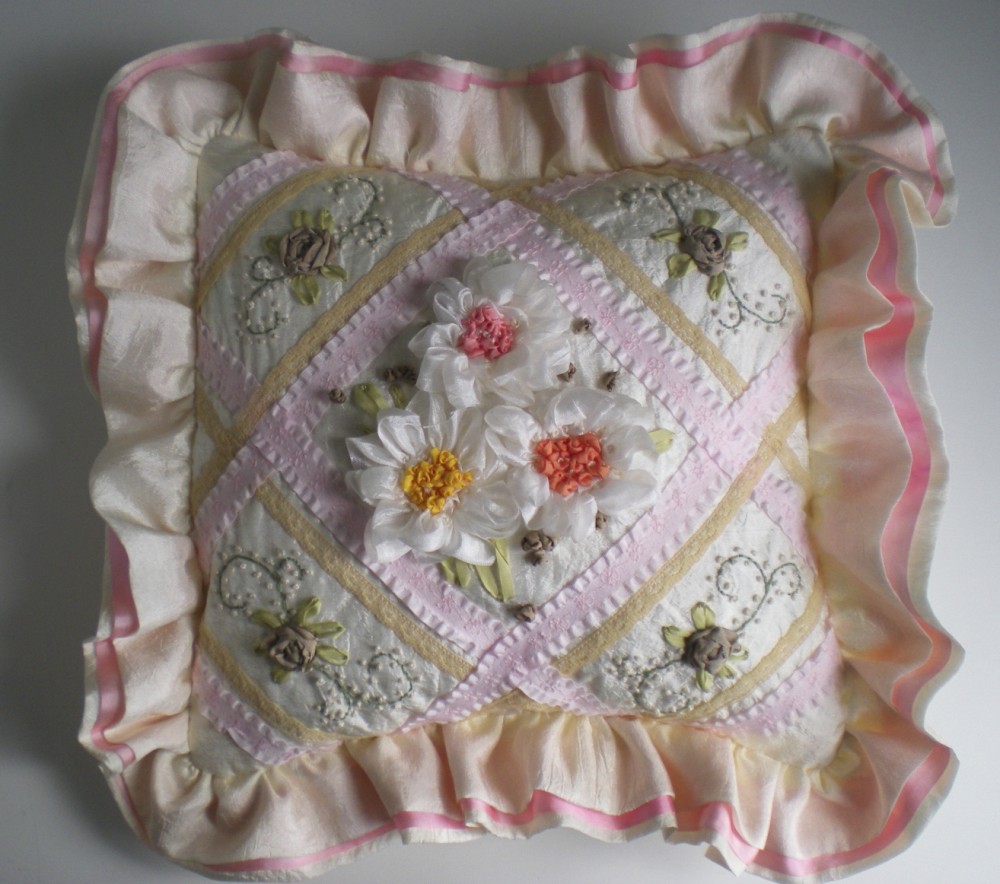
Isn’t it sweet?
I love doing silk ribbon embroidery because it looks so complicated but is really very simple. In fact I’ve got a video for you to prove how easy the stitches are.
Actually, it’s two videos. Bonus! 🙂
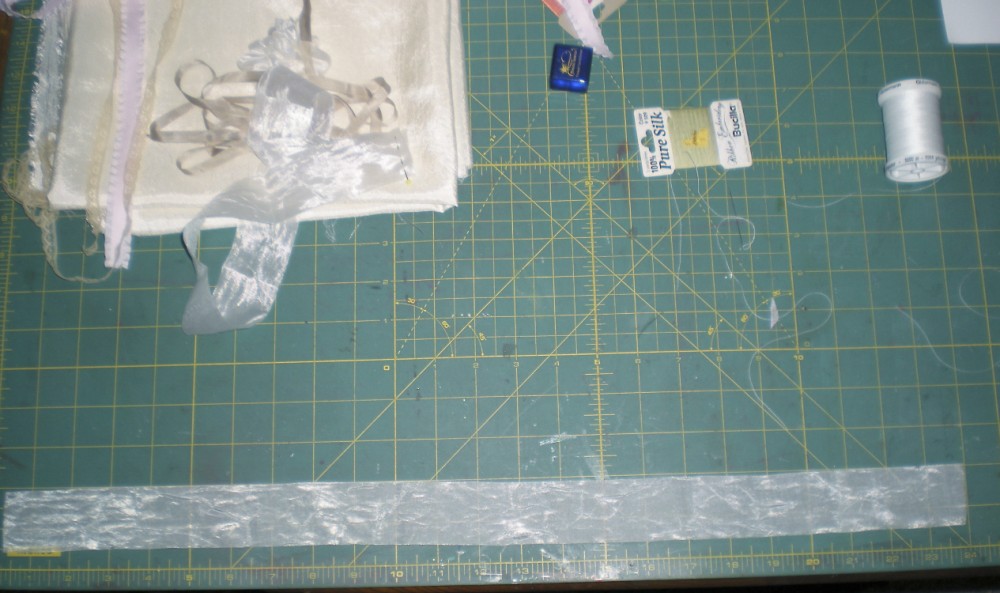
Here are the materials you will need to make your own pillow:
- 1 yard fabric for pillow front, back and ruffles (I used Silkessence, a lining fabric from Joann’s. It’s a light ecru/cream color and has a nice crinkled texture.)
- 11″ square lightweight to medium fusible interfacing
- 4mm silk ribbons in green, yellow, pink and peach (or colors of your choice)
- embroidery floss in a green and off-white of your choice (I used DMC 522 and 712)
- 2 yards 1.25″-1.5″ wide pink silk ribbon
- 10″ square pillow form
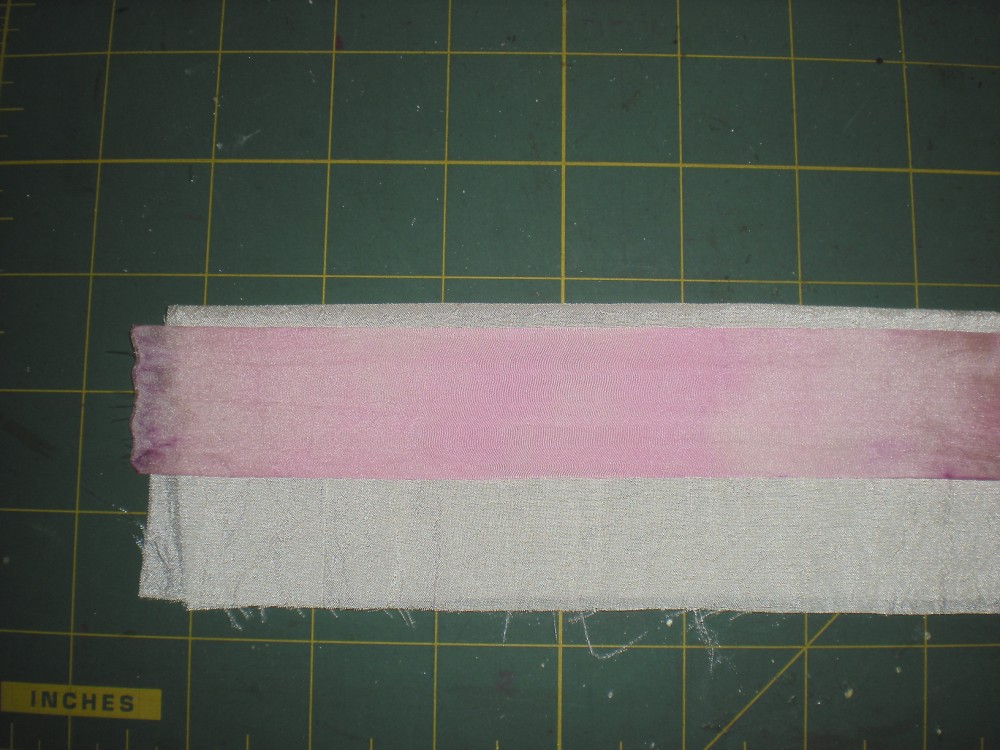
These four ribbons are the ones May Arts sent me to work with. Their item number is after the name in parenthesis.
- 2 yards 3/8″ white scalloped edge lace (390-38-09)
- 2 yards pink faux suede with ruffle edge (NV17)
- 2.5 yards 1/4″ taupe silk (SK35)
- 2 yards 1.5″ solid crinkle in white (EA01)
To get started, thoroughly wet the 3/8″ white lace and wring out. Place in a small bowl with 1/4 cup coffee (hot or cold, it doesn’t matter) and let soak overnight.
I’ll bet you weren’t expecting that for the first step!
Making the white ruched flowers:
(Also shown on the video.)
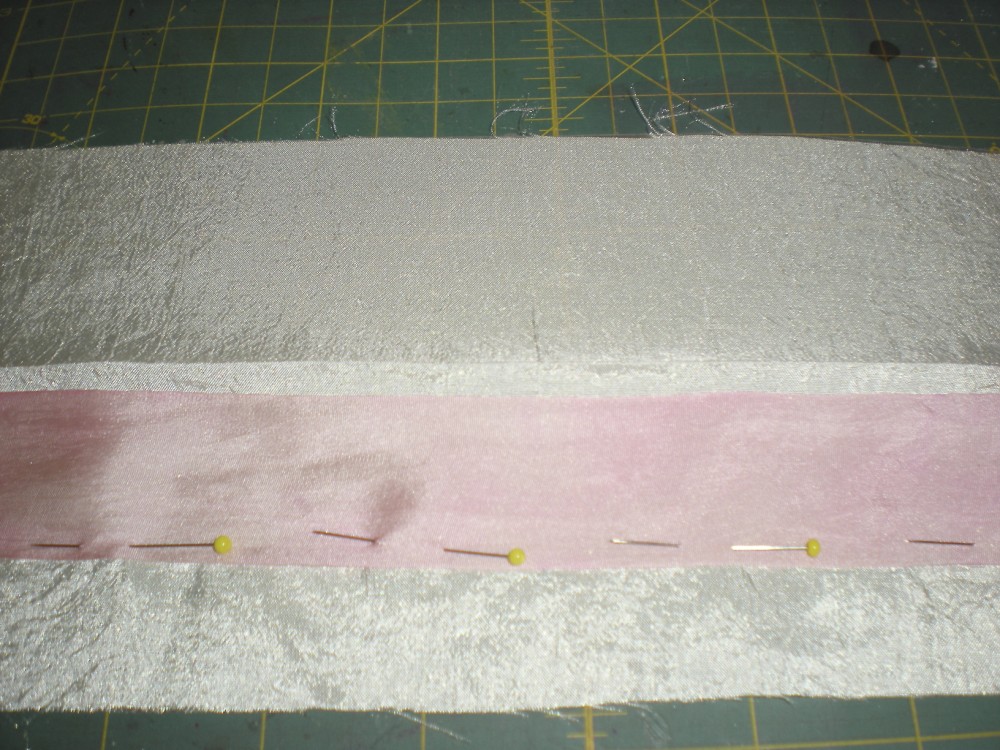
Cut your 2 yards of white 1.5″ solid crinkle ribbon into three 24″ lengths.
Use a water erase marker to mark one long edge of each piece at 2″ intervals. Mark the opposite long edge also at 2″ intervals, but offset 1″ from the marks on the other side. (The marks, if connected, would make a zigzag pattern.)
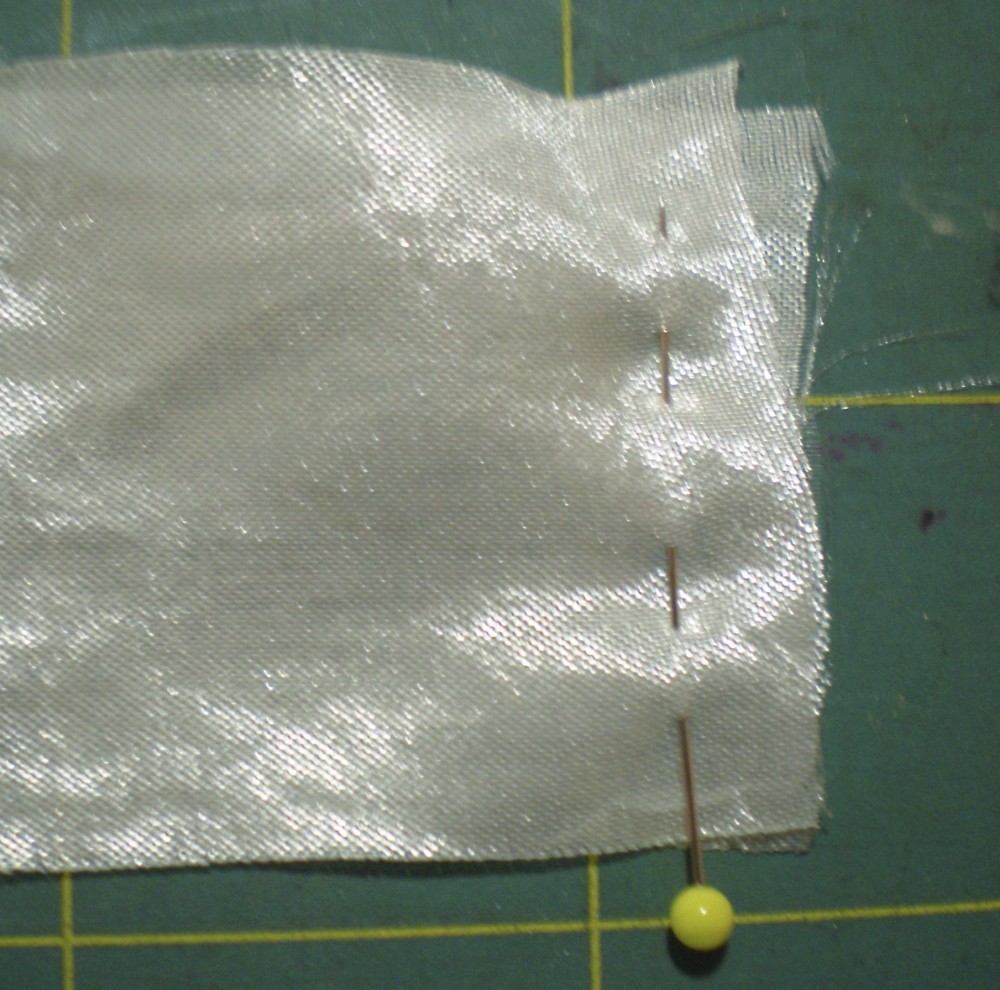
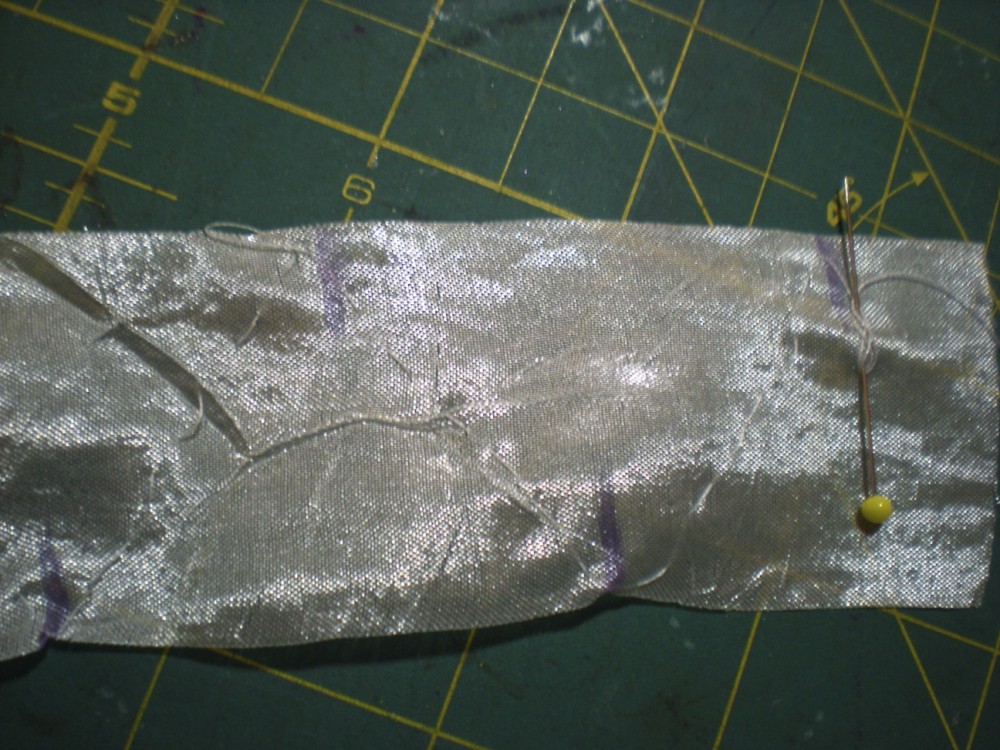
Take one length of ribbon and pin the ends together.
Either by machine or by hand, sew a narrow seam. I chose to do it by hand because I figured it would take about the same amount of time as fighting with my machine while it tried to eat this delicate ribbon.
(I know the ends aren’t sewn together in this photo. I forgot to do it first on this one. )
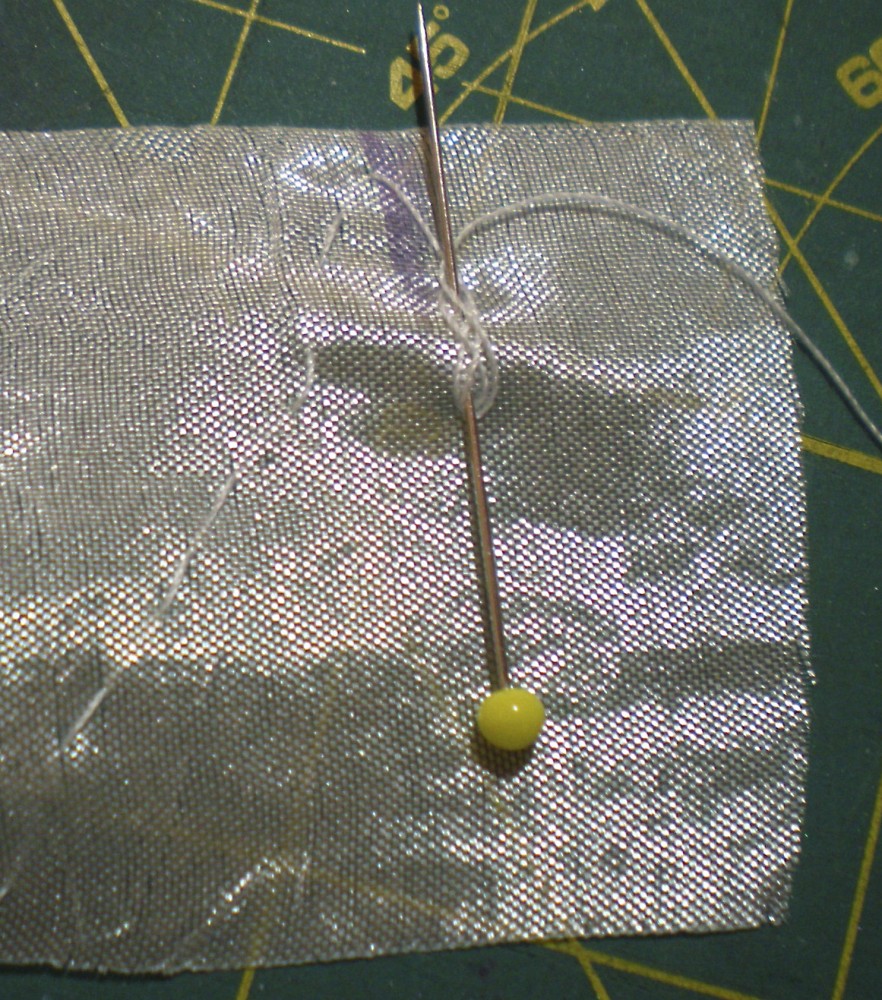
Thread a needle (sharp, not blunt, please) with about a yard of thread to match the ribbon. Anchor the thread end by doing a few figure 8’s over a pin.
Stitching from a mark on one side to the next mark on the opposite, make a medium length running stitch. (My stitches here are about 1/4″ long.) Your stitching line will zigzag back and forth across the ribbon.
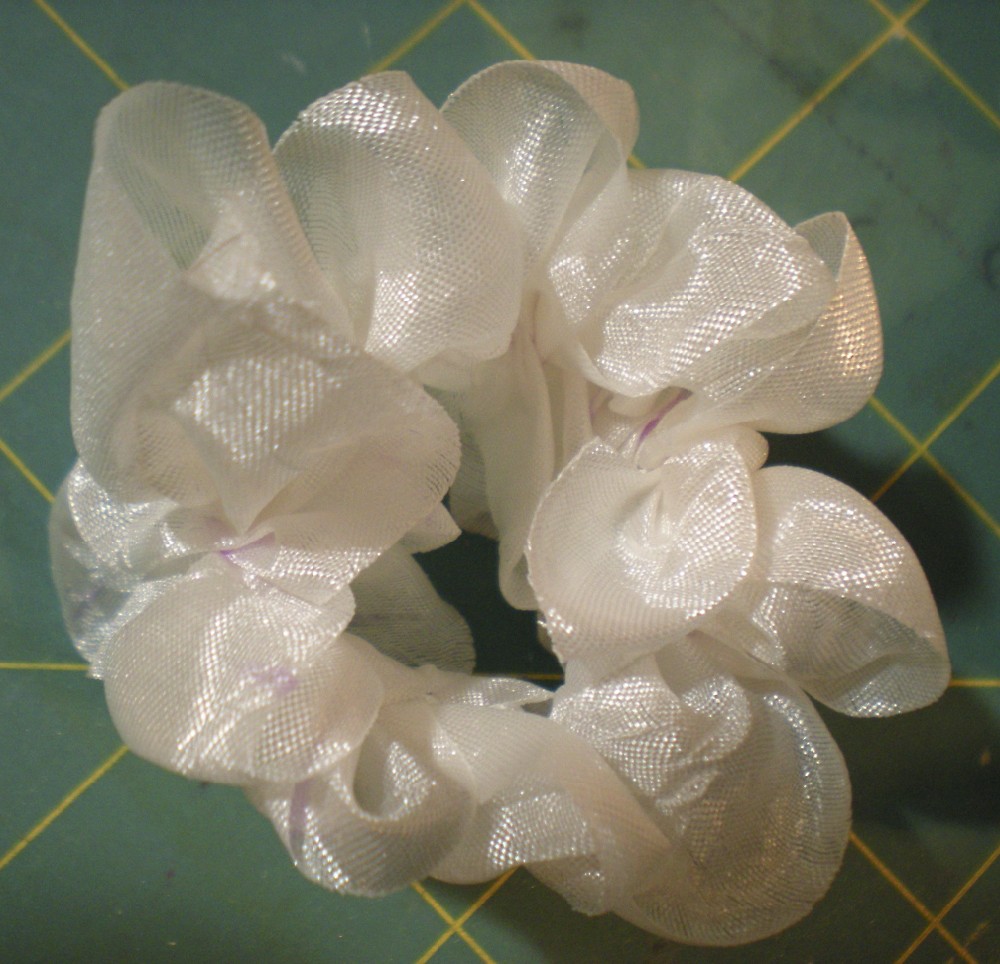
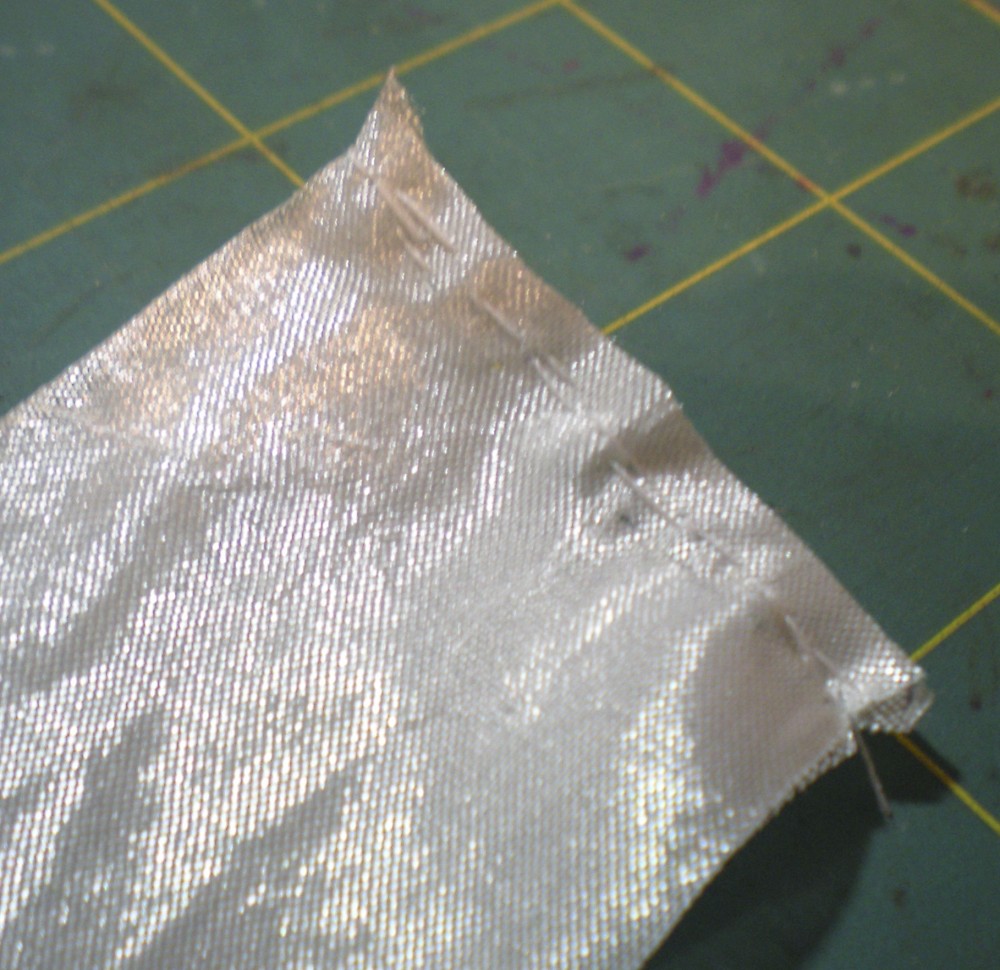
Once you’ve stitched around the entire ribbon, carefully pull to gather your sewing thread until your ribbon looks like this. (Isn’t that cool?) Tie off your threads, but leave this space in the center (enough to fit a finger into.) If you gather too tightly, it will be hard to form your flowers.
Later we will be flattening out this ribbon circle to make our flowers, but for now, repeat the stitching and gathering with the other two ribbon pieces and set aside.
Preparing the pillow top.
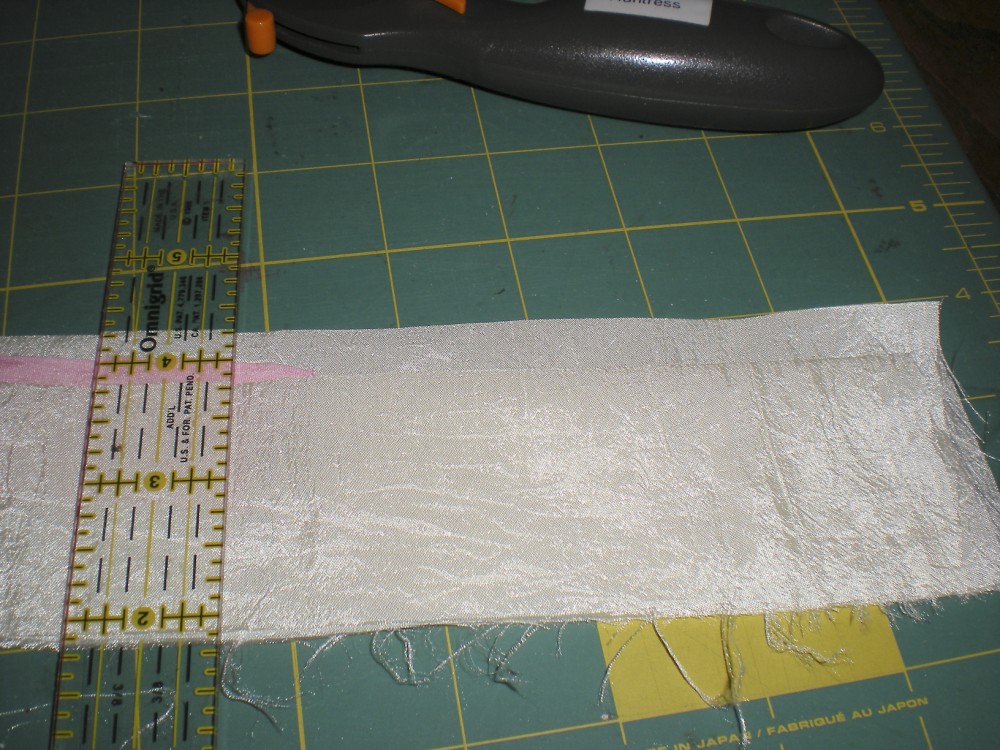
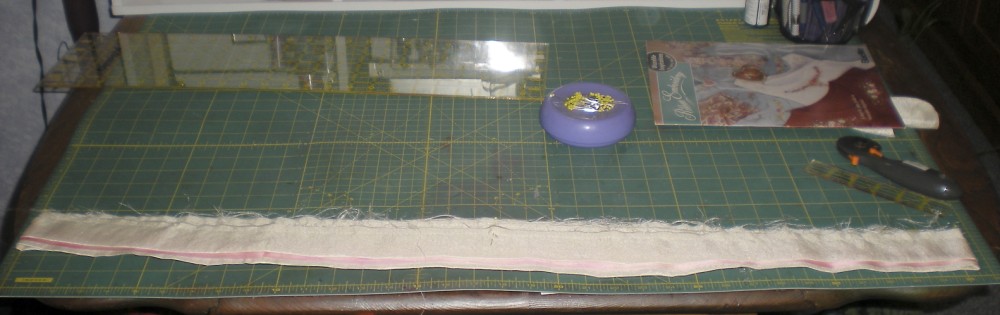
From the main fabric for the pillow (the Silkessence, in my case) cut a 10.5″ strip across the width of the fabric.
From this 10.5″ strip cut one 10.5″ square and two 8.5″ x 10.5″ rectangles.
Often, I have found that fusible interfacing shrinks when I iron it onto the back of my fabric, crinkling and distorting it. To keep that from happening, place your fusible interfacing square, fusible side up, on your ironing board. Set your iron to steam and get it as hot as it will go.
Holding the iron 1″-2″ above the interfacing, steam it thoroughly. You may even be able to observe it shrinking.
Allow the interfacing to cool, cut into a 10.5 square and fuse to the back of your 10.5″ fabric square.
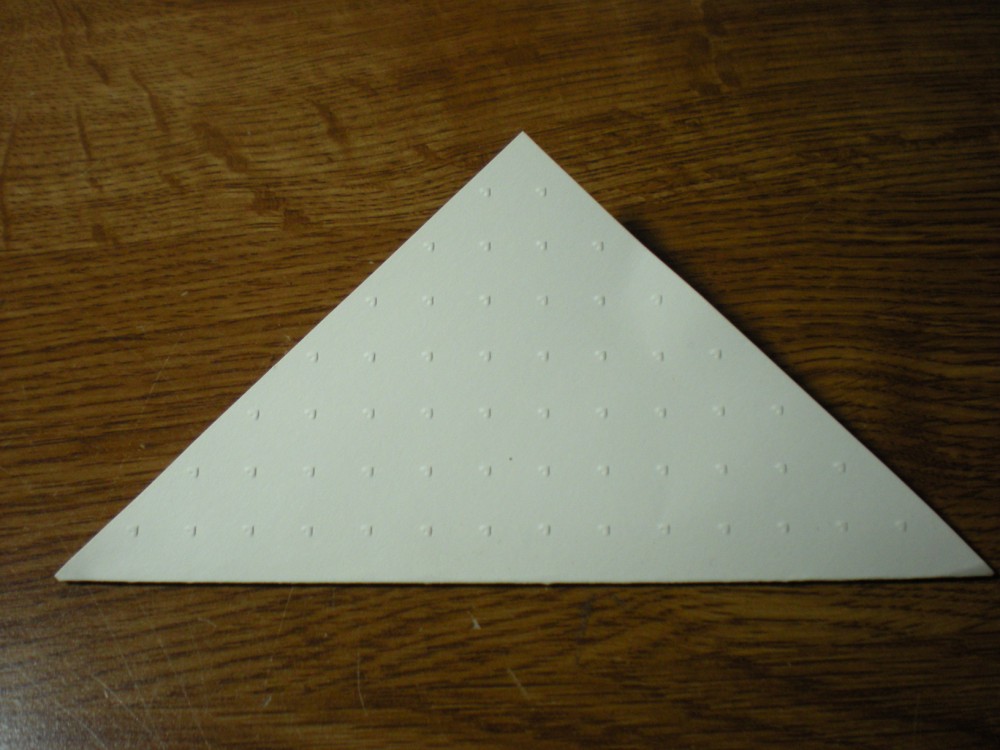
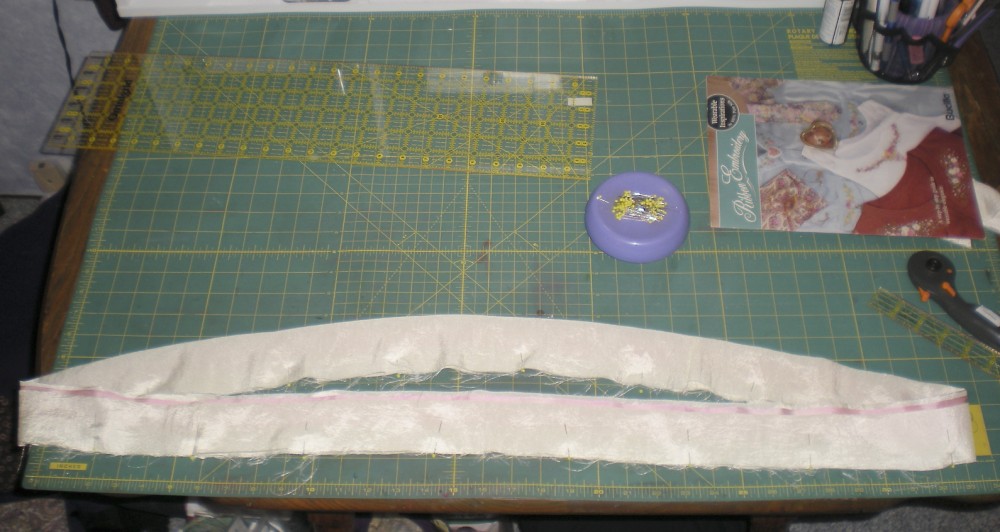
Now we’re going to mark our fabric square by folding and pressing. I forgot to take pictures doing this with the fabric, so I’ll show you on a piece of paper.
First, fold your fabric in half diagonally. Press this fold.
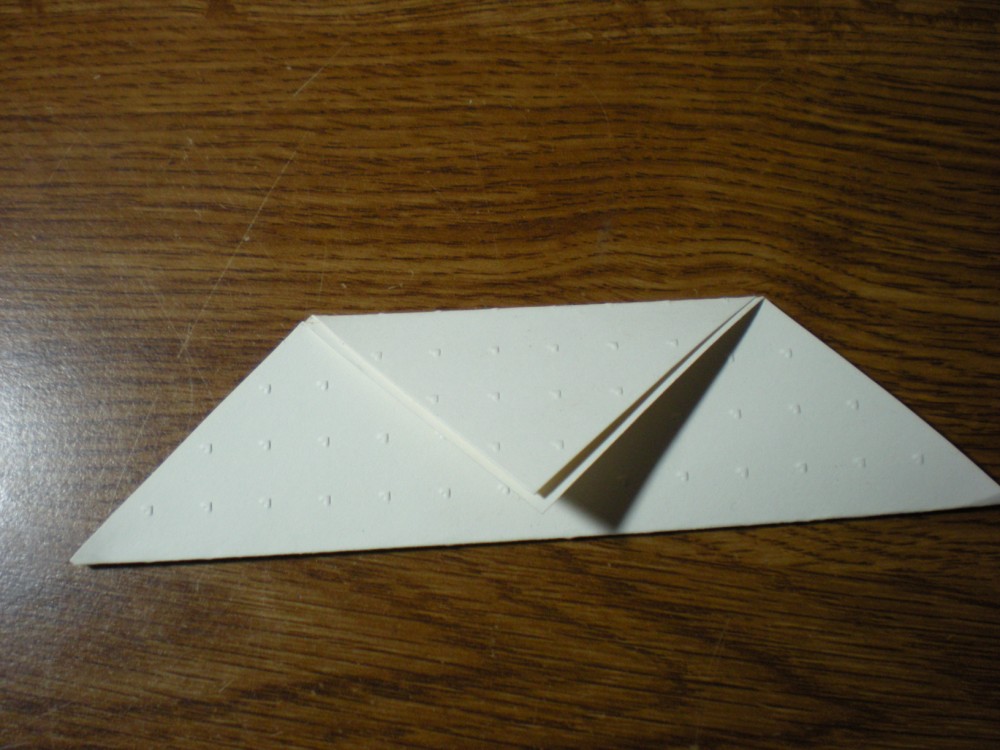
Now, fold again, the two folds should be parallel and the point should meet the first fold.
Make one more parallel fold.
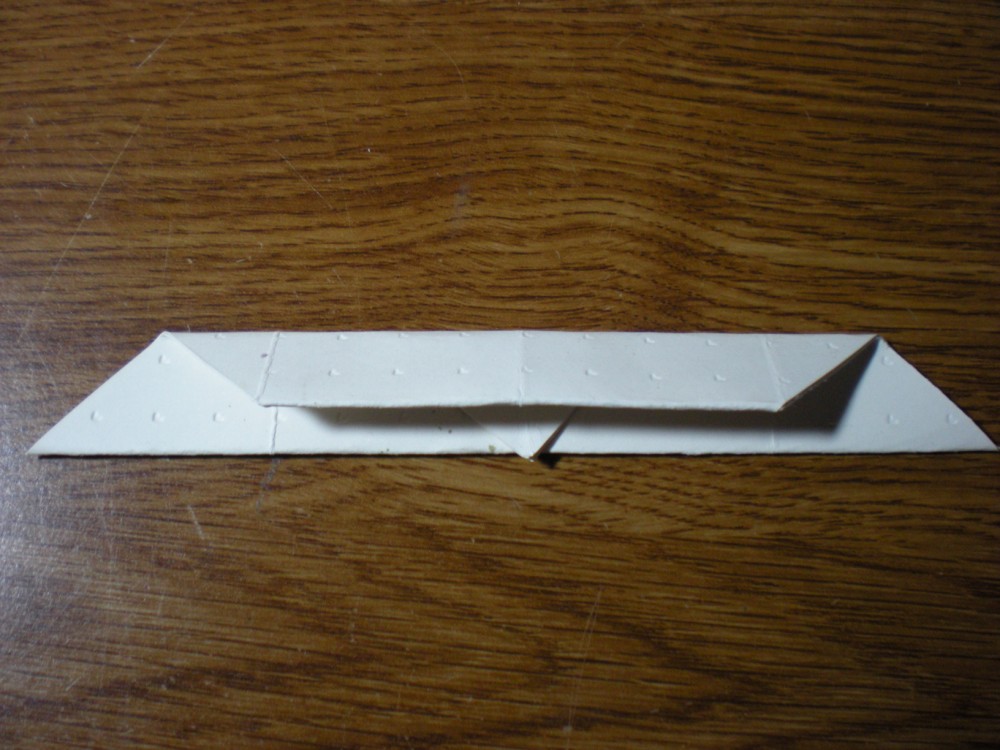
Open it out, and fold again on the diagonal, but in the opposite direction.
Again, make the second fold parallel to the first. And fold once more parallel to these folds.
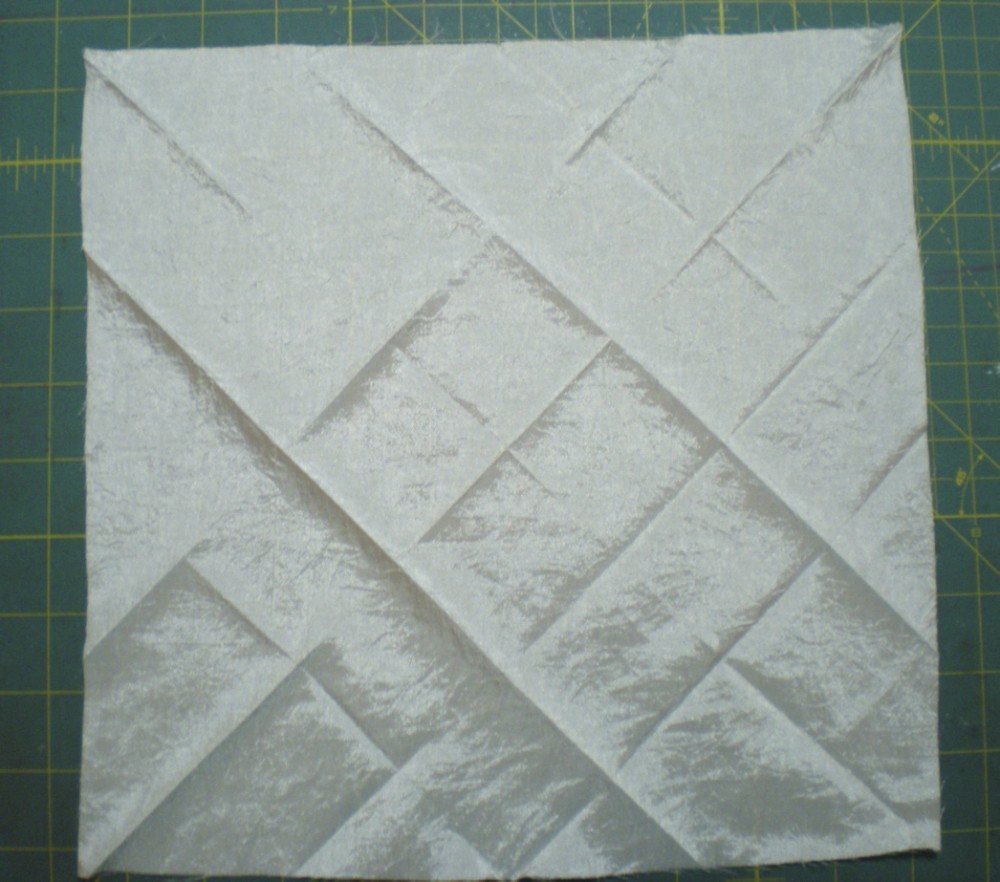
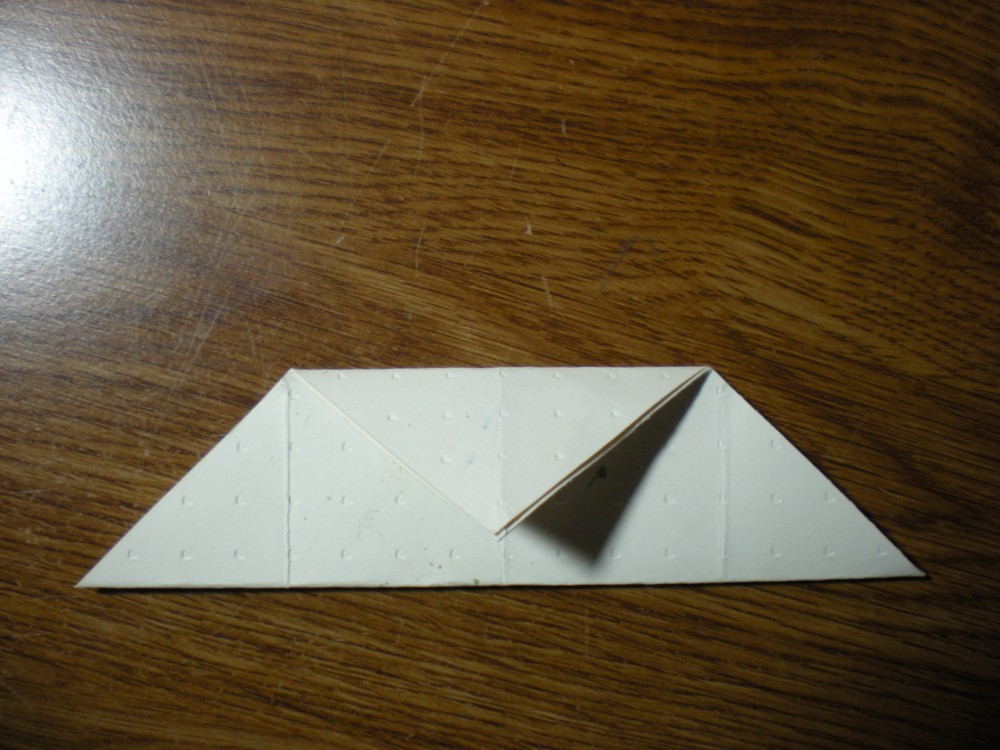
You fabric should look like this.
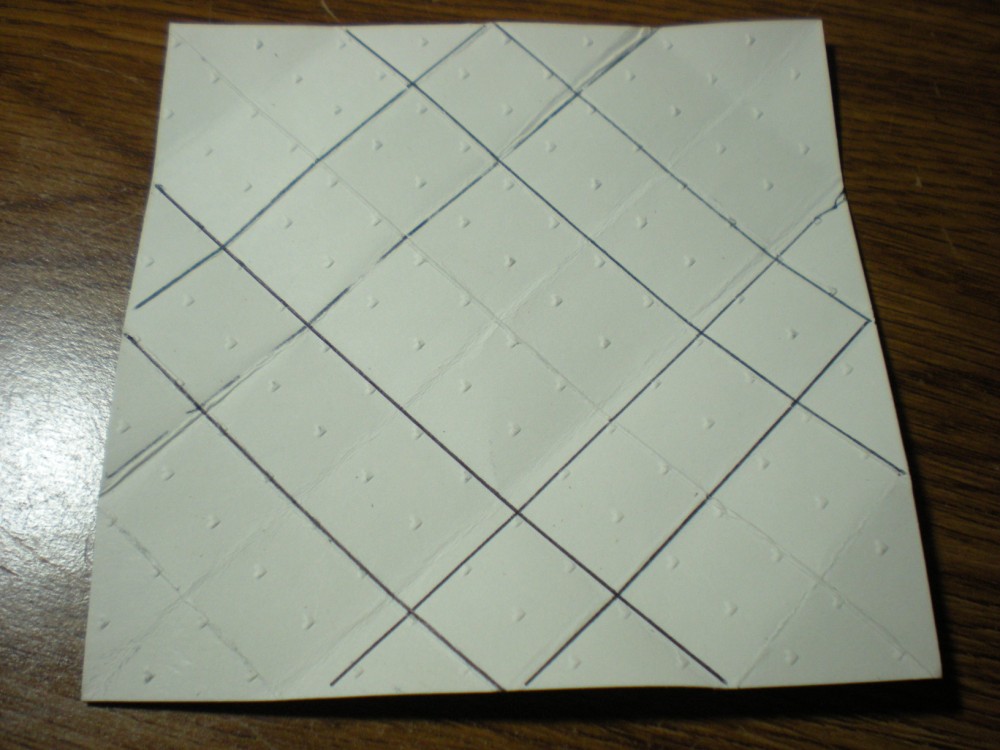
Here I’ve drawn on my piece of paper to show you the ribbon placement.
Place four pieces of pink ribbon along the inner lines. They should make a 3.5″ square in the center of the pillow. Place a piece of your coffee-dyed, rinsed, dried and ironed lace along the outside of each pink ribbon. Place four more pieces of pink ribbon along outer lines, and four more pieces of lace inside those.
Arrange the ribbons and lace until they are pleasing to you. Pin in place.
My four smaller rectangles measure 1 3/4″ x 3.5″.
(I apologize that I was having so much fun sewing I forgot to take pics of this process.
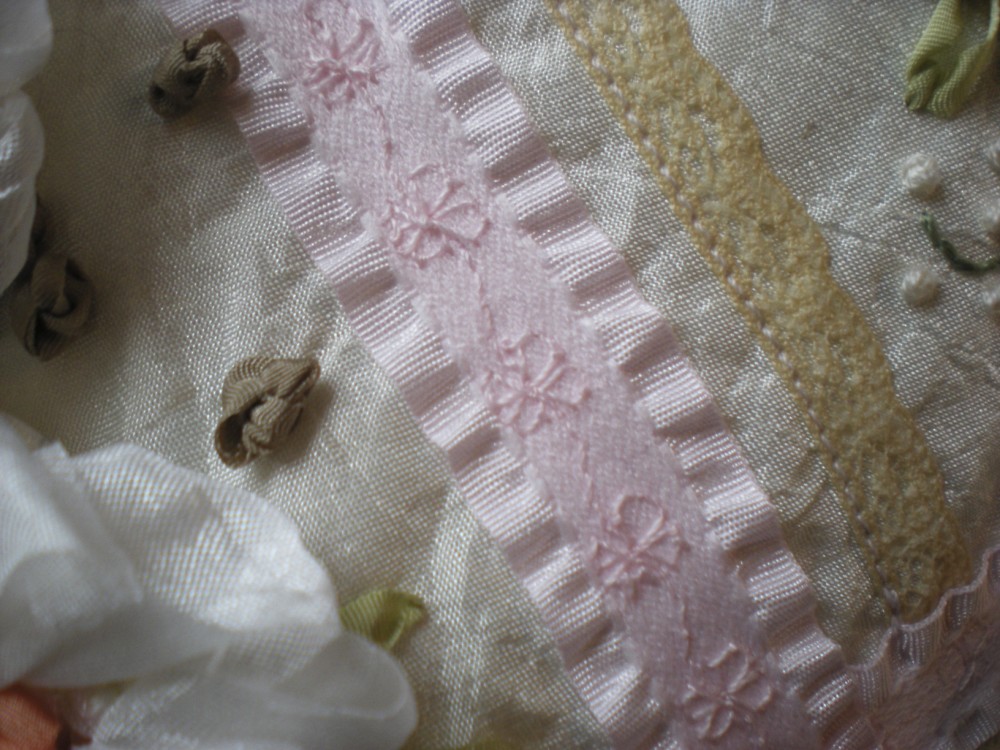
Use a decorative stitch on your machine and matching thread to sew down the pink ribbons. Use matching thread and a straight stitch to sew the long straight side of the lace.
Time for some ribbon embroidery!
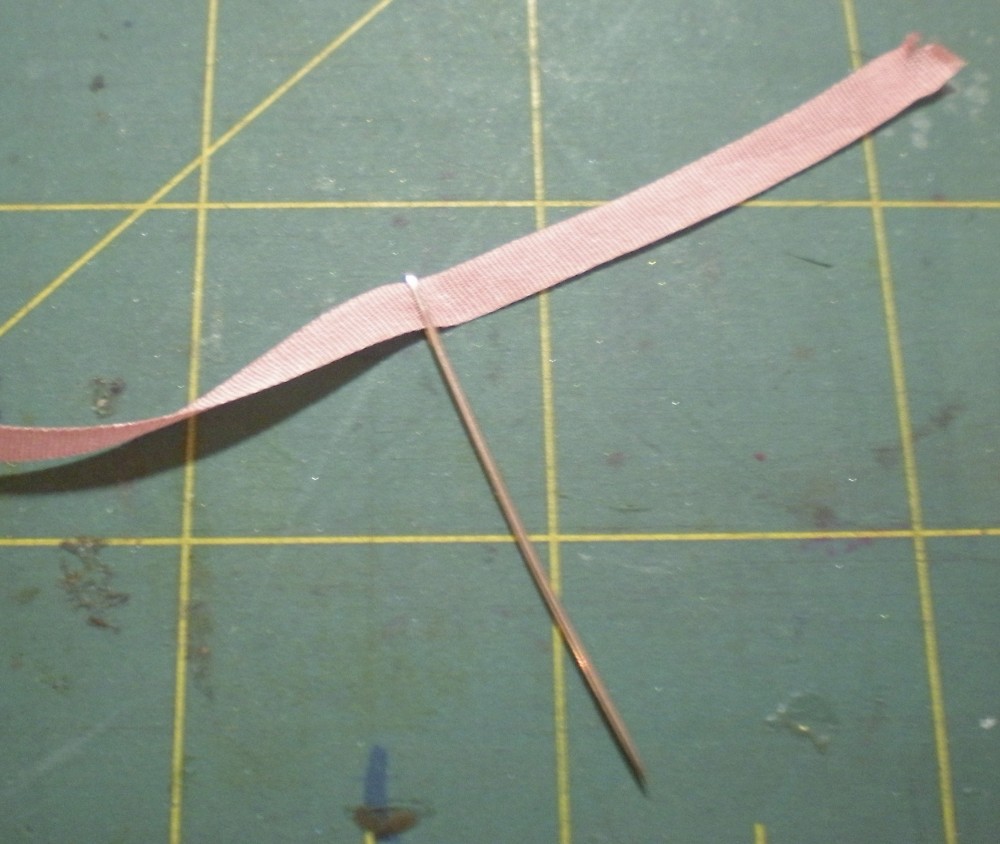
Choose a needle that has a sharp point and a largish eye. Thread a 4mm ribbon through it.
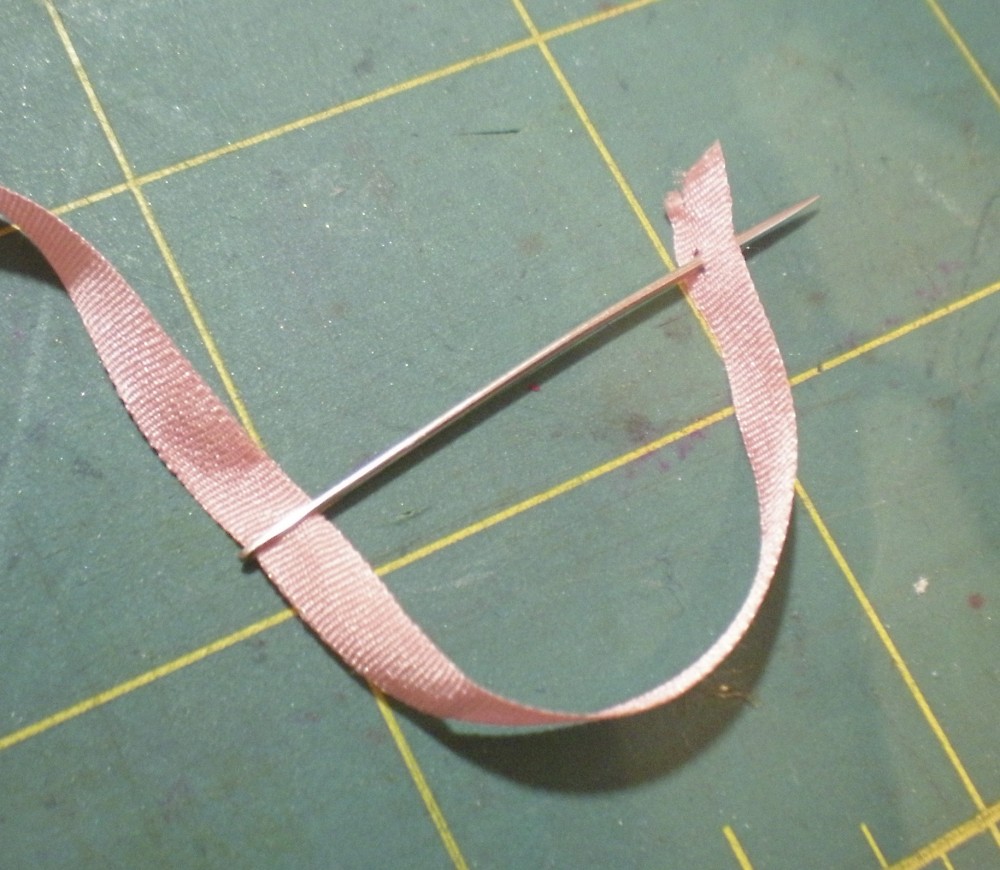
Poke the needle tip into the ribbon tail, about 1/4″ from the very end.
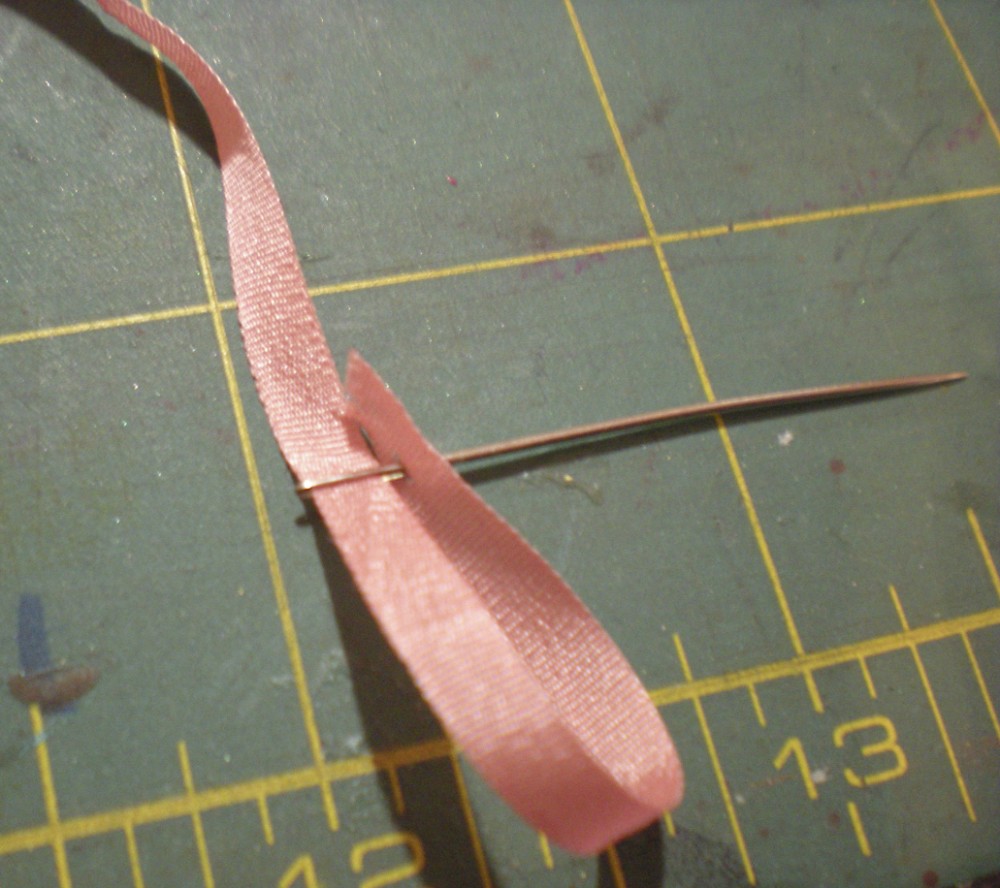
Slide the ribbon tail all the way to the eye of the needle…
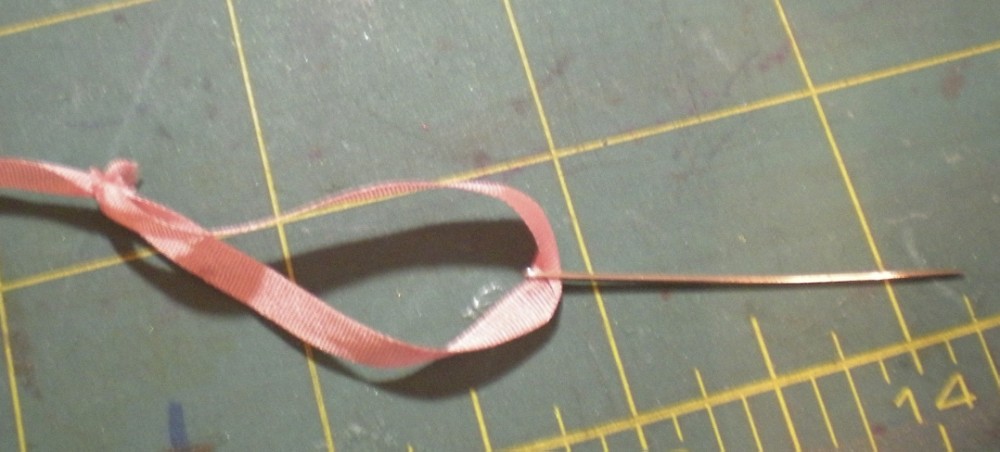
…and pull right over the eye back onto the length of ribbon.
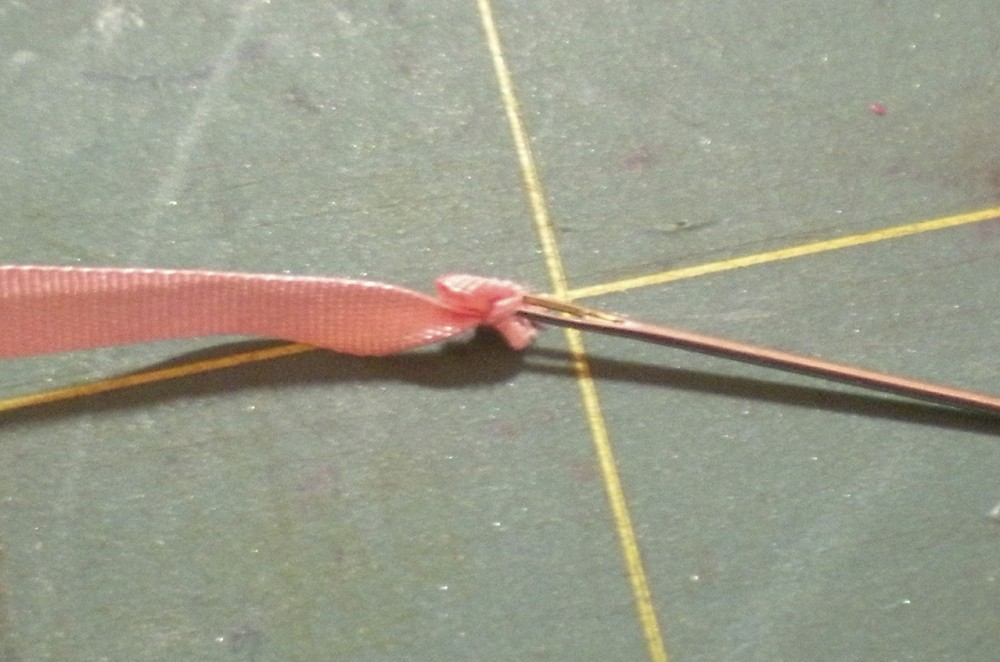
Hold the long end of the ribbon and pull on the needle. The ribbon end will slide right up to the eye and lock itself there.
There are two wonderful things about this technique, a) the ribbon never slides out of the needle, and b) you can use just about every inch of your precious silk ribbon.
(If you didn’t get this from the photos, I do show it on the video.)
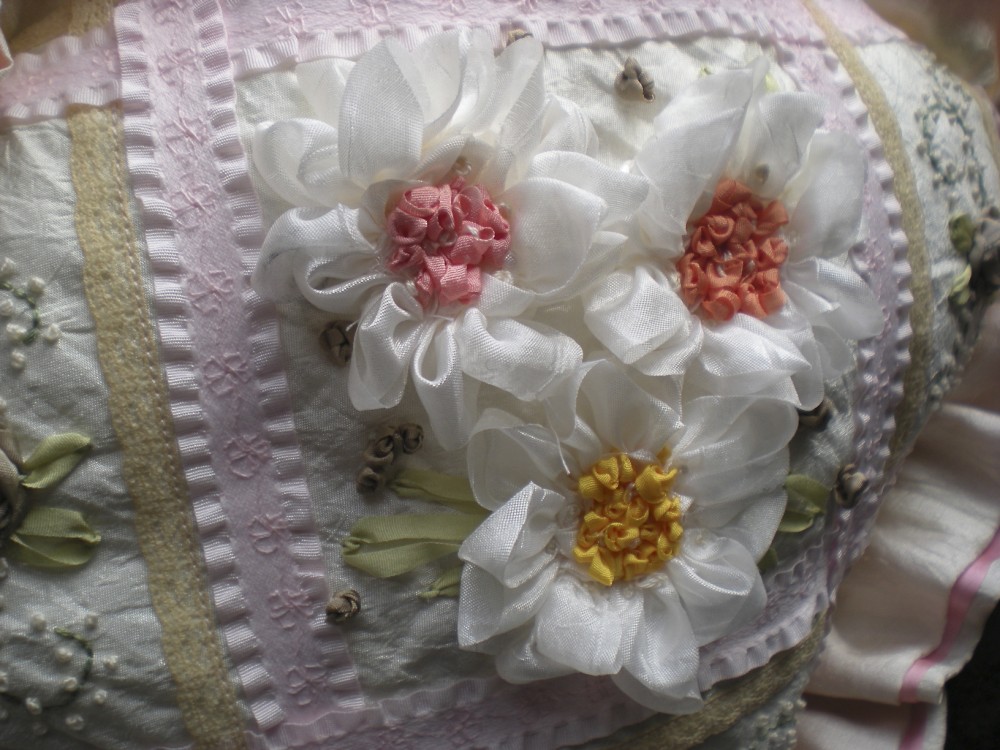
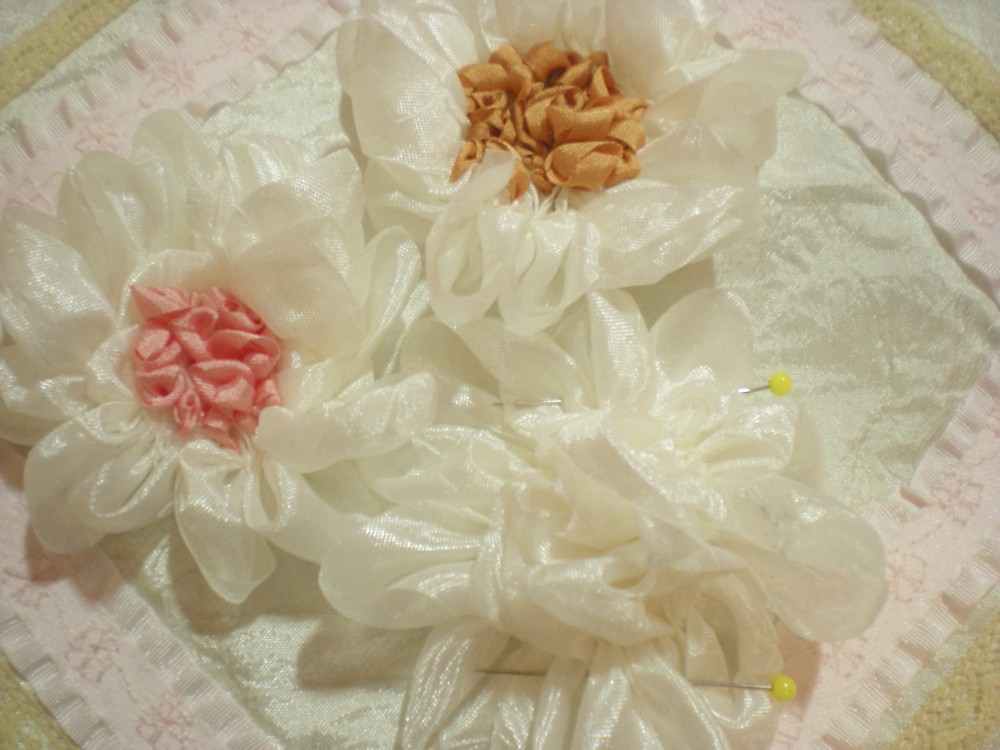
Now it’s time to pin your ruched flowers to the center of the pillow. Here I have two already done and am working on the third.
The petals on one side of your gathered piece will fan out to make the flower. The petals on the other side will be squished into the center. (See the video.) Just flatten it out and you’ll see how it works. (This is why we didn’t gather the flower center tight. )
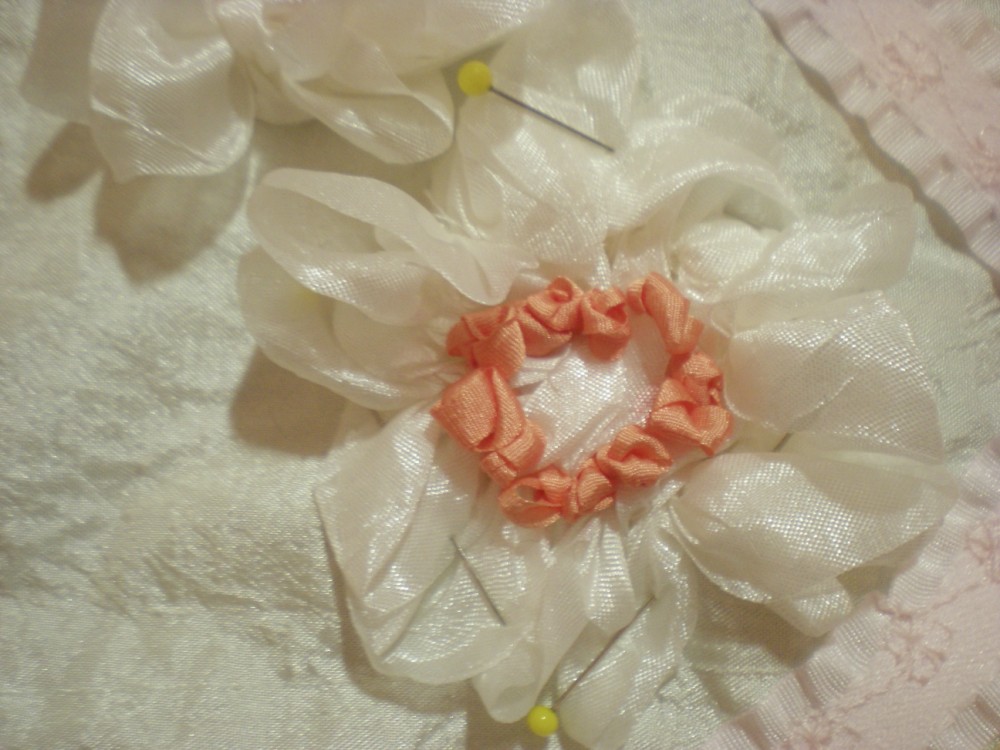
Start tacking down the flower center by making a ring of French or Colonial knots. (See the video for how to make Colonial knots.)
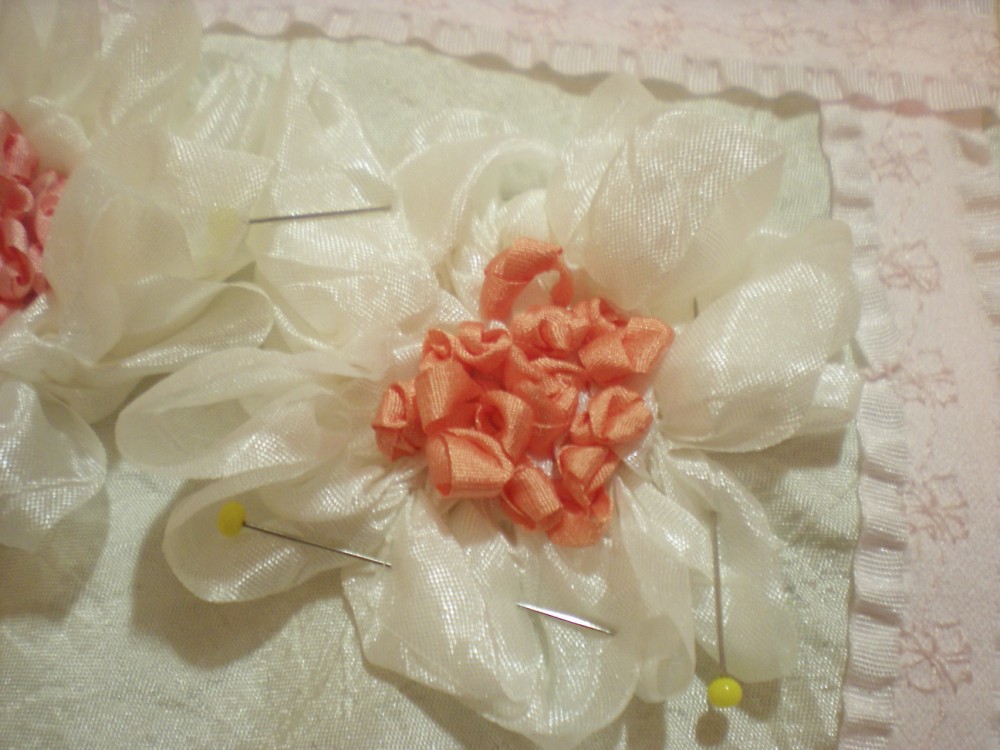
Then fill in the center with more knots.
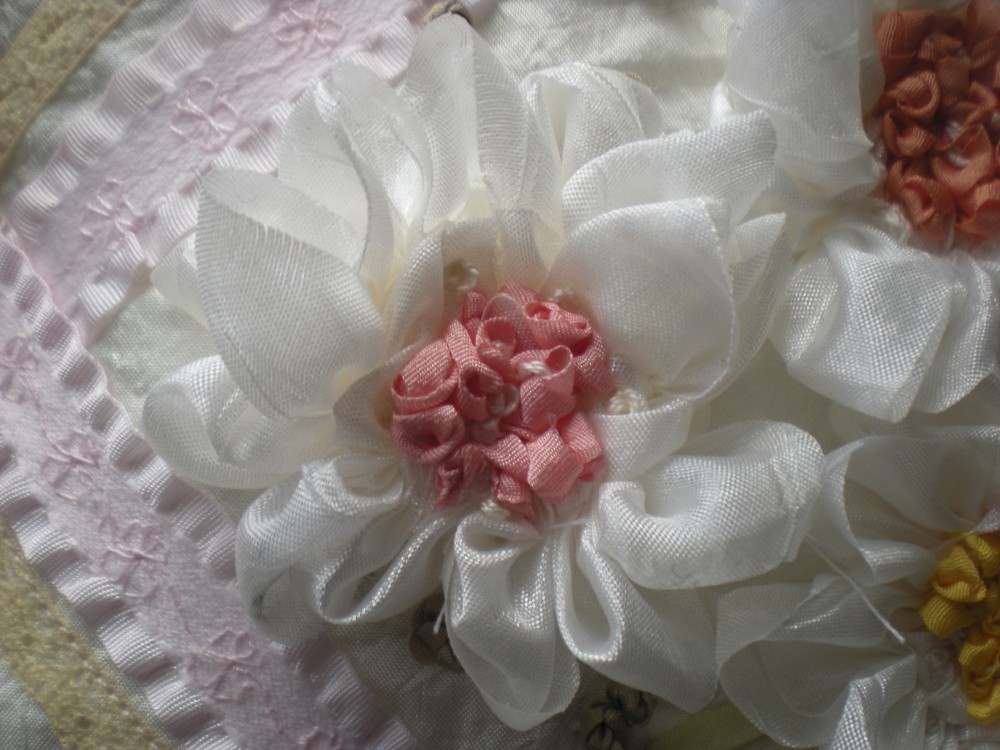
Here’s the pink flower completed. I made lazy daisy stitch leaves with green ribbon. (Also on the video.)
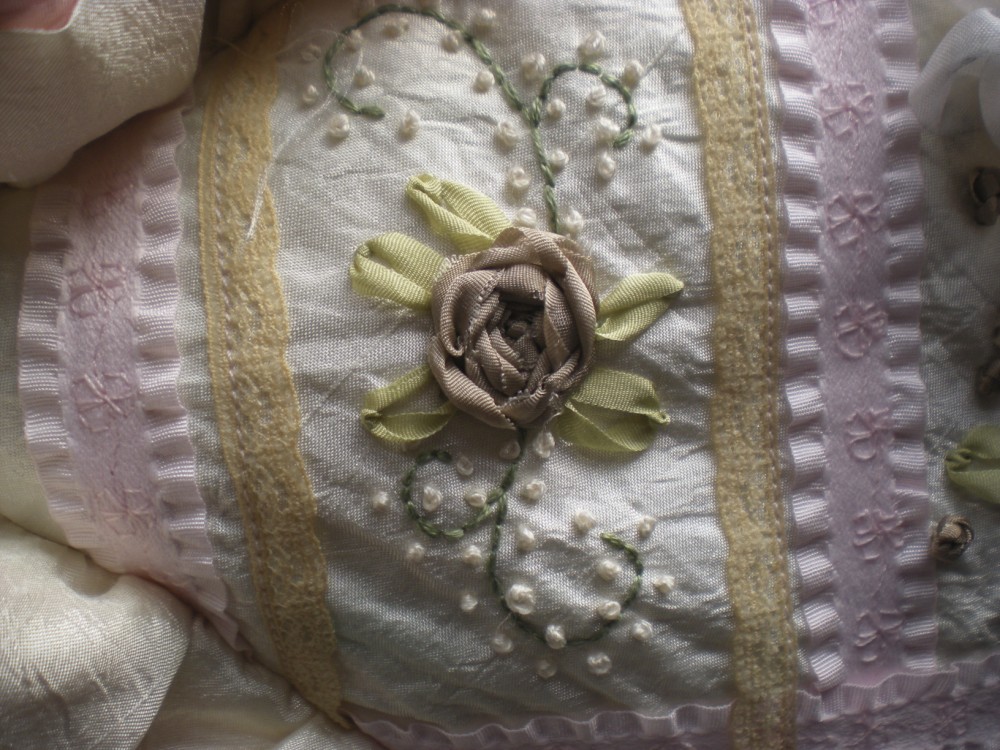
Next, use a water erase marker to draw an “S” scroll in each of the four rectangles. Add another scroll to the end of each and backstitch these lines with green embroidery floss. (Yup, it’s on the video.)
Add a spiderweb rose (on the video, too!) to the center using 1/4″ taupe silk ribbon. I used 1/2 yard for each rose. Stitch green leaves with lazy daisy stitch.
Make off white colonial knots about 1/4″ apart along all sides of green backstitched scroll.
I also added a few knots with the taupe ribbon to the center square, just to tie it all together.
The pillow top is complete!
Let’s make the ruffle.
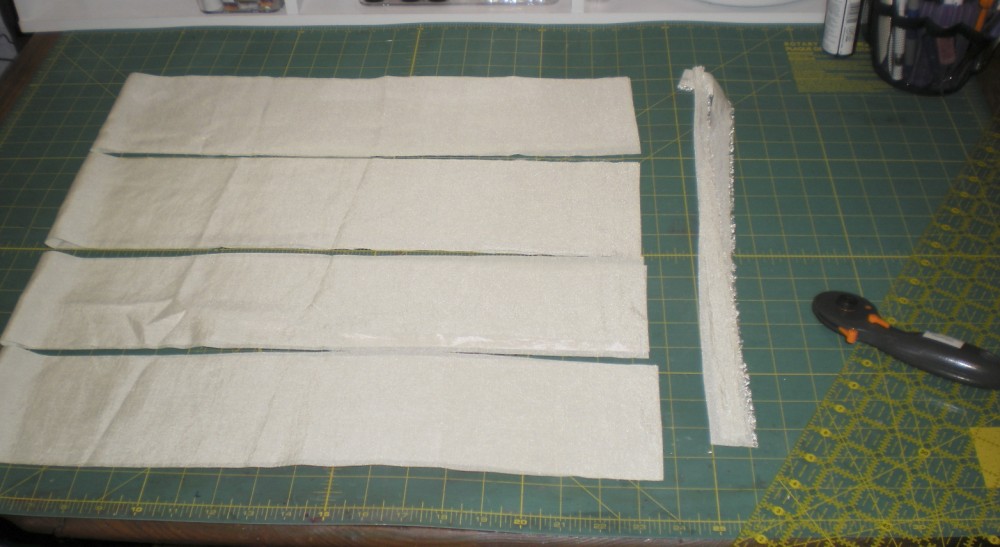
From your remaining fabric cut two 5″ strips and two 4″ strips. I like to cut off the selvedges first.
Sew the two 5″ strips together along one short side, press this seam open. Press this strip in half lengthwise, wrong sides together. Repeat for 4″ strips.
Lay your folded 5″ strip down and place the 1.25″ to 1.5″ wide pink silk ribbon on top of it, a scant 1/4″ from the fold.
Open out your fabric strip and pin the ribbon on the side farthest from the fold. Stitch along this edge with a straight stitch. Don’t be too fussy about this stitching, it will not show. What’s more important is to keep the ribbon edge a consistent distance from the fold.
Refold the 5″ strip and lay out, ribbon side up. Lay 4″ fold strip on top, raw edges meeting. There should be just a bit of the pink ribbon showing between the two fabric strips.
Trim all three pieces to the same lengths. It’s likely your ribbon will be just a bit shorter than the fabrics.
Sew the remaining ends of the ribbon/5″ strip together to make a loop. Be careful not to twist. Repeat for the 4″ strip.
Press the seams open and repress the folds, if necessary. Layer these pieces together as before, with the 4″ strip on top and about 1/4″ of the pink ribbon showing.
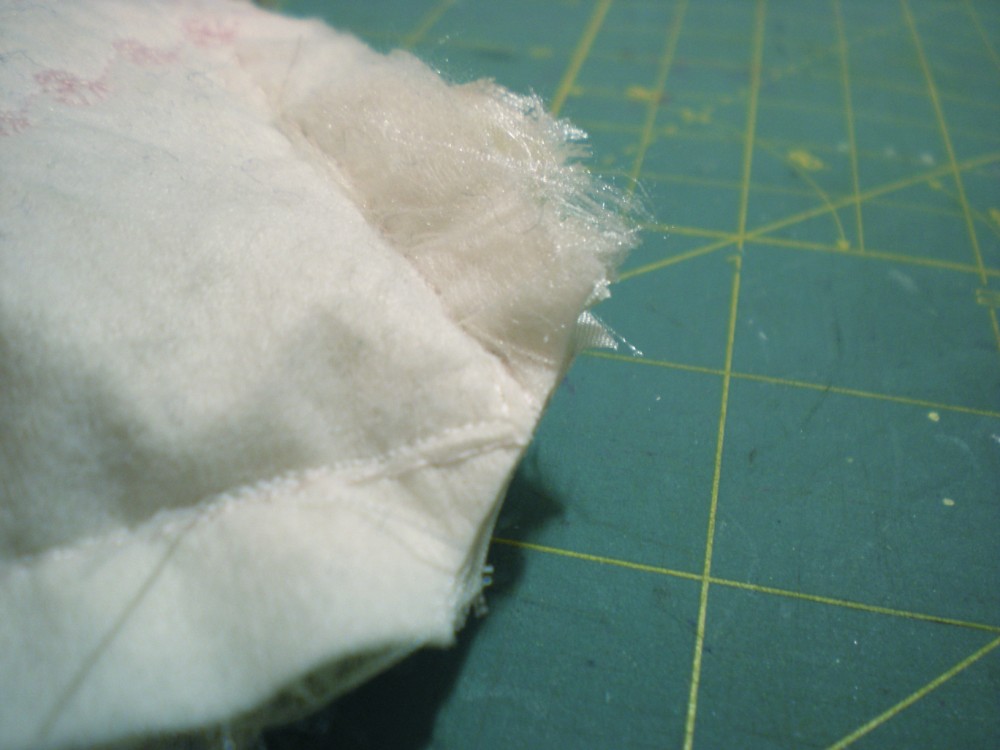
If your fabric is ravely and you have a serger, this is a good time to use it. Or just zigzag the raw edges. (Wish my serger hadn’t been in the shop when I made this.)
Run a gathering stitch (by hand or machine) a scant 1/2″ from the raw edges and gather to fit your pillow front.
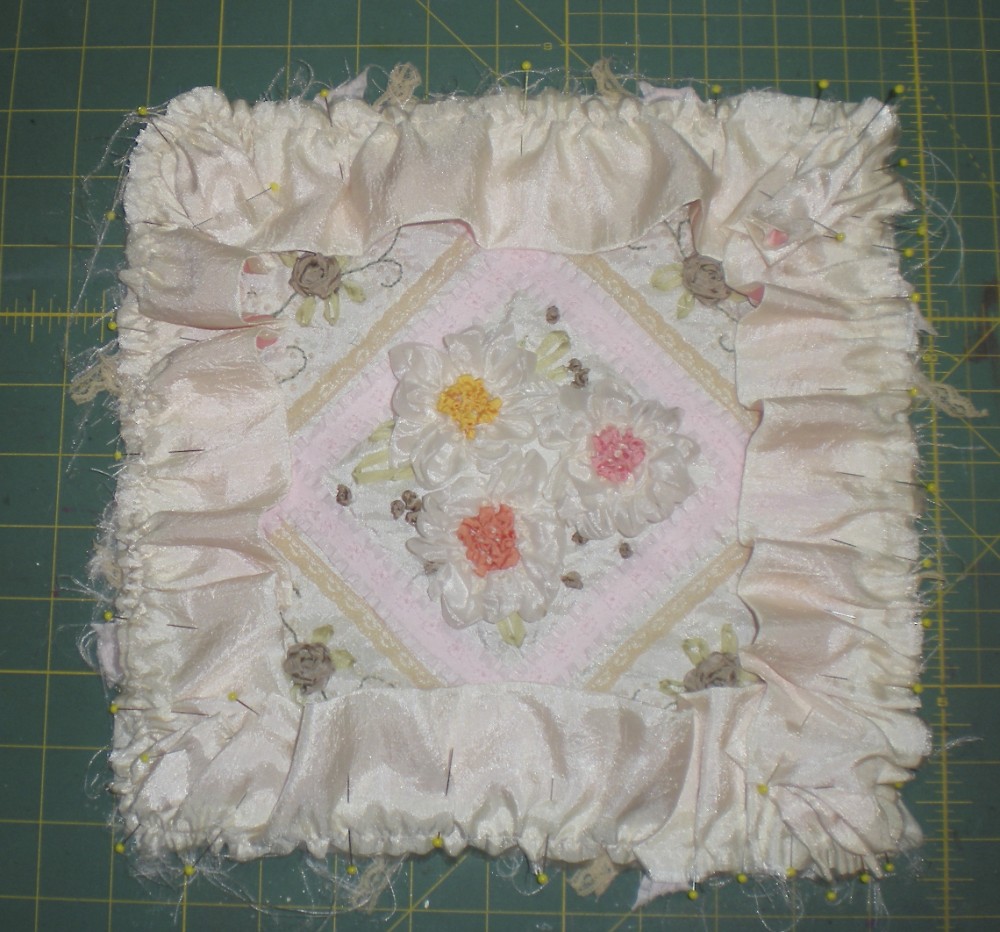
Pin the ruffle onto the pillow front, leaving a little extra gathering in each corner. The pink silk ribbon side should be against the right side of the pillow top.
Pin the gather corners out of the way of the seamline and baste with a scant 1/2″ seam.
Remove all pins and check to see that everything is as it should be. The major problems you’ll find are not enough fullness in the corners, so your ruffles will cup, and ruffles stitched into the seam.
Once you are satisfied, repin the ruffle corners out of the way.
Time to add the back pieces and you’re done!
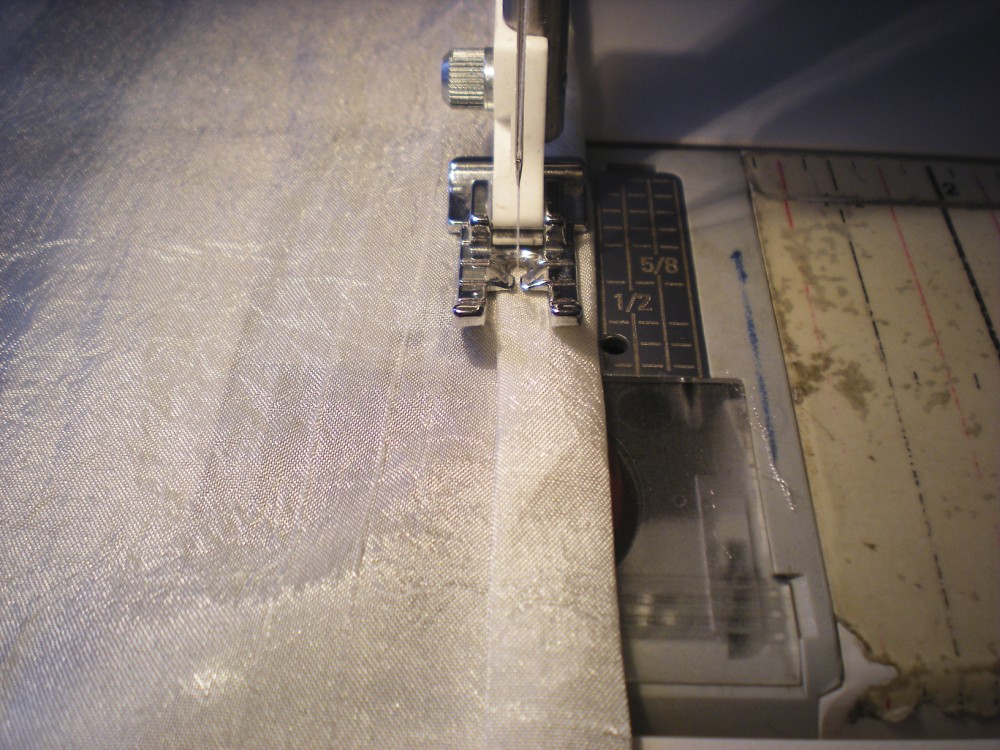
For the pillow backs, press under one 10.5″ side of each 10.5″ x 8.5″ rectangle 1/4″, then press under 1/4″ again. Stitch along the inner fold to finish the edge.
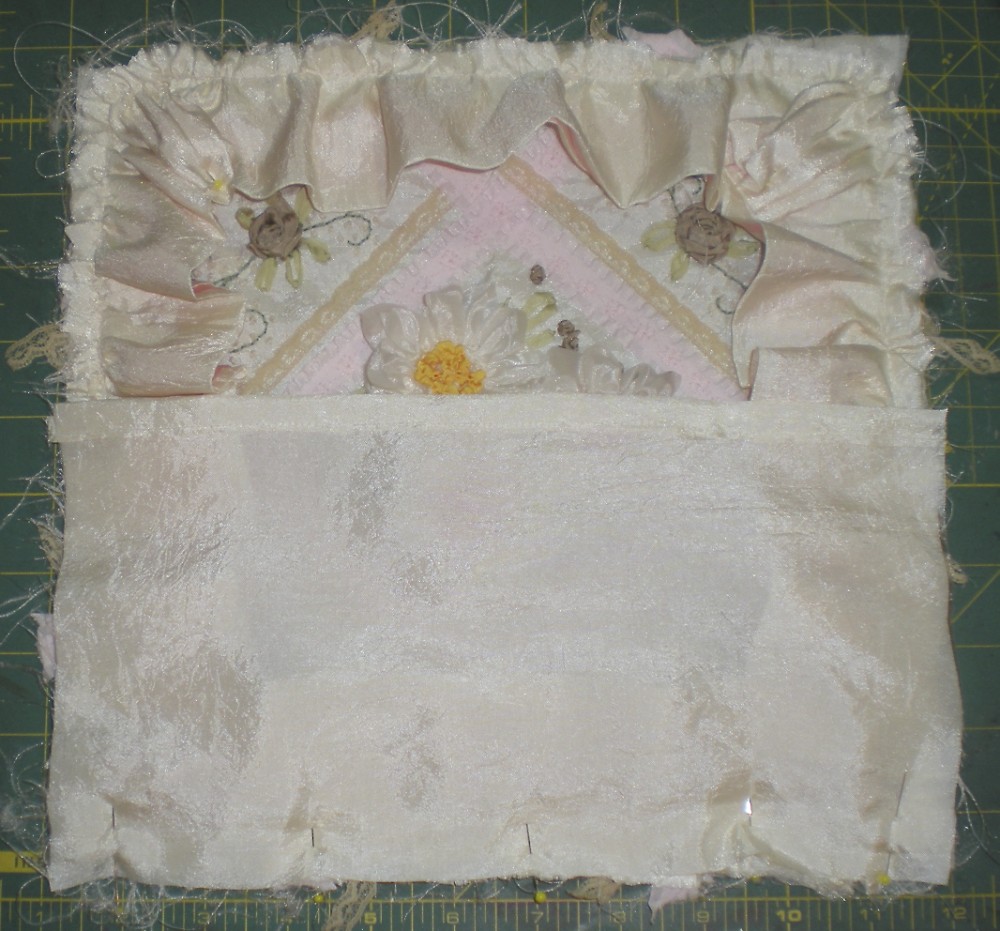
Lay one of these rectangles over your pillow front, right sides together. The edge you just finished should be towards the center of the pillow.

Lay the other 8.5″ x 10.5″ rectangle onto the pillow front, meeting the remaining raw edges. The finished edges should overlap a bit. This is where you will insert your pillow form later.
Stitch with a 1/2″ seam. Remove all pins, turn right side out and check to see all is as it should be.
Turn inside out again and trim the corners close to, but not through the stitching.
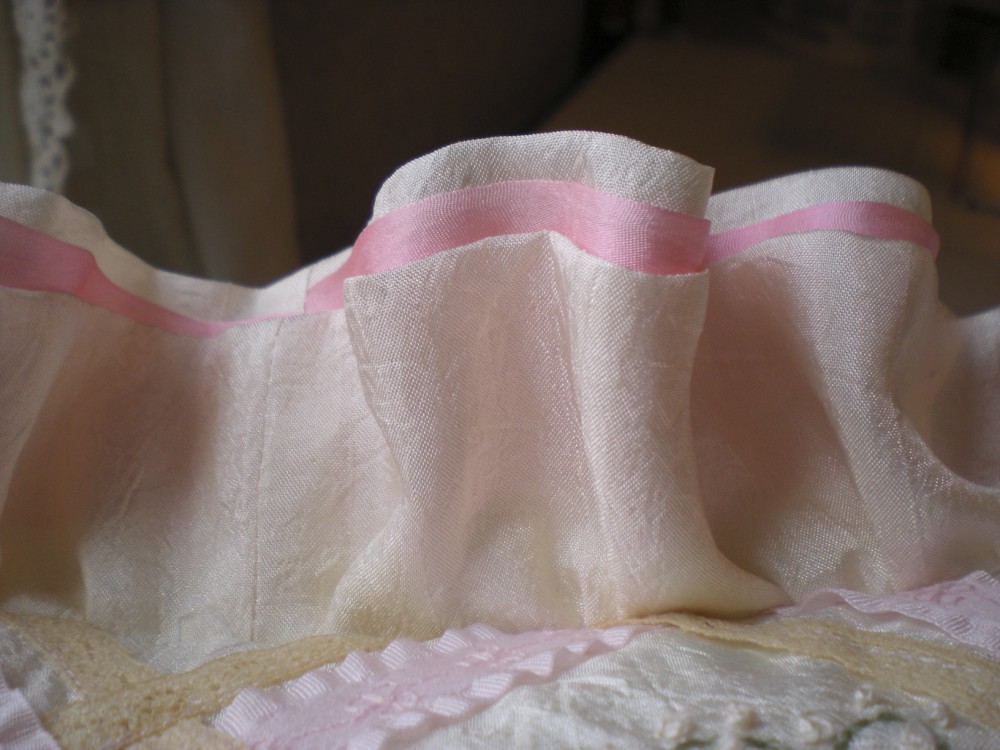
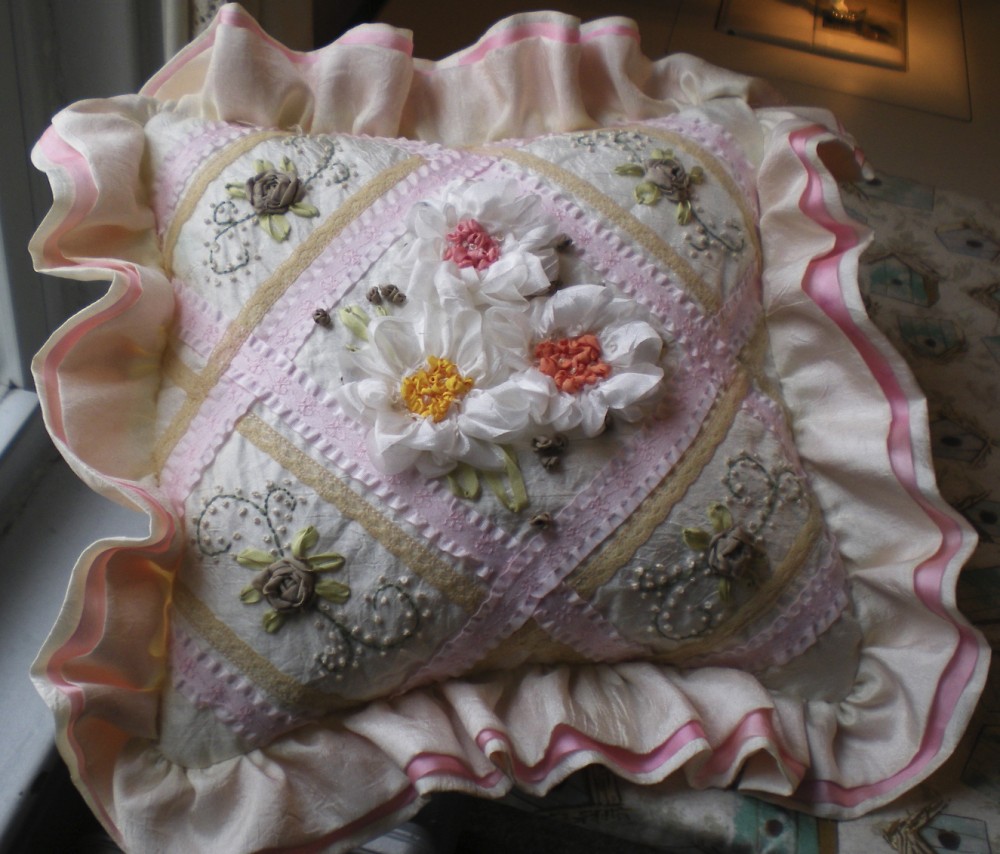
Here’s the finished ruffle. Insert your pillow form and enjoy!
Happy Creating!

That is precious! You make it look so easy. In fact, all of the entries I saw are adorable. They make me want a little Victorian house to fill up. (Or maybe Edwardian.)
That’s because it IS easy. I dare you to try. >:)
Isn’t that little birdhouse the sweetest thing? So many pretty entries. I hope you voted for your favorite.
Dare all you want; I’d never come up with anything as cute as what’s on that site. The Ribbon Lady needs different categories for entries: clothing, pillows, cards, boxes, etc. Then again, Laura Cox cheated. She had backup singers, an orchestra, and fireworks in her video presentation. Amazing.
Did she now? I haven’t watched any of the videos, I was too busy counting how many votes I got in the comments, lol. Guess I should go see what the competition is up to.
(Not that I did the project to compete so much as for the personal challenge.)
I wonder if one could get away with ballot stuffing. Not that I personally would ever resort to anything so low, of course.
Oh, no, no, that would be wrong. 😉
And probably impossible, since my first and only vote hasn’t made it past moderation yet. 🙁
Unless there’s another Robin, your vote finally did go through. Thanks so much!
You’re welcome! Good luck!
Sandy, you are soooo talented! This is just divine… what a sweet, gorgeous little cushion! i’ve never seen this technique done before. I’m now off to see how to follow your blog!
Shoshi
Aw, shucks, I’m so glad you like my little projects. Happy Creating!
Sandy I like your pillow and I am going to have a go at making it chris
Hi Chris,
I’m so glad you like the pillow and are going to try it. Let me know if you have any questions as you go.
And, be sure to send me pics when you’re done! 🙂
Happy creating, Sandy