


Those of you who follow my Facebook page may remember a post from last week where I shared a fun use of shrink plastic: Victorian Farmhouse Inspired Shrink Plastic Necklace. Utterly adorable!
With that wonderful inspiration, and these great instructions for sanding shrink plastic I set about making my own version. (What ever did we do before we the internet? Oh yeah, we had less information, but a lot more time, lol.)
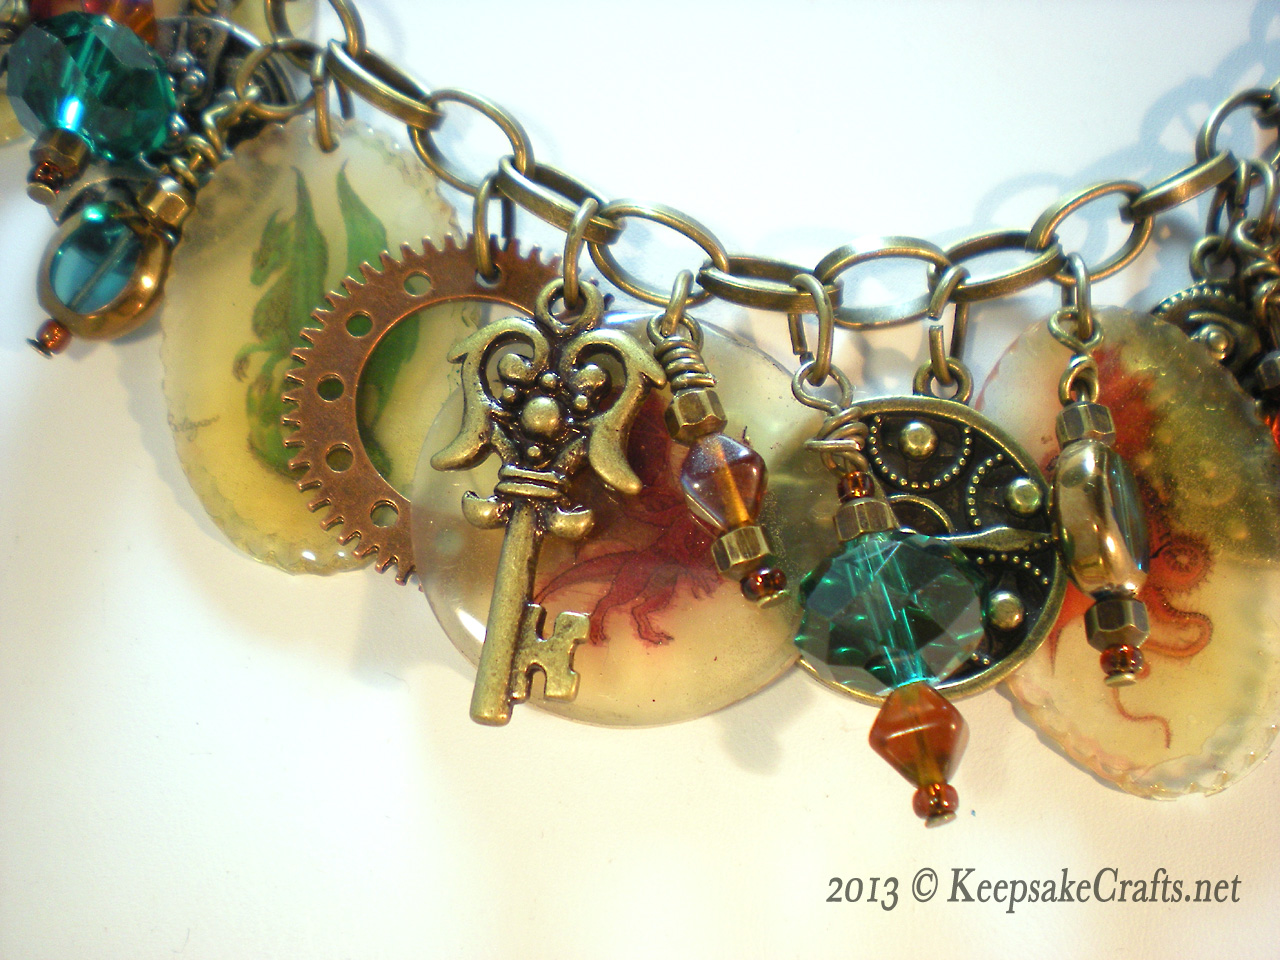
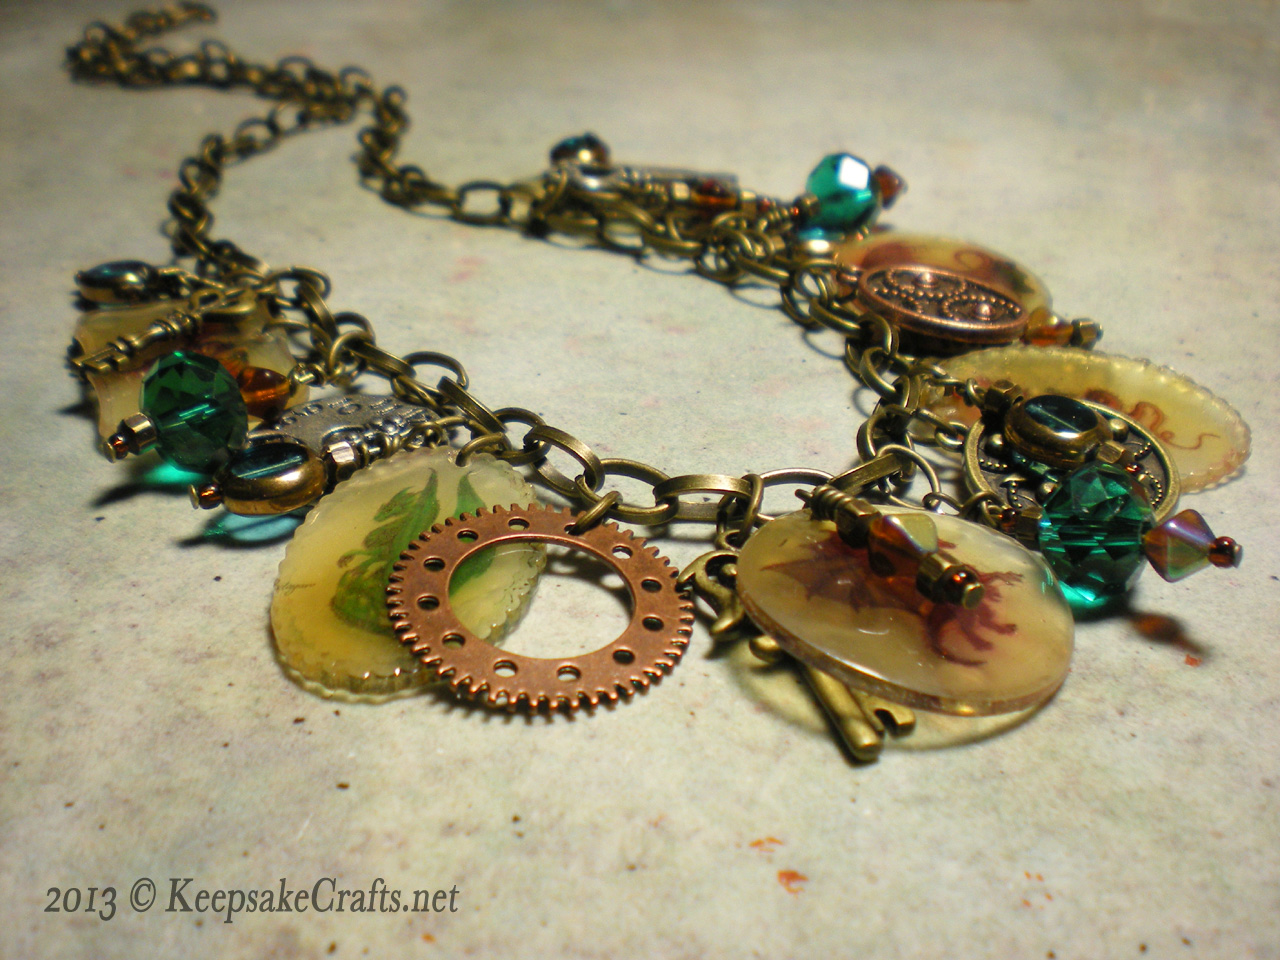
Finding just the right type of image for the shrink charms was key, I discovered. As I mention in the video, if you want to be able to tell what it is, you need to have an image with a clear silhouette and lots of white space in the background.
If you want images with other stuff in the background, perhaps the white shrink plastic would work better. If you try it, let me know, I’m curious.
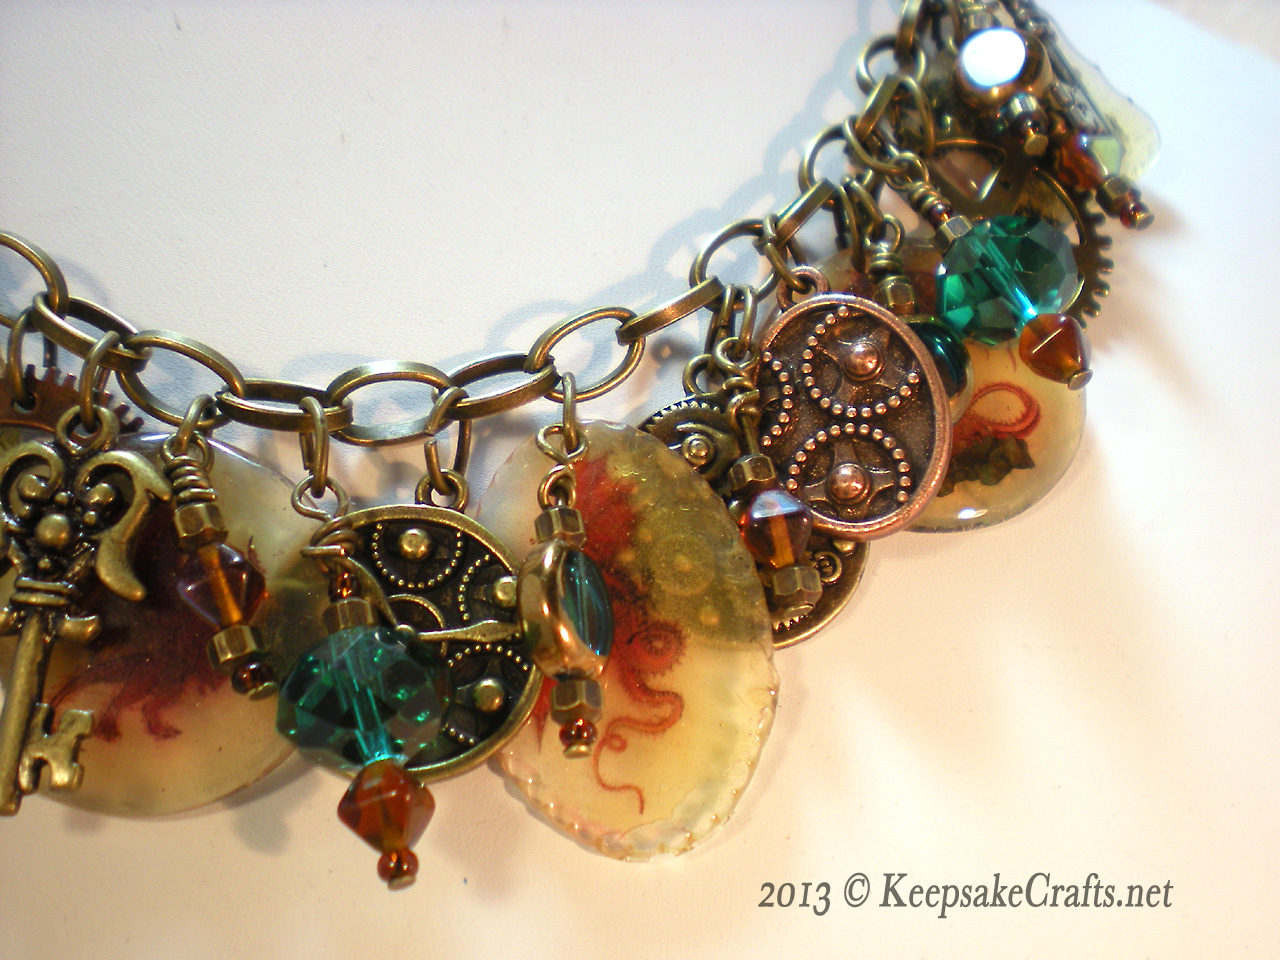
Click on any of the photos for a larger view.
This is going to be a fun one to wear!
Enjoy the video and happy creating. 🙂
Go here to watch it on YouTube: Steampunk Dragon Charm Necklace Video Tutorial
Materials for charms:
- 5-7 images of your choice pasted into an 8.5×11 inch format document (Word, Photoshop, etc.)
- ink jet printer
- shrink plastic (such as Computer Grafix Ink Jet Film, Clear)
- 400 grit sandpaper
- die cutters and die cutting machine, or just scissors (I used Spellbinders Large Standard Circles Dies, Spellbinders Nestabilities Mega Dies, Labels 8 and Spellbinders Nestabilities Labels One
)
- ¼-inch hole punch
- home oven OR heat embossing tool OR Ranger Melt Art Melting Pot, Ultra Thick Embossing Enamel
and Ranger Cool Tool (a heat resistant spatula)
- non-stick Craft Sheet
- metal tweezers
- awl
To make your shrink plastic charms:
- Print your images onto plain white paper, checking that images are complete, the size is about 2 ½ times larger than you want the finished charms to be and there is enough space around each image for cutting out.
- Use the 400 grit sandpaper to sand one side of a sheet of shrink plastic, first from top to bottom, then from side to side, creating a cross hatch pattern. Thoroughly wipe off all sanding dust. (If your shrink plastic specifies that it’s for ink jet printing, then you do not need to do the sanding step.)
- Print your images on the shrink plastic, making sure to print on the sanded side. Use die cutters or scissors to cut out each image. Use the ¼-inch hole punch to punch a hole for hanging your charms.
- To shrink your charms you can, a) use the shrink plastic manufacturer’s instructions to shrink them in your home oven, b) use a heat embossing gun, or c) follow the below instructions for coating with UTEE and shrinking in a melt pot.
To shrink your charms in a melt pot:
- Place your melt pot on a non-stick craft sheet and pour in Ultra Thick Embossing Enamel powder. Move the switch to UTEE setting and put on the lid. Once Ultra Thick is melted you can place your shrink plastic into it, pushing to the back of the pot with the cool tool.
- Your charms will quickly shrink, first curling up and then flattening out. Use the cool tool to nudge the charm to the front of the pot where you can pick it up with metal tweezers and place it on the craft sheet to cool. Pull the charm slightly along the craft sheet to wipe off excess UTEE. Use an awl to open hole for hanging.
- Once all charms are shrunk and coated, peel up cooled bits of UTEE and remelt in the pot. Clean excess UTEE off edges of charms with scissors, being careful not to cut into shrink plastic.
Materials for necklace:
- 26 inches chain
- lobster clasp
- jump rings
- head pins
- decorative charms to match your theme
- beads to match your colors
- small accent beads
- chain nose pliers
- round nose pliers
- crimping pliers (helpful, but optional)
To make necklace:
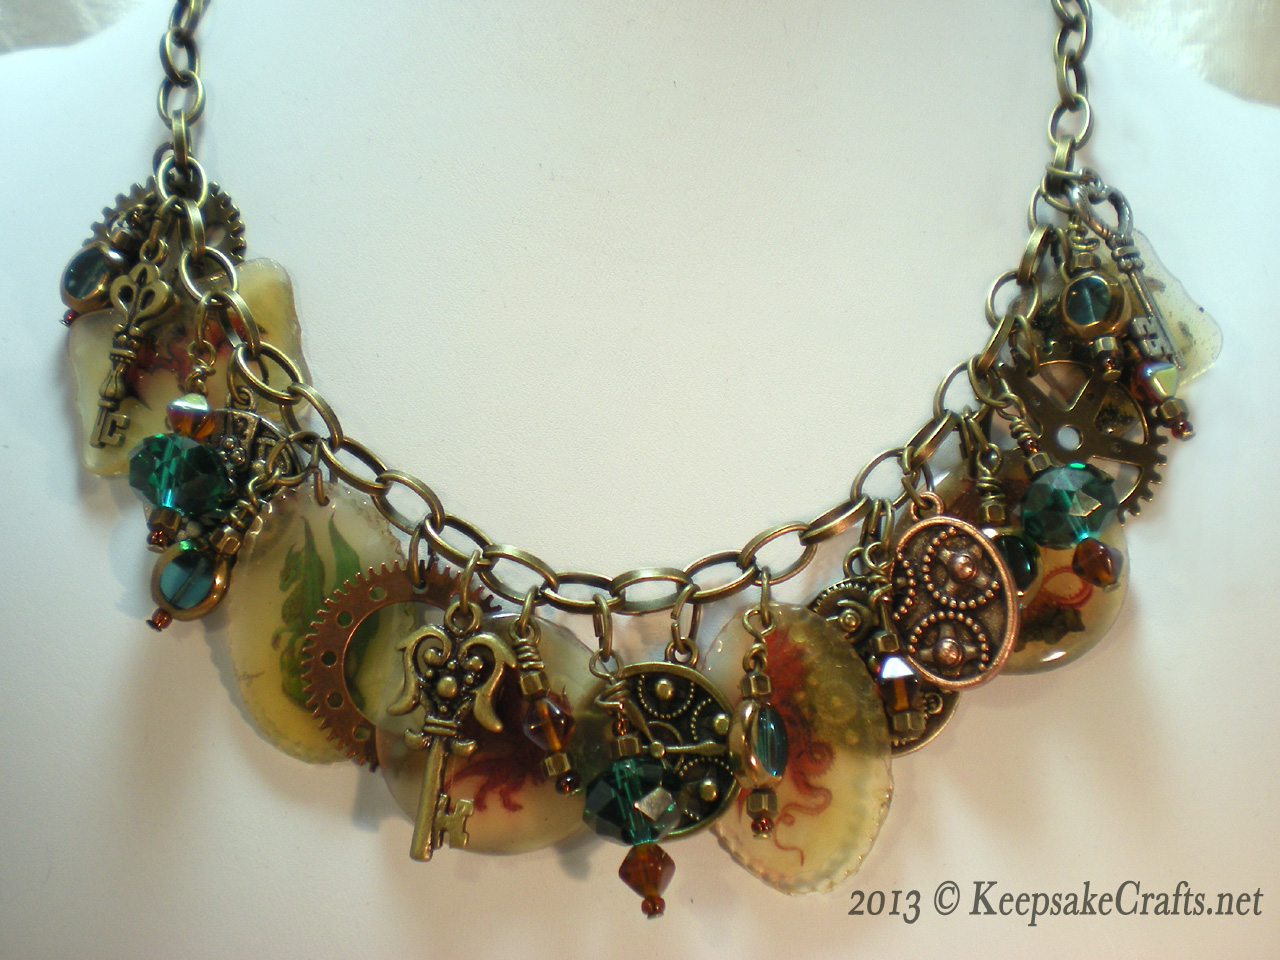
- Arrange your charms in the order you’d like them to be on your necklace. Find the center of the chain and use a jump ring to attach a charm that you’d like on the end 3 inches from the center of the chain. Attach your other end charm 3 inches to the other side of center. Attach your remaining charms evenly spaced between these two.
- To make a wire wrapped bead dangle arrange beads in order of your choosing on a headpin. Use chain nose pliers to grasp wire just at point where it exits last bead. Bend wire at 90° angle. Grasp bend with round nose pliers and wrap wire around pliers as far as possible to start to make a loop. Reposition pliers to finish loop. Wrap remaining wire around wire below 90° bend. Use wire cutters to trim, if necessary. Use chain nose pliers or crimping pliers to tuck in end.
- Make as many bead dangles as you like. I used about ten in my necklace.
- Use jump rings to fill in the remaining spaces between your charms with decorative charms and bead dangles.
- Use a jump ring to attach the clasp to one end of the chain.
Enjoy wearing your totally unique new necklace!

Squee! I love it! What great doodads! And dragons, of course. Wow, your projects just get better and better.
Yes, doodads. Lots and lotsa doodads around here…..
Thanks so much for sharing a link back to my blog. I’m loving your necklace!
I get such a kick out of seeing what other people come up with. Great job!
I’ll share it on my facebook page so other people can see. 🙂
Vicki
Awwww, thanks, Vicki. I appreciate the original inspiration and firmly believe in giving credit where credit is due. 🙂
Happy creating!