


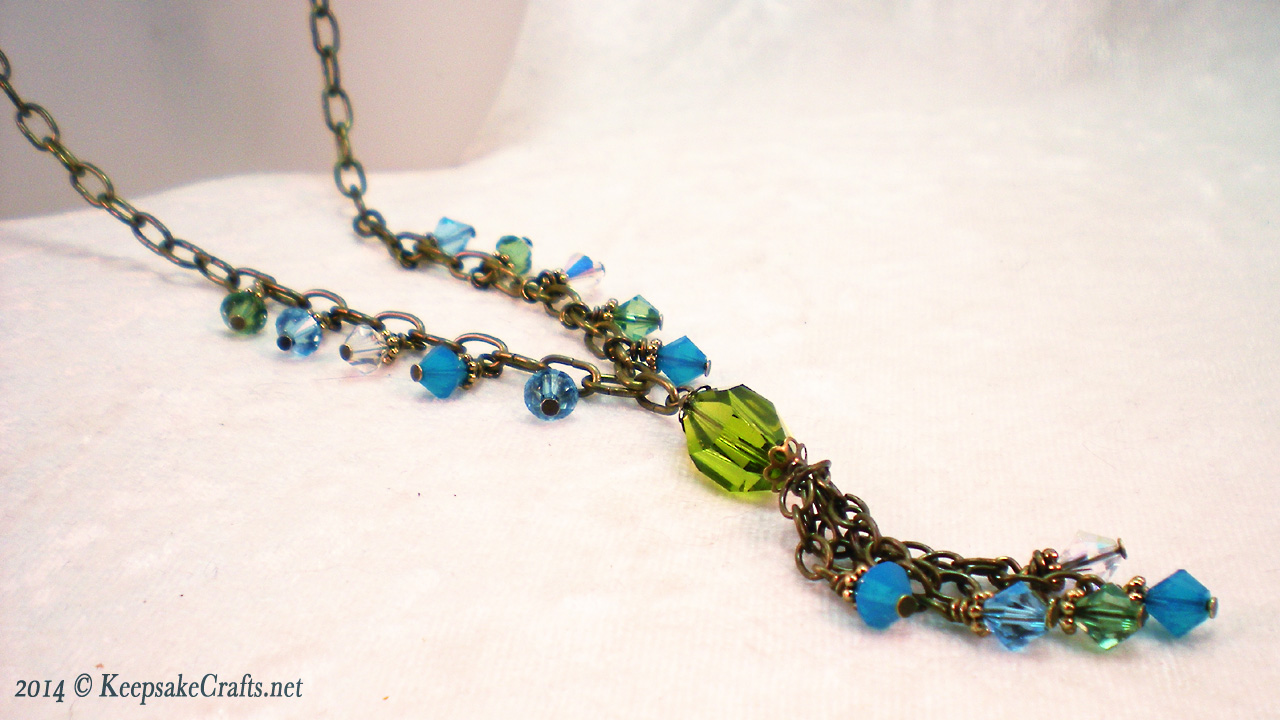
Sometimes all it takes for inspiration is a lovely grouping of colors. As soon as I saw Swarovski’s “Sea Breeze” assortment of 6mm bicone crystals, I knew what I wanted to do.
(Click on either photo for a closer look.)
I have no idea of the name of the pendant shape. It was a free goodie tucked in with an order from Art Beads and I wasn’t able to find it in any Swarovski catalog. If you know, please let us know!
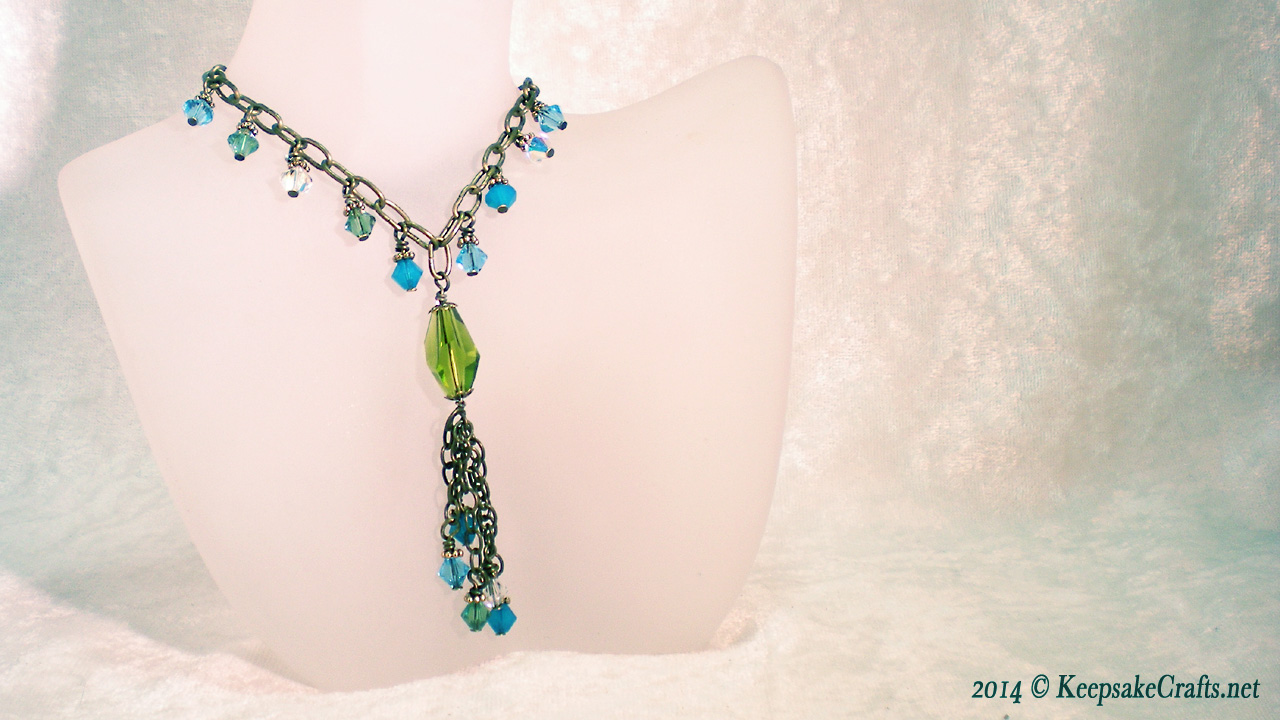
The chain is actual antique brass… it’s cuckoo clock chain from my friends who repair clocks.
You can watch the Sea Breeze Crystal Necklace Video Tutorial over at YouTube.
Happy creating!
Materials:
- desired length 4-links-per-inch necklace chain with clasp (mine is 30 inches long)
- approx. 6-inches 7-link-per-inch chain, separated into links that are 4, 5, 6, 7, & 8 links long
- 1 package 15-6mm Swarovski crystal bicone beads in color assortment “Sea Breeze”
- 15 daisy spacers for bicones (optional)
- 18mm x 10mm Swarovski crystal pendant
- 2 bead caps for pendant (optional)
- 15 head pins
- 1 3-inch piece 20 gauge wire
Tools:
- two pair chain nose pliers
- round nose pliers
- wire cutters
- Slide onto a head pin: 6mm Swarovski crystal bicone bead and a daisy spacer.
- Use chain nose pliers to grasp wire just at point where it exits daisy spacer. Bend wire at 90° angle. Grasp bend with round nose pliers and wrap wire around pliers as far as possible to start to make a loop. Reposition pliers to finish loop. Slightly twist loop open and insert end link of one of the short pieces of chain. Close loop and hold with chain nose pliers. Use another pair of chain nose to wrap remaining wire around wire below 90° bend. Use wire cutters to trim, if necessary. Use chain nose pliers to tuck in end.
- Repeat steps 1 & 2 to add a 6mm crystal to one end of each of the smaller pieces of chain.
- Find center link of necklace chain. Repeat steps 1 & 2 to add a 6mm crystal to every other link on each side of center link. (Five crystals on each side.)
- Grasp 3-inch piece of wire near the center with chain nose pliers; make a 90° bend. Grasp bend with round nose pliers about halfway up the round nose and wrap wire around pliers as far as possible to start to make a larger loop than usual. Reposition pliers to finish loop. Slightly twist loop open and insert other end links of each of the five short pieces of chain. Close loop and hold with chain nose pliers. Use another pair of chain nose to wrap remaining wire around wire below 90° bend. Use wire cutters to trim, if necessary. Use chain nose pliers to tuck in end.
- Slide on a bead cap, if using, 18mm x 10 mm Swarovski crystal pendant and another bead cap.
- Repeat step 2 to make a wrapped loop attached to center link of necklace.

A cuckoo clock chain! That is genius!
They gave me quite the box of old clock bits, most awesome for steampunk. 🙂
Love the crystals against the antiqued chain. Great idea…cuckoo clocks…for chain!