Welcome back to the final day of our Topsy-Turvy doll directions. For the previous days, see: part 1, part 2, part 3.
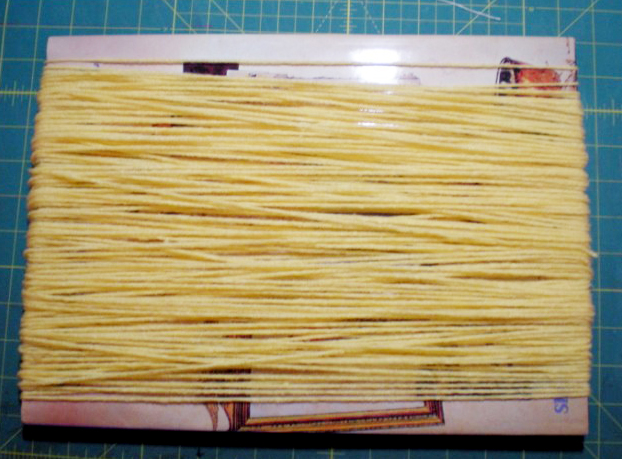
Today we’ll make the yarn hair for our doll. I used Red Heart brand in worsted weight, but you can use whatever you like or have on hand. You’ll need to find a book (or a rigid object) that is 14″ across. Wrap the yarn around this object 80-100 times. (I got a little overenthusiastic and wrapped mine 130 times! As a result, my doll’s hairs is a bit thicker than strictly necessary. Ah well.) If you have thinner yarn make more wraps, or use less wraps for thicker yarn.
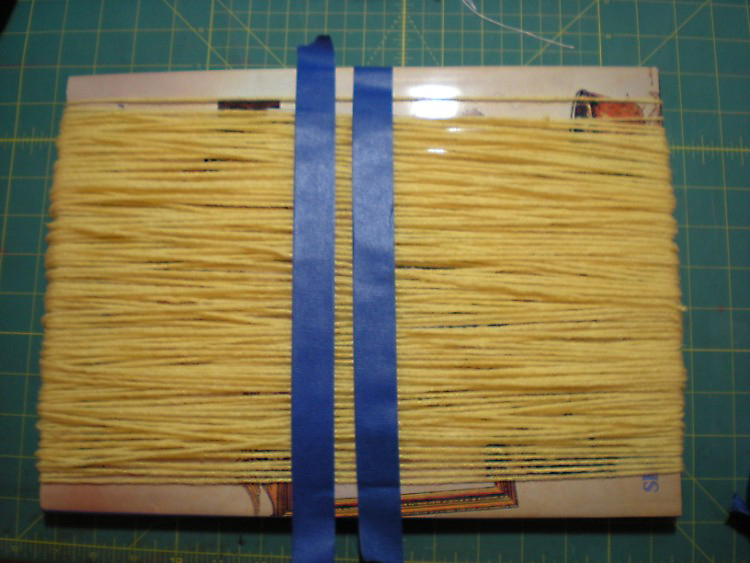
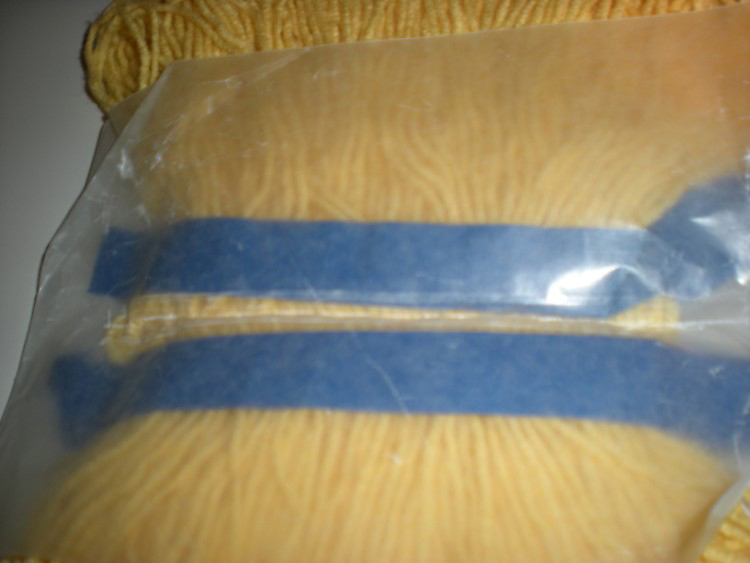
Once your book is all wrapped, find the center of this bundle of yarn. To hold the yarns in place for sewing, place a piece of painter’s tape slightly to one side of center and another to the other side of center, leaving a 1/2″ gap. Do this on both sides of the book.
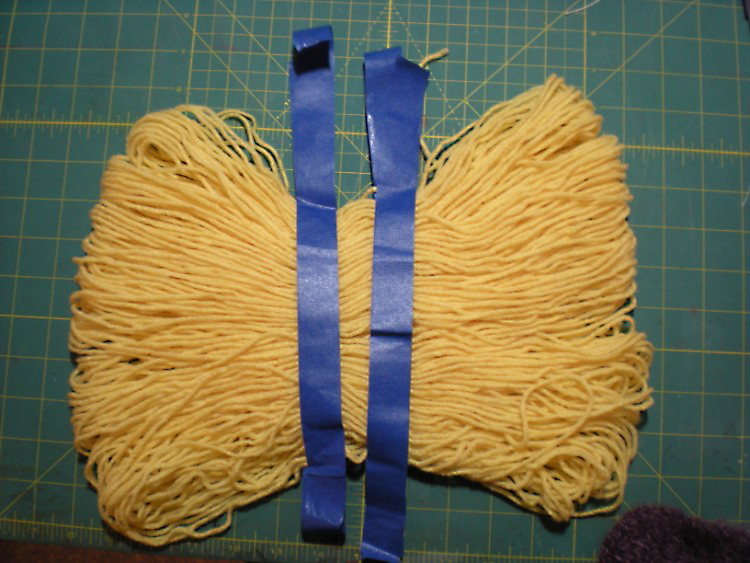
Now, gently slide your yarn off the book. (This is the tricky part, just take your time. Don’t worry if it gets a little messed up while sliding.) Your yarn bundle should look something like this:
Lengthen the stitch on your sewing machine and sew down the middle of your bundle of yarn, right between the two pieces of tape. To keep the yarns from getting caught on the presser foot and feed dogs, sandwich your bundle between two pieces of waxed paper while sewing. Make sure to backstitch to secure both ends. Gently remove the tape and waxed paper.
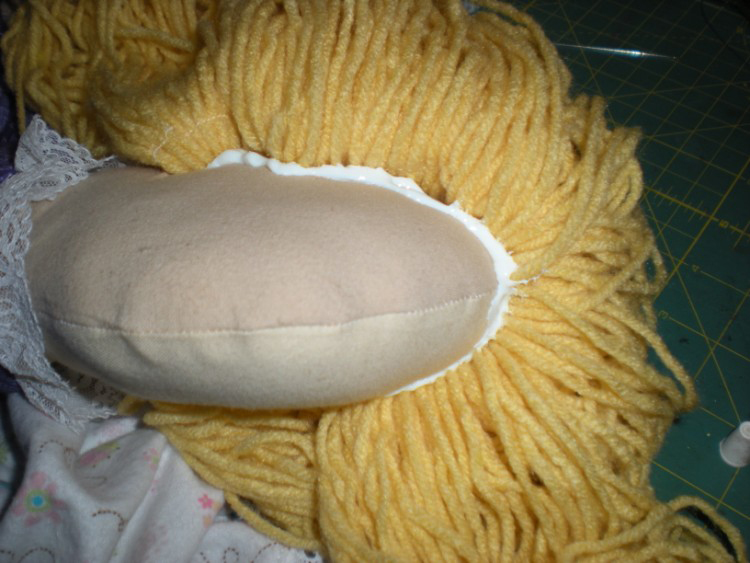
Hand stitch the seam to your doll’s head. This seam becomes the center part of her hair. Since mine was so thick, and difficult to sew, I also lifted up the hair on either side of the part and applied a line of glue to further secure it.
Repeat this wig-making process to make hair for the other side of the doll.
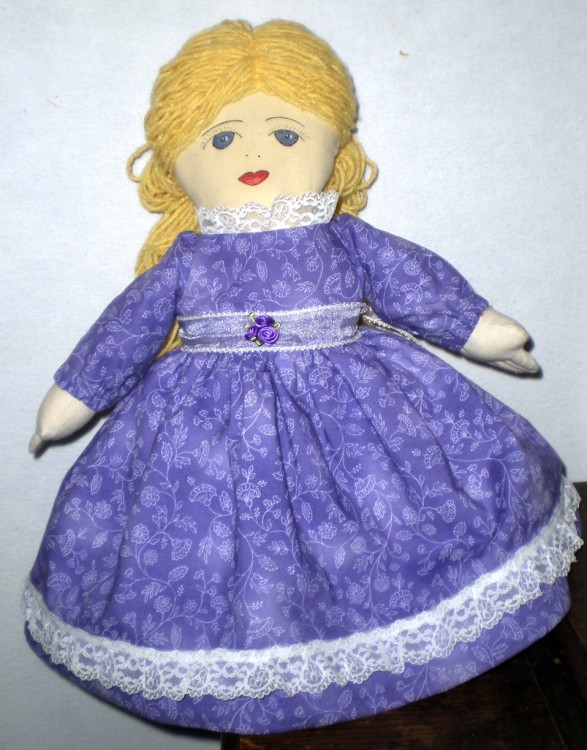
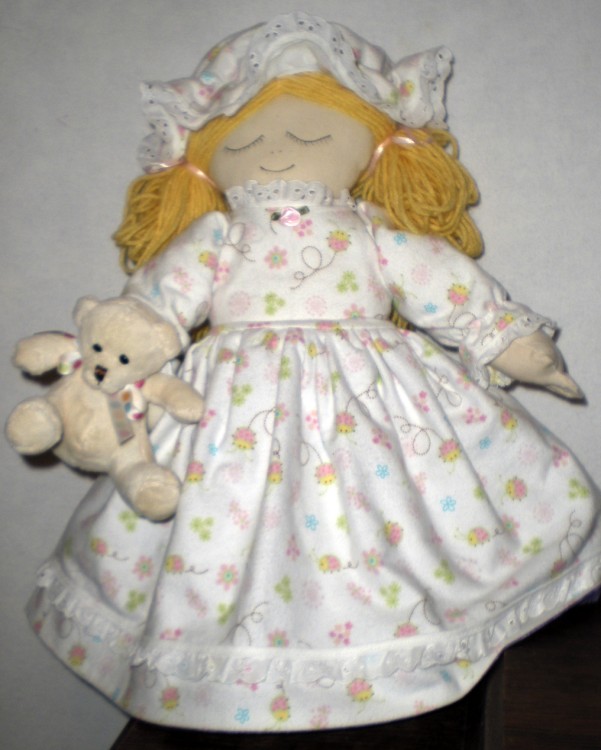
You can now style your doll’s hair as desired. If you want to trim the yarn loops, that’s fine. I left in the loops because this doll is going to a two-year old and I don’t want her to be able to pull out single strands of yarn. My day doll’s hair is pulled back and the night doll’s hair is in ponytails.
If desired, hand sew the nightcap to the sleeping doll’s head. Now is the time to add whatever other trimmings you like. I gave the day doll a ribbon rose and sash for her dress and flowers for her hair.
The sleeping doll got a ribbon rose on her bodice, ribbons on her pigtails and a teddy bear. I had to carefully position the bear so that it didn’t show as a big lump under the day dress.
And here she is, once again. Hope my granddaughter loves her!
If you decide to make a topsy turvy doll of your own, please send me pictures. I’d love to see what you’ve done!





This is an absolutely adorable topsy turvy.and your photos are so clear. I’m linking to this page from my hub: http://hubpages.com/hub/Charming-Topsy-Turvy-Dolls-Lovable-Toys-Depict-Nursery-Rhyme-and-Fairytale-Characters
Thanks so much, I’m glad you like it!
Happy Sewing,
Sandy
Thank you so much for this post!! I just finished making one for my daughter. It came out perfect and I can’t wait to make more for the rest of the girls in my family!! Thanks again.
Aren’t dolls so much fun to make? I just love them. 🙂
We’d all love to see photos of your finished dollies!
I can’t quite figure out how to cut the dress on ?two folds.
Hi Loretta,
First you fold your fabric in half in one direction, lengthwise. Next you fold the fabric again, in the other direction, crosswise, perpendicular to the first fold. Now you have two folds at right angles to each other.
Think of it how you fold a washcloth to make it into a smaller square. First fold one way, then the other.
Hope this helps! I should probably put up some photos to illustrate this step more clearly.
I am having troble figureing out how to get doll into the dress the under skirt falls down when one is upright…..I love the pattern but can’t seem to get pass this one point and I did sew the bottom of skirt together…
Hi Joan, What you need to do to keep everything in place is to sew the gathered tops of the skirts together (the skirts will be wrong sides together) sandwiched between the two bodices (the bodices will be right sides to the right side of their respective skirts.) These four layers, with two of them gathered, will make a very bulky seam, but this will keep everything in its place no matter which way the doll is flipped.
I hope this helps. Feel free to contact me with any further questions.
I’m so excited to find this pattern. I made this doll for my daughter 35 years ago and now my grandbaby just loves it. I want to make more to give as gifts. God Bless you for sharing!
You’re very welcome, Jamye. It’s my pleasure. 🙂
why can’t I download part 3&4 of the topsy turvy doll
Hi Alice,
Thanks for stopping by my little blog. I’m not sure what you mean by “download” the parts. The Topsy Turvy doll series consists of four separate blog posts, plus a pdf of the pattern. I’ve listed all the links below.
http://keepsakecrafts.net/blog/2010/11/18/topsy-turvy-doll-free-pattern-and-directions-part-1/
http://keepsakecrafts.net/blog/2010/11/19/topsy-turvy-doll-free-pattern-and-directions-part-2/
http://keepsakecrafts.net/blog/2010/11/20/topsy-turvy-doll-free-pattern-and-directions-part-3/
http://keepsakecrafts.net/blog/2010/11/21/topsy-turvy-doll-free-pattern-and-directions-part-4/
http://www.keepsakecrafts.net/topsy_turvy_doll_pattern.pdf
If you want to print the directions from my blog posts, you’ll need to highlight them, right click on any of the words and select “print” from the little pop-up window. When your printer comes up, chose “print selection” and it will only print what you’ve highlighted.
Hope this helps!
Happy creating,
Sandy
Thanks Sandy I got them all so cute Thanks Alice
Awesome! Have fun sewing. 🙂
none of the links to the other pages will work for me. I keep getting “page not found” 🙁
Hi Nicole,
The links are working fine now, give it another try. 🙂
Thank you!!!!!!
This looks very similar to what my grandmother made for me and my 2 sisters when we were kids. Unfortunately mine got “misplaced/lost/destroyed” when I went to college and my parents subsequently moved. Mom was not a saver. I was devasted. That was some 35 years ago. My sisters have theirs and I am going to make one for myself. I know it won’t replace the irreplaceable, but it will definitely remind me of Grammy none the less.
Thank you so much for sharing.
Hi Cheryl,
Thanks for stopping by, I’m so glad you’ll get good use out of the pattern. Perhaps you can find something of your grandmother’s to sew into the doll that would make it even more meaningful.
Happy sewing!
Sandy
I’ve been searching for this for a couple of years now! Thanks so much for the great instructions!
Is there a pattern for the bonnet? I think I can figure it out but I was thinking I missed it somewhere.
Hi Martha,
Glad you can use the pattern! The nightcap is just a circle, the dimension (I think it’s 13 inches) is in the instructions.
Happy creating!
P.S. I just recently put all the instructions together into a pdf. http://keepsakecrafts.net/Topsy%20Turvy%20Doll%20pattern%20and%20directions.pdf
Thanks for this great post. I am going to give it a try for my granddaughter too.
December 1 2015
Leslie Thomas
I’m glad you like the pattern. It’s a fun one to make and the recipients always seem to love them. 🙂
I love this doll!
Mine is nearly finished …
To make it easier to sew her hair on in a (roughly) straight line, I drew a light pencil line across the top of her head, in line with the middle of her eyebrows.
I printed out the instructions first, read them, reread them and kept reading them till I had a good idea what I was in for.
I had to refer back to these pages for a better look at the photos when it came to sewing on her arms. It looked weird but worked well.
Thanks, Sandy.
Hi Heather, I’m so glad you liked this project. Good idea penciling in a guideline for the hair!
Sandy, thanks so much for a great tutorial! My Mum made one for me back in the late ’40s, but I was the eldest of nine kids and it didn’t survive the siblings plus multiple moves. I have four grand-daughters and two grandsons and I’m making one for each of them, plus a few for some nephews and nieces. This will be a while in the making, as i still have to find my fabric in the storage or else buy more . . . sigh . . . 🙂 This looks like a fairly simple and fun project, so I’m looking forward to it.
First up though, one for me (a prototype of sorts).
Thanks again. ~ Linne
Hi Linne!
I’m so glad you like this pattern. These dolls are fun to make, I love all the possible combinations.
They aren’t overly complicated, but there are lots of steps to each. I hope your creations become cherished keepsakes for your grand & great-grandchildren!
Happy creating!
Sandy
I made these for my granddaughters. They love them. What a wonderful pattern to share. I’m making them for other little girls who are in need so your kindness will ripple all over the world!
I’m so happy to hear you’ve made such great use of the pattern. Happy creating, indeed!. 🙂