


Finally, after many, many years of sewing, I’ve managed to figure out a most important thing that helps me get a good fit (most of the time) in my garments.
That thing is ease: the difference between your actual body measurements and the finished measurement of the garment.
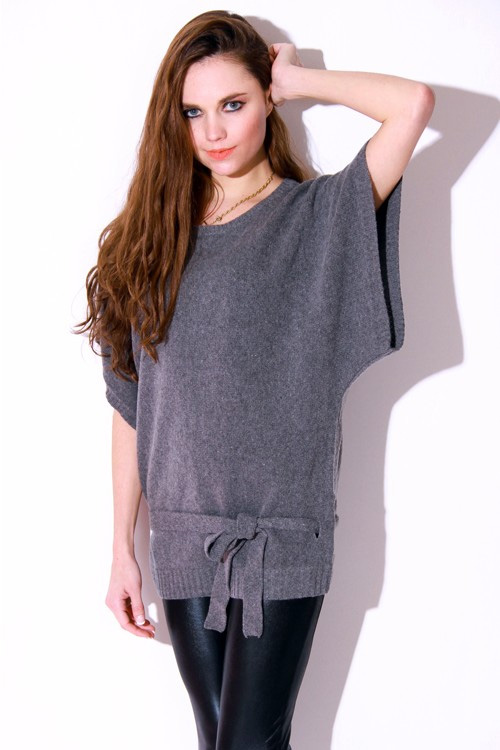
So, for example, this tunic has a LOT of ease around the bust and waist. Those garment measurements are quite a bit more than the model’s.
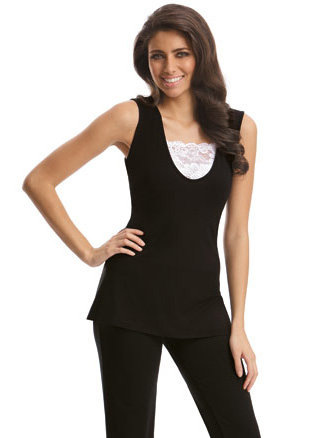
This top has very little ease, it measures just a little bit more than the model.
My very first lesson in ease came when I was 17 and decided to make an outfit for my mom’s second wedding. I had picked out a very pretty burgundy jacquard for a skirt and some white silky stuff for a top. After carefully taking my measurements I designed and drafted my own patterns for both pieces. I was so proud of myself that I’d even remembered to include seam allowances on the patterns. 🙂
So you can imagine my surprise when I tried to try on these two articles of clothing only to find that they were skin tight! It wasn’t until much later that I figured out what the problem was… no wearing ease.
(Sadly, I was accused of trying to look like a hussy at my mom’s wedding and was promptly sent to the local mall to buy a more appropriate garment. I didn’t sew for years after that.)
Anyhow, you need to know about two types of ease, wearing ease and design ease. Wearing ease is what makes it possible for us to wear non-stretch woven fabrics and be able to move & breath in them. You have to have a little room to breathe, twist and bend in order to be comfortable in your garments.
Here are some general guidelines for wearing ease:
| Misses’ Ease Allowances | ||||
| Bust Area | Hip Area | |||
| Silhouette | Dresses, Blouses, Skirts, Tops, Vests | Jackets | Coats | Shirts, Pants, Shorts |
| Lined or Unlined | ||||
| Close Fitting | 0 -2 7/8″ | not applicable | 0 – 1 7/8″ | |
| Fitted | 3 – 4″ | 3 3/4 – 4 1/4″ | 5 1/4 – 6 3/4″ | 2 – 3″ |
| Semi-Fitted | 4 1/8 – 5″ | 4 3/8 – 5 3/4″ | 6 7/8 – 8″ | 3 1/8 – 4″ |
| Loose Fitting | 5 1/8 – 8″ | 5 7/8 – 10″ | 8 1/8 – 12″ | 4 1/8 – 6″ |
| Very Loose Fitting | over 8″ | over 10″ | over 12″ | over 6″ |
Everybody has different preferences, so to best determine how much wearing ease suits you, find a close-fitting garment that you like the fit of. Measure yourself and the garment both at the key fitting areas (bust, waist, hips.) The difference between the two measurements in each area is the amount of wearing ease you prefer. It’s not a bad idea to write down this info, by the way.
If your garment has sleeves you may also want to measure around the widest part of the bicep to determine the wearing ease needed there.
The other kind of ease is design ease. The above tunic’s style is largely due to how much bigger it is than the model.
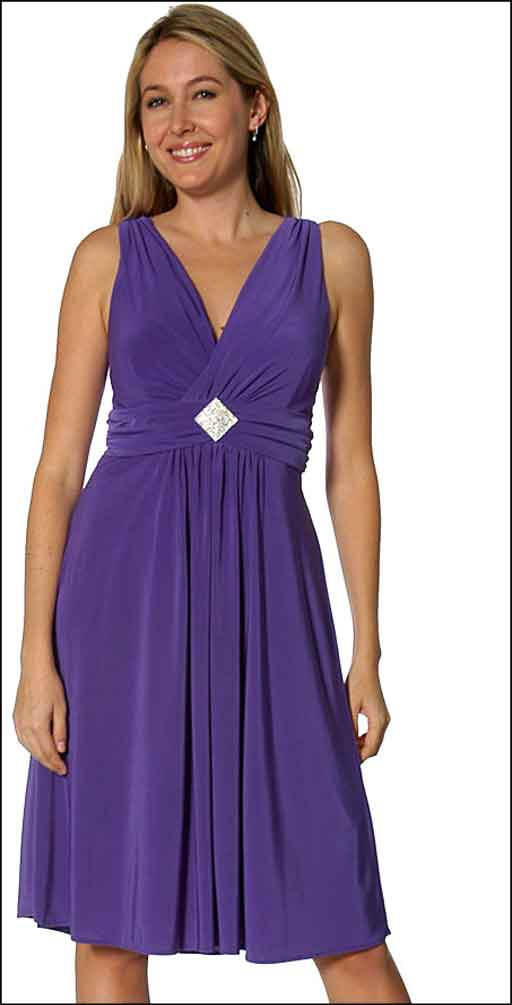
The skirt of this dress is a lot bigger around than the model , but that’s what gives it its style. She obviously doesn’t need all that extra room to move. 🙂
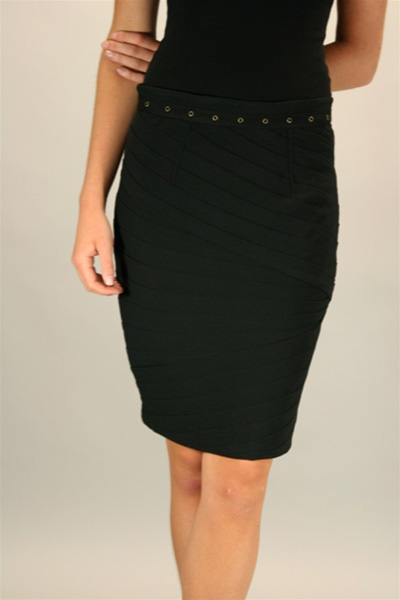
This skirt’s style is very interesting, but it doesn’t involve adding extra width around the body. So it only has wearing ease, not design ease.
So, here’s how you figure it:
body measurement + wearing ease + design ease = finished garment measurement
Now, the next time you look at a pattern envelope, just ignore the size chart. Instead look for a chart of finished garment sizes.
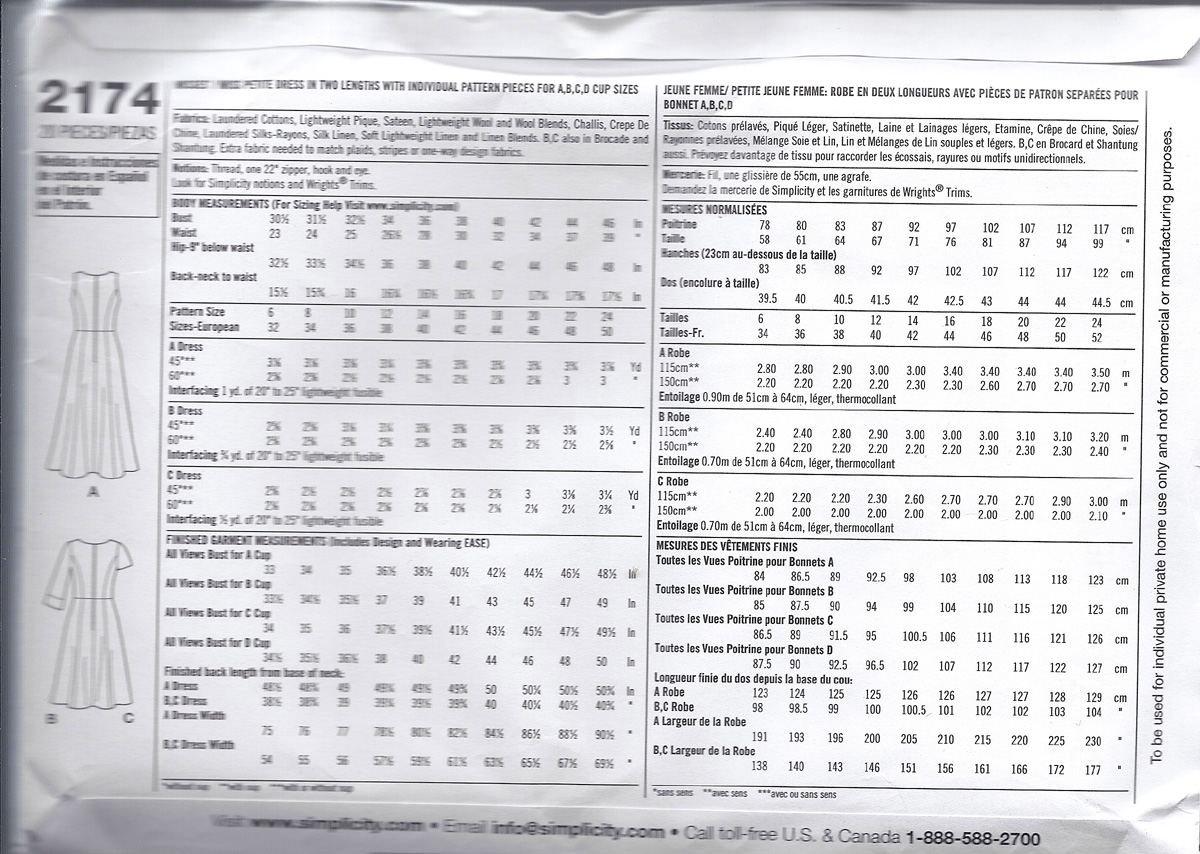
On this pattern back you find the finished garment measurements at the bottom, below the yardage charts. This pattern even kindly tells you that they include design and wearing ease.
Sometimes you’ll find finished garment measurements on the pattern envelope flap or printed on the tissue pattern. Occasionally I’ve found them on the pattern maker’s web site. And, sometimes, you’ll just have to measure the flat pattern (don’t forget to subtract the seam allowances.)
So now, instead of being frustrated, not knowing which is the right size to sew, just pick the size with measurements that match your body measurements plus preferred wearing and design ease. Simple, eh?
Here’s to happy sewing AND getting a good fit!
P.S. To my regular readers, sorry for having been so long between posts. My father passed away and life has gotten quite complicated. Like, as in, I might have to write a book about it someday complicated. Seriously, it’s quite a mess. So, please pardon me if posts are a bit sporadic for a while.

That is interesting! I Yeah, my first sewing effort was a complete disaster for that very reason. I didn’t even try to put it on. You don’t want to know more.
So sorry for your loss. Hope you can get your father’s estate sorted out.
Thanks, Robin.
I’m certain those first sewing disasters are common, but they sure are good teachers. Mine was 30 years ago and I’ve never forgotten the lesson.
Hope you have a wonderful Fourth of July!
I wish I knew about ease back when I knitted my second sweater. I knitted to my exact measurements on a sweater that wasn’t supposed to be that tight, and got disastrous results. And so I learned the hard way to add inches when I wanted to wear a sweater over a blouse.It is useful to think about what you’ll wear under the sweater when calculating ease. If it is, say, a clingy T shirt, and you’re planning positive ease, you need less than if you’re intending to wear a sweater over a fabric shirt.
Ah yes, those first disastrous projects. We do learn from them, though.