


A couple weeks ago I shared a video tutorial showing how to make this necklace.
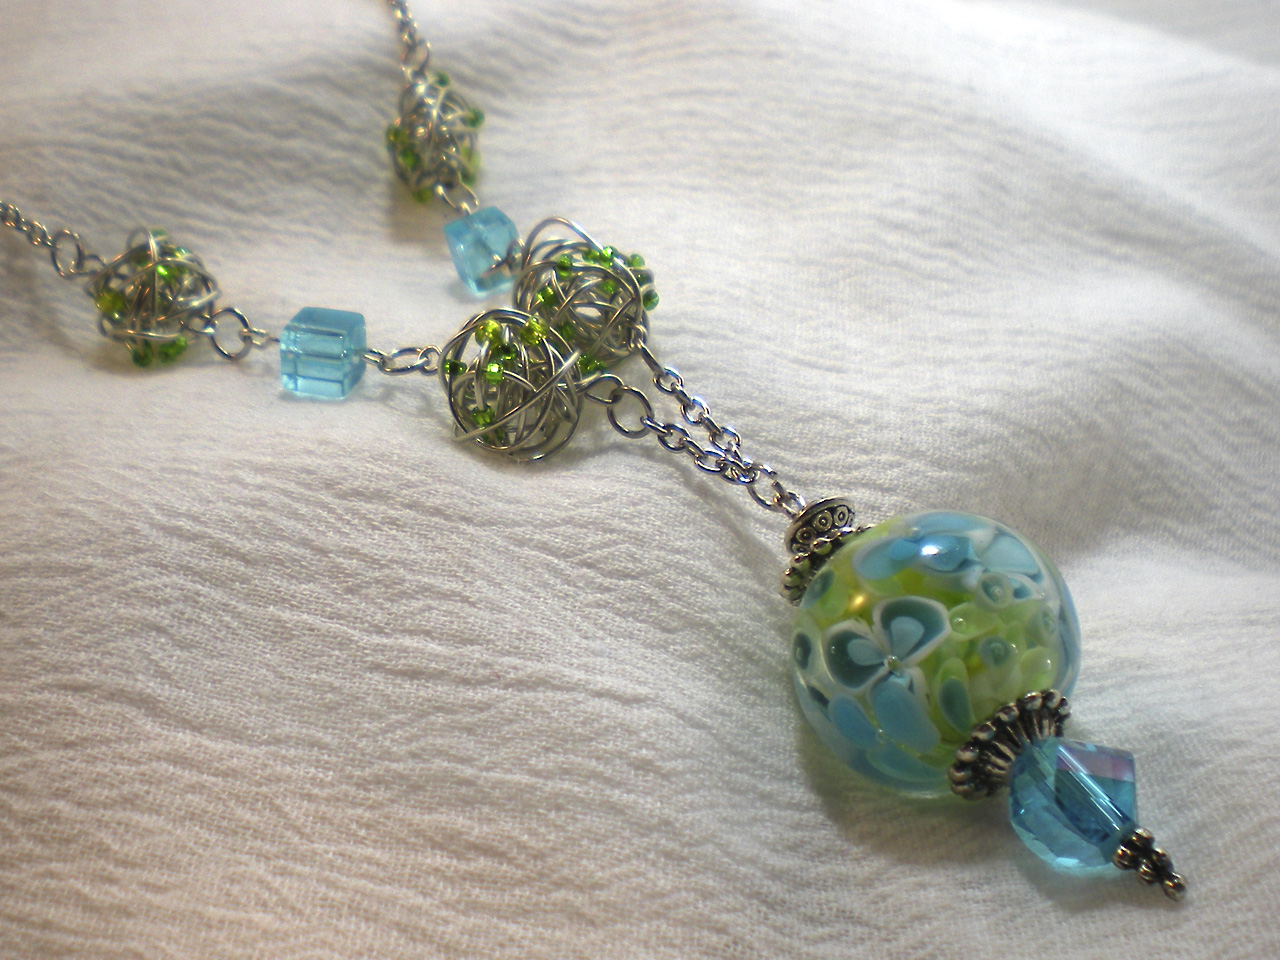
In the video I promised to show you how to make your very own tangled wire beads.
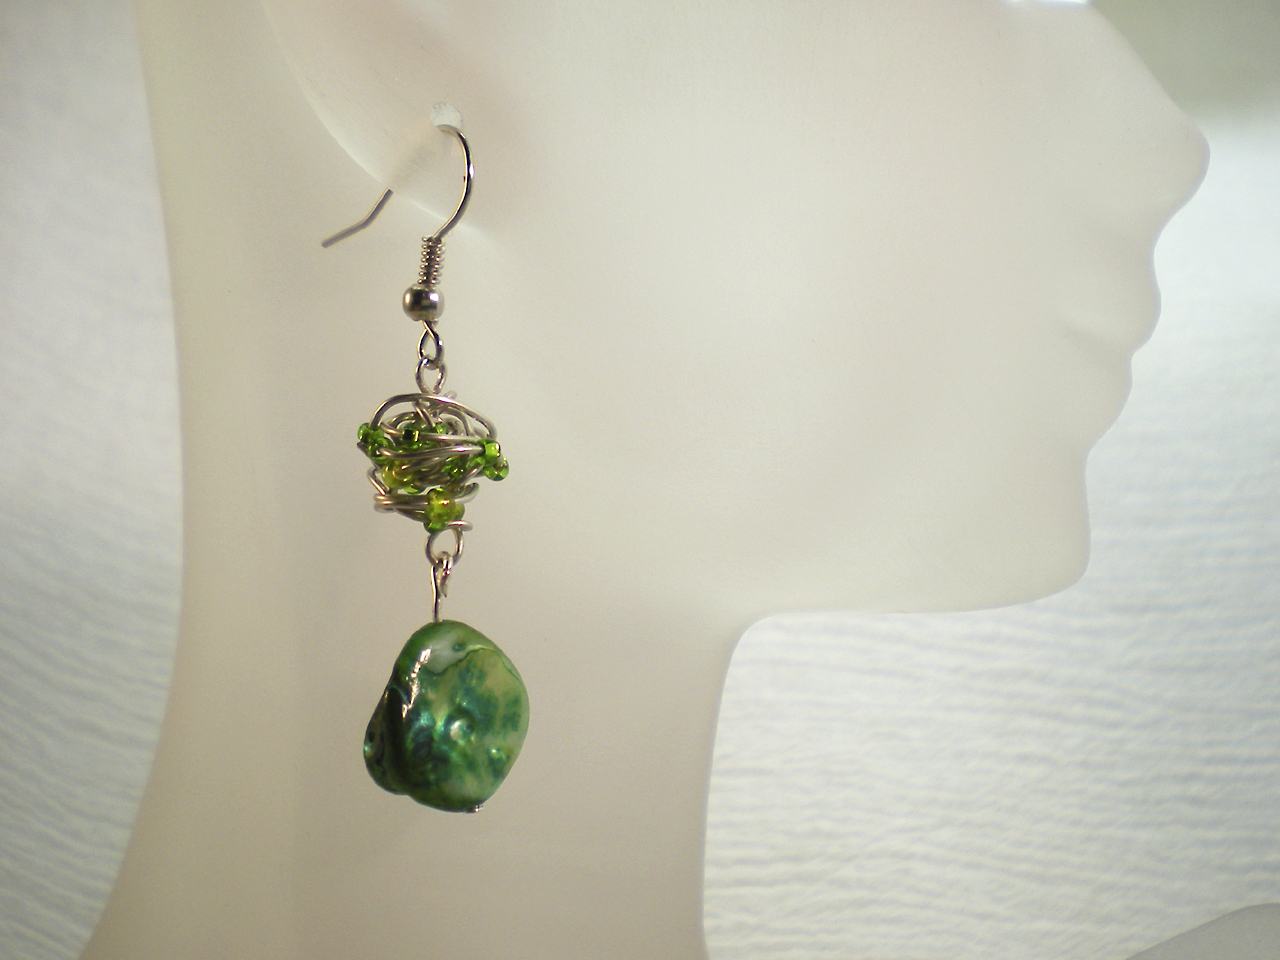
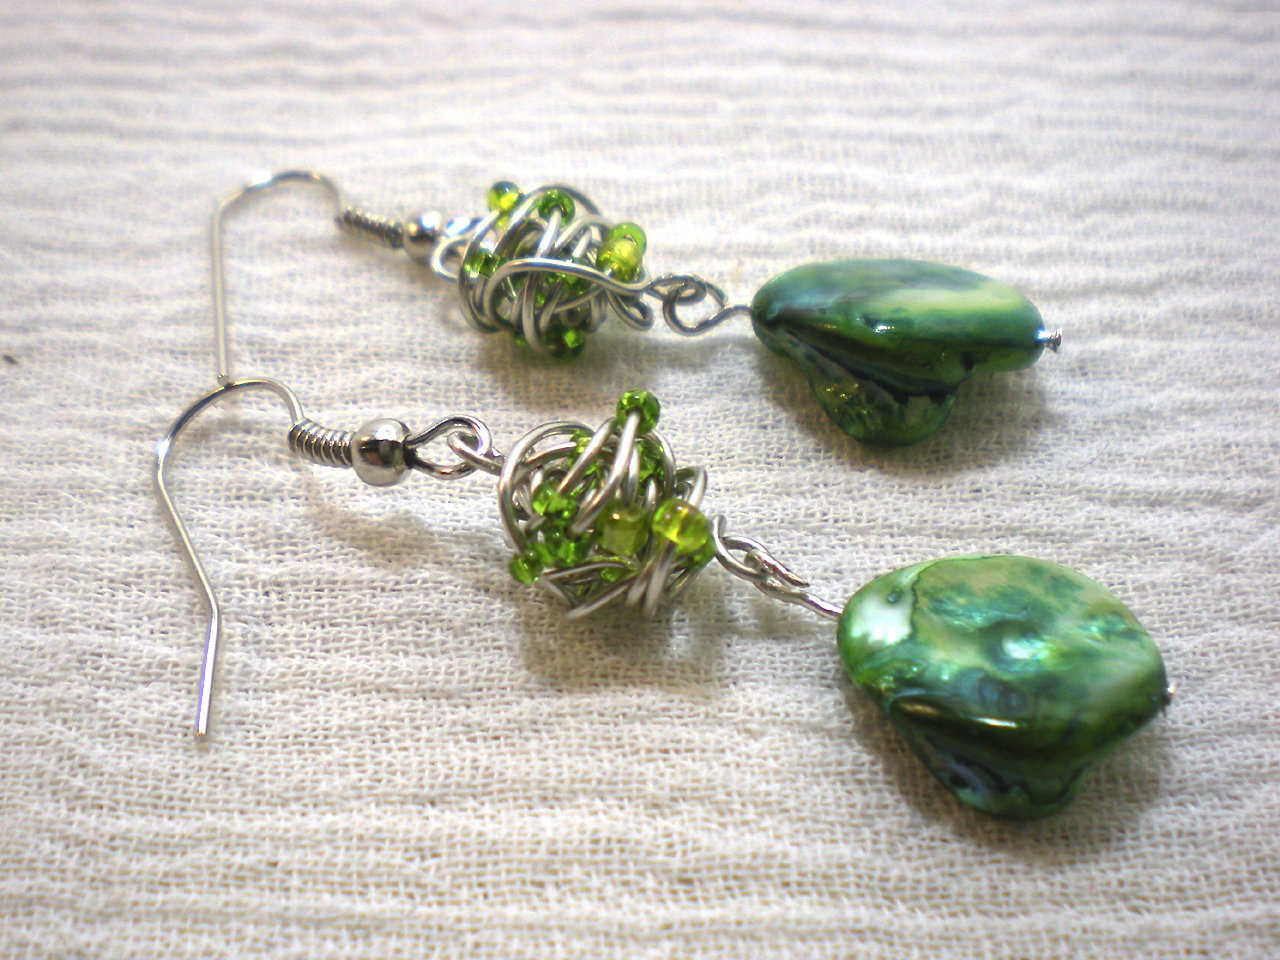
As promised here they are, made up into earrings.
You can make your wire beads as large or small as you like, in any color wire, with any color or colors of seed beads. Imagine the possibilities!
Materials:
- two ear wires
- two head pins
- spool of 22-gauge craft wire
- 24 glass seed beads
- two shell beads
- round nose pliers
- chain nose pliers
- wire cutters
Instructions:
- Leaving wire on spool, string 12 glass seed beads onto wire. Use round nose pliers to make a loop with end of wire. Use chain nose pliers to make a bend after loop. Use chain nose pliers to make a 90-degree bend ¼-inch from first bend.
- Use your hands to freeform wrap wire around ¼-inch piece, forming core of bead. Continue freeform wrapping, occasionally sliding down a seed bead, until you’ve used all 12 seed beads and wire bead is desired size and shape.
- Position wire on side opposite loop. Trim wire to 1 inch long. Use round nose pliers to form another loop, tucking end of wire into bead. Trim excess wire if necessary.
- Repeat steps 1-3 to make second bead.
- To make bead dangle, thread shell bead onto a head pin. Use chain nose pliers to grasp wire just at point where it exits bead. Bend wire at 90-degree angle. Grasp bend with round nose pliers and wrap wire around pliers as far as possible to start to make a loop. Reposition pliers to finish loop. Use wire cutters to trim wire where it crosses beginning of loop. Repeat to make dangle with second shell bead.
- Open loop of bead dangle and attach loop of a tangled wire bead. Open loop of ear wire and attach other end of tangled wire bead. Repeat to make second earring.
Happy Creating!

That is really cool, especially in combination with the shell beads you have there.
Thanks! I think I’d love these beads in combination with just about anything. I have a couple of ideas for variations, too. Coming soon. 🙂
I love this tutorial. I’m going to definitely share this!
Thanks, Whitney, I’m so glad you like them. They’re fun to make and even more fun to wear!
Can u tell me potential problems using brass or copper colored inexpensive earring wires that I intend go sell? Concerned about wire sensitivity.
Thanks
That’s something I haven’t looked into, since I rarely sell my jewelry. I’m sure an online search will bring you plenty of info, as it’s a common topic.
The most important thing, I would think, would be to be open and honest with your customers about the materials used.