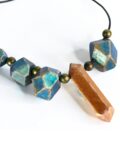
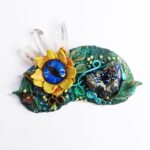
Here’s a bracelet to match the Hammered Paddle Headpin Earrings from a couple weeks ago.
The spring colors in this bracelet make me happy!
If you need practice making wire wrapped loops, this project is for you. 🙂
The concept is fairly simple: make wire wrapped connectors of largish (10mm or so) beads, connect them with jump rings and hang several wire wrapped smaller crystals (4mm) on each jump ring.
I needed a little more length and so added five pairs of jump rings to one end, thus making it longer and adjustable. There were four stray crystals left on the table (couldn’t have that) so I add three to the end of the chain and one next to the clasp.
For details on how to do the wire wrapping, check out the video. Happy creating!
You can watch the Crystal Dangles & Roses Bracelet Video Tutorial over at YouTube.
Materials:
- 6-8 10mm ceramic beads
- 15-24 4mm Swarovski crystal bicone beads
- 15-24 head pins
- 3mm silver plated beads (optional)
- 6mm silver plated jump rings
- silver plated lobster clasp
- 20 gauge silver filled wire
Tools:
- round nose pliers
- chain nose pliers
- wire cutters
Directions:
Use 20 gauge wire to make wrapped loops on each end of 10mm ceramic beads. Wrap enough beads to make the desired length of bracelet less one inch.
Slide each 4mm Swarovski crystal onto a head pin and make a wrapped loop. (If desired add a 3mm silver plated bead first.) Make enough of these for three to go between each ceramic bead. Wrap extras if you’d like some near the clasp or at the end of the chain.
Open a jump ring and slide on loops of two ceramic bead units and three wrapped crystals. Close jump ring securely.
Repeat to connect all ceramic beads together with crystal on jump rings in between. Use a jump ring to add lobster clasp to one end (and crystal, if you like) and several jump rings to the other end.


Interesting combination–the blue crystal beads with the rose ceramic beads. I never would have thought of that, but they go together beautifully.
Thanks, Robin!