


I’ve been working my way through Tim Holtz’s 12 Tags of Christmas and just completed a two-page scrapbook layout based on the techniques he showed on day 7.
Phew, but it would be a lot quicker to just make the tag. However, then I wouldn’t know what the heck to do with it. As it is, I’ve completed yet another scrapbook layout. I may yet get caught up in this lifetime!
I loved the look of Tim’s day 7 tag, so elegant.
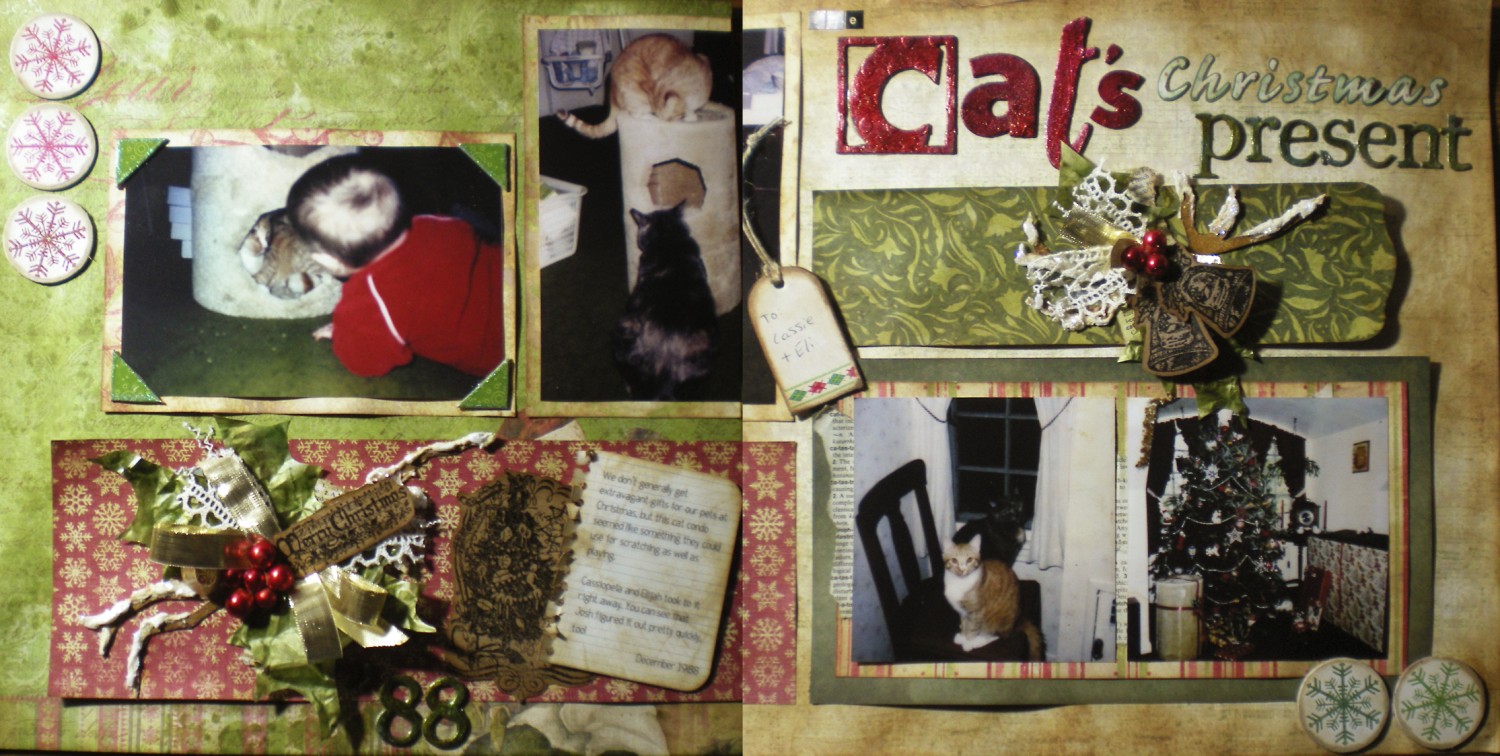
All the papers were from K & Company’s Glad Tidings Card Making Pad (the shaped green piece) and their Yuletide Specialty Paper Pad
.
The first step is to swipe Antique Linen Distress Stain and Picket Fence Distress Stain onto the Non-Stick Craft Sheet. Then mist your background paper with water and swirl it through the stains on the craft sheet. Keep swirling and dabbing until you’re happy with the look, then dry with a heat tool. The colors will be much lighter and less intense once they dry.
A few things I learned while using this technique.
- Don’t choose Distress Stains that are a lot darker than your background paper, unless you want a really funky, blotchy look.
- As you swirl your paper, try to turn it nearly 360°, this gives the most mixing and more even results.
- Make sure your paper is completely dry before adhering anything to it. Otherwise you will get weird lumpy, ripply things happening.
Next choose a background stamp and stamp all over your paper. I used the Music Background Cling Stamp with Bundled Sage ink on the right side, and the Italian Poetry stamp (also by Hero Arts, it seems to be no longer available. However, this one, also by Hero Arts is quite similar: Old Letter Writing Stamp
) on the left with Vintage Photo
ink.
Now to create the holly leaf embellishments!
Tim’s main focus for this tag was using Kraft Glassine for the leaves. If you watch the video, it looks like amazing stuff. However, I didn’t want to wait for an order to arrive, so tried it out on vellum and think they came out rather nice.
First you use the Ink Blending Tool (with felt, not foam) to apply Gold Metallic Mixative , Pesto
, Meadow and Stream alcohol inks to your vellum paper. Next add some Alcohol Blending Solution
and go over it all again.
Then crumple up the paper. The vellum doesn’t crumple as nicely as the glassine appears to do, but other than that, I was happy with it.
Use a die cutting machine (I like the Sizzix Big Shot) to cut out the Holly Branch Alterations Die twice from this mottled green paper. You should have six holly leaves.
Cut the branches from the same die out of Grungeboard and paint with Tarnished Brass Distress Crackle Paint. Once the paint is dry, sand the edges with a sanding block, then ink with Vintage Photo
Distress Ink.
Let these branches dry completely before going on to the next step. Tim often uses the Snow Cap Paint Dabber to make snow, but that never seems to work well for me. Instead I globbed on a couple layers of Embossing Paste, sprinkling superfine glitter onto the last layer.
Unless you like everything within a 20 foot radius to be glitterified, I do not recommend using superfine glitter. Using Stardust Stickles would be much more sensible, but sadly, my little bottle was empty.
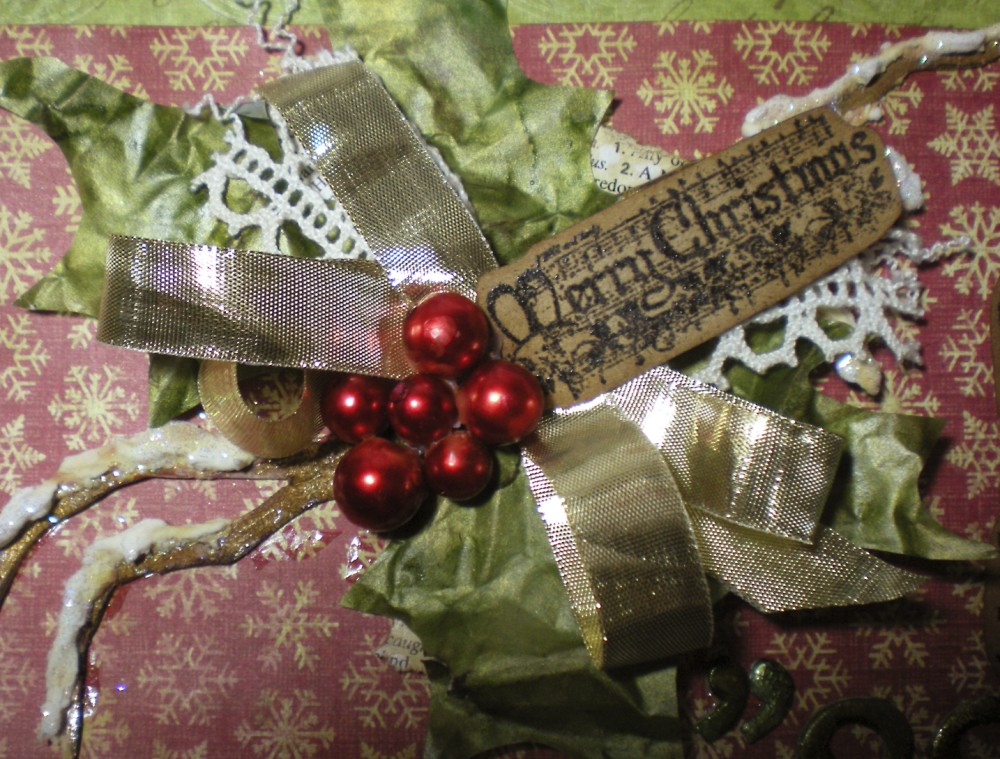
To make the red berries, simply drop some pearls into a plastic baggie and add a few drops of Red Pepper alcohol ink. Let dry on the Non-Stick Craft Sheet. The leftover mess of ink cleans up beautifully with some Alcohol Blending Solution.
To finish off this embellishment, stamp onto Kraft cardstock with Clear Embossing Ink with your choice of stamp. (This set was made by Michaels and since it has no series name or title, I can’t find it anywhere online.) Sprinkle on Super Fine Detail Embossing Powder, black and emboss with a heat tool. (If you swipe a dryer sheet over the paper before stamping, you’ll reduce static and get a cleaner embossed image.) Cut out around the image and ink the edges with Vintage Photo
Distress Ink.
To make the embellishment, adhere the snowy branches and four of the vellum holly leaves with Glossy Accents. Wire up a scrap of lace and some gold tinsel or ribbon and adhere. Use Matte Multi Medium
to glue the “berries” to the center and then tuck in your stamped image.
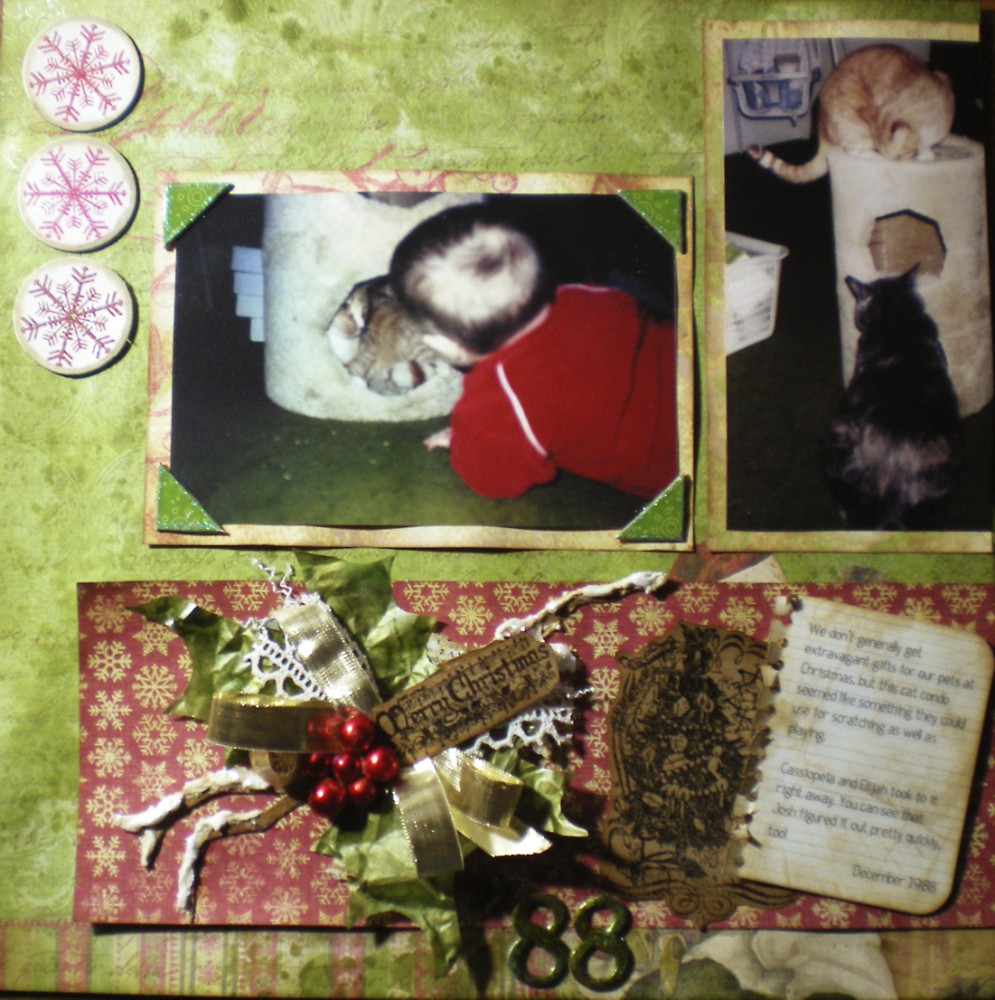
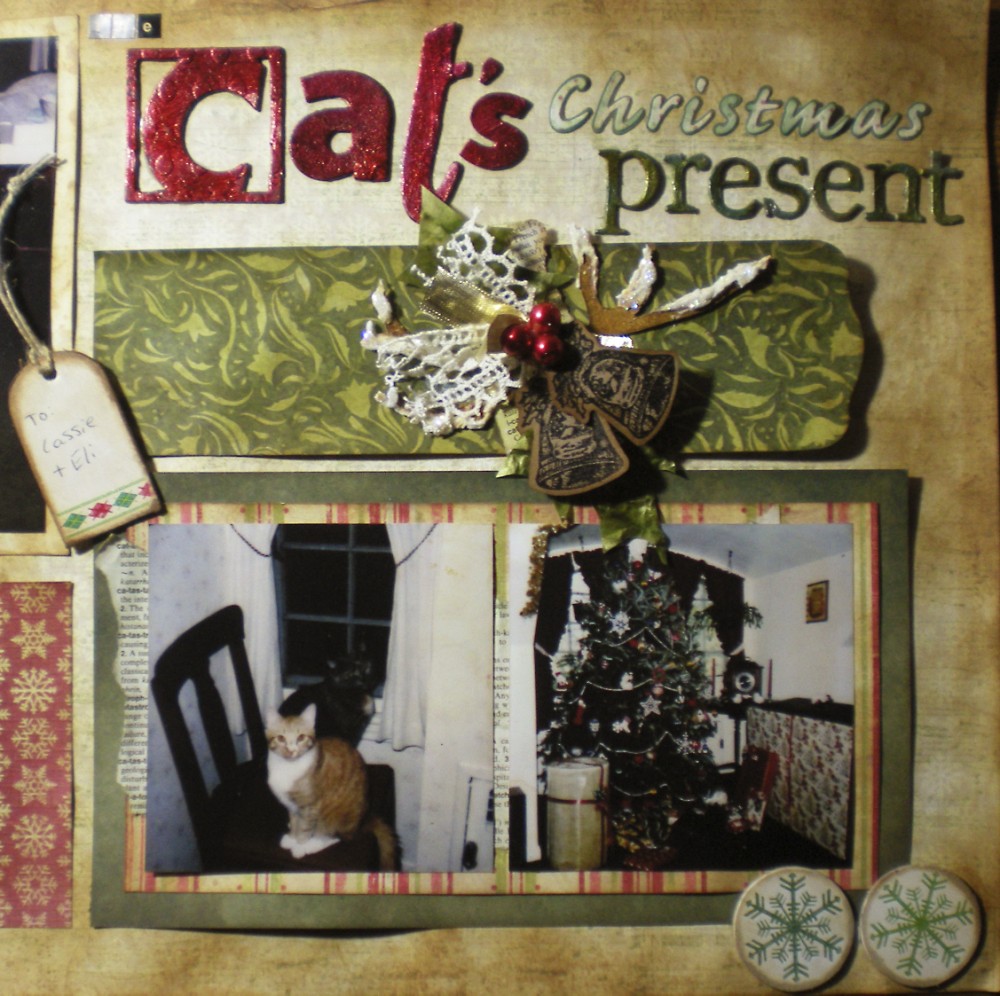
I used four of the holly leaves for the large embellishment on the left and two leaves for the smaller focal point on the right.

Ok, now the title! The Cat’s is from Grungeboard Alphas (with a couple random chipboard letters that I got who-knows-where thrown in), presents is from Grungeboard Mixed Minis and Christmas is made with the Sizzix Sizzlits Script Alpha Set (long since discontinued, but this one is similar and kind of nice: Sizzix Sizzlits Alphabet Set – Bloom
)
The little Sizzlits letters and bits are tiny. I’ve found the Zig 2-Way Glue Pen gets the glue exactly where you need it without making a mess. Tweezers are also helpful in lining up the pieces.
I painted the Cat’s and presents with Brushed Pewter Distress Crackle Paint and once dry colored with alcohol inks. (This is a technique Tim showed a year or two ago, and I still use it all the time.) For a richer look use a combination of similar colors. Cat’s got Red Pepper, Cranberry and Raisin. Presents got Pesto, Meadow and Stream. (As did the 88 on the left page, also some random chipboard.)
Last but not least is the journaling. Notebook paper is big right now, but I haven’t been able to find any in the scrapbooking section of the craft stores.
After much searching I finally went here, then uploaded the file to Printmaster – Platinum Version 18 (I’ve been using Printmaster since version 4.0 and love it for all kinds of desktop publishing uses.) I was able to layer the notebook paper under a text box, then print the journaling and the notebook background onto some white cardstock.
To really make it look like notebook paper, I used the 1/8th inch punch on my Crop-A-Dile to punch holes on every other line, then snipped to each hole with scissors. After roughing up the edges a bit, I inked it all with Antique Linen
Distress ink and applied it to the page with Foam Adhesive Squares
(pop dots.)
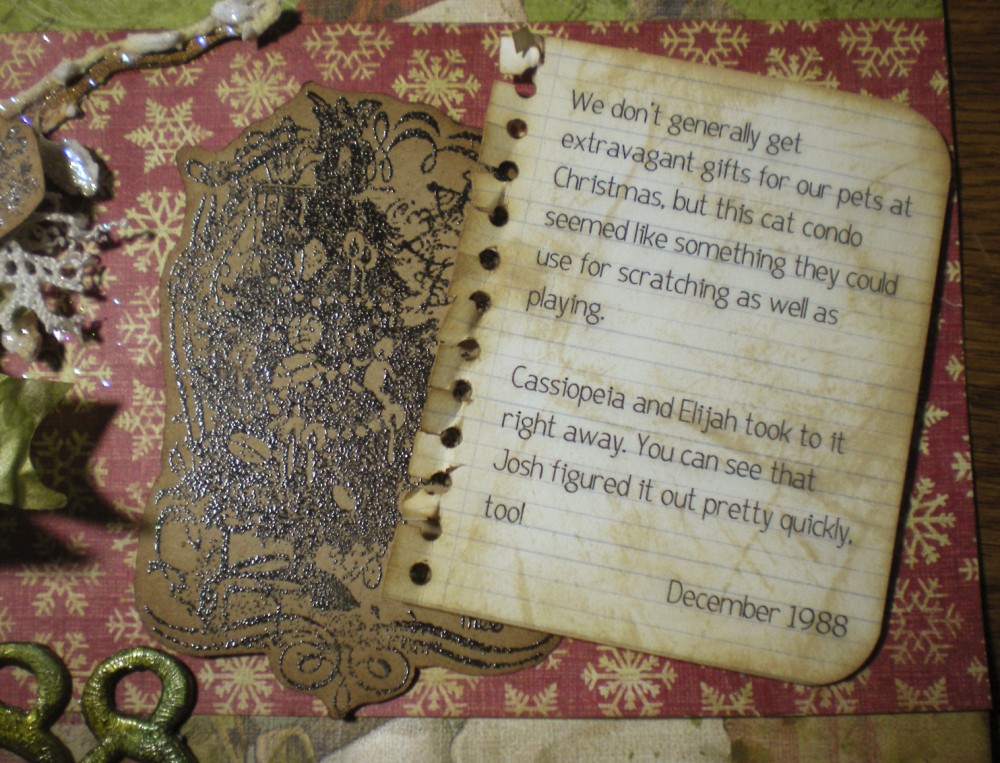
The chipboard photo corners, circles and tag have been kicking around for a while. I think I got them at Joann’s. Their edges were sanded, then inked with Antique Linen Distress.
Wowzer, that was a LOT of work! I hope I didn’t bore you silly with my long post but there was a lot to share. If you’d like to see step by step photos for any of these techniques, make sure to check out Tim’s 12 Tags directions. He really is a fantastic teacher.
Happy Creating!

Okay, that is PRECIOUS. After all that work, please tell me you’re not going to just stow it away in the attic. >:|
No, the pages get stowed away in albums. I fill one album for each year.
Generally once I finish an album it sits out on the coffee table for a while for us or company to flip through.
Someday, I hope my kids, grandkids and maybe great grandkids will enjoy looking through them.