


What else is a new grandma to do for her granddaughter’s first Christmas except make her a dolly?

Traditionally Raggedy Ann has red hair, red & white striped socks, black shoes and a red or blue calico dress, but I love these non-traditional colors.
There are some special fabrics included. The apron is made from a petticoat I used to wear, the pink rick-rack is from her great-grandma Huntress’ sewing stash, and her dress is a piece of fabric leftover from her cousin’s butterfly quilt.
And, of course, grandpa had to get in on the act by making a cradle, complete with hand-cut dovetails.
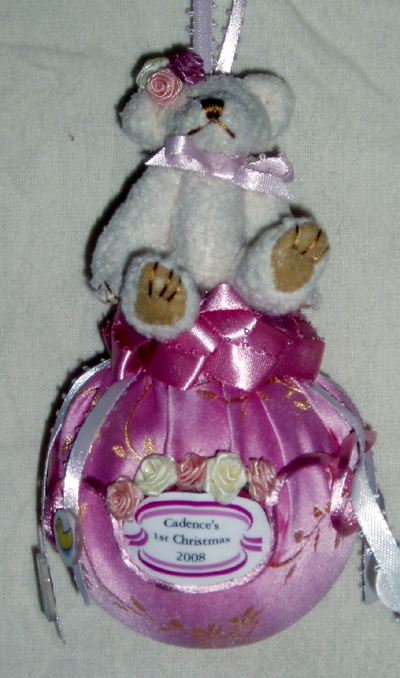
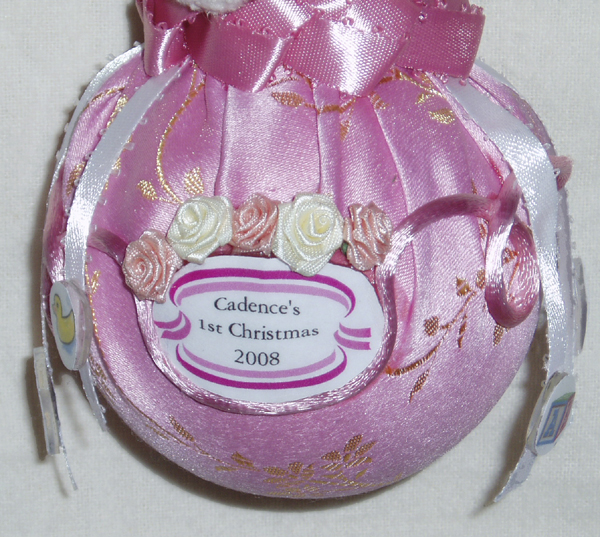
Grandma also decided that it was very important for Cadence to have a handmade “baby’s first Christmas” ornament. My grandma (Cady’s great-great grandma) made the braided ribbon trim on the ornament. Kinda neat, I think. So much pink & purple, so much fun!
If you’d like to make an ornament like this, it’s very easy. You could make them for just about any theme imaginable, new baby, first Christmas together, sports teams, favorite hobbies . . . Here are some general guidelines:
1. Cover a 4″ foam ball with a layer of batting.
2. Run a row of gathering stitches around the edge of a 13″ circle of fabric.
3. Insert the ball into the fabric circle and pull the gathers up tight. Hot gathers glue in place.
4. Add whatever decorations you’d like to the ball. I used my inkjet printer to print “Cadence’s 1st Christmas 2008” onto sanded shrink plastic. I cut out the oval shape and then shrank it with a heat gun. Then I trimmed this with rat tail cord and ribbon roses.
5. Starting at the gathered section, glue lengths of ribbon all around the ball. I left mine long to begin with and trimmed them later.
6. Cover the raw edges of the gathers with ribbon trim, small toys, whatever you like. Make sure to add a hanging loop!
7. Add small charms to the ribbons. I used more images that were printed onto shrink plastic, punched out with paper punches and shrunk. Trim the ends of the ribbons on the diagonal.
Have fun, and don’t forget to share what you’ve made!
Sandy
