I used to sew so many so many of the Christmas gifts for my family, but as my boys got older I did less and less. However, now that I have a granddaughter, it feels good to get back into it!
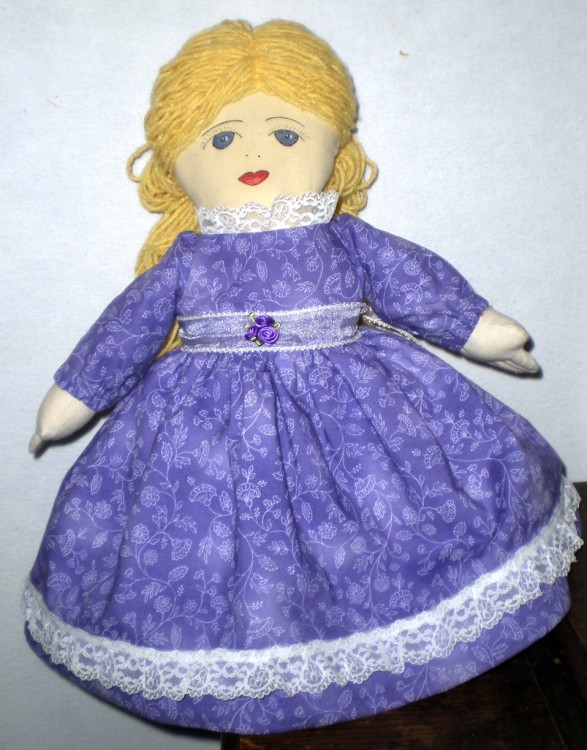
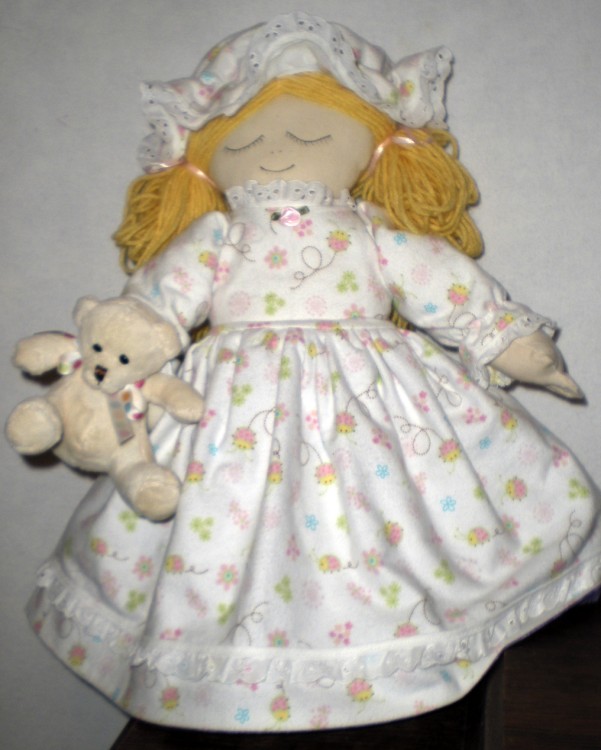
This year I’m making Cady this topsy-turvy doll. On one end the dolly is awake, flip up her dress and she’s asleep in her flannel nightgown and cap. I’ve made several of these over the years, and it’s always fun. There’s something quite charming and magical about them.
If you’d like to make your own dolly for someone special, you can find the patterns here. (When you print out the patterns, make sure to tape together the two body sections along the thin line, matching the marks.)
For materials you’ll need:
- 1/3 yard flesh tone fabric for head/ body and arms
- 1/2 yard fabric for day dress
- 5/8 yard flannel fabric for nightgown and cap
- 2 yards lace trim for day dress
- 3 yards lace trim for nightgown and cap
- 1 yard ribbon to trim waist of day dress
- 1 yard 1/4″ elastic
- polyfil stuffing
- permanent markers or embroidery floss for faces
- yarn for hair
- additional trims such as ribbon roses, ribbons for hair, teddy bear, if desired
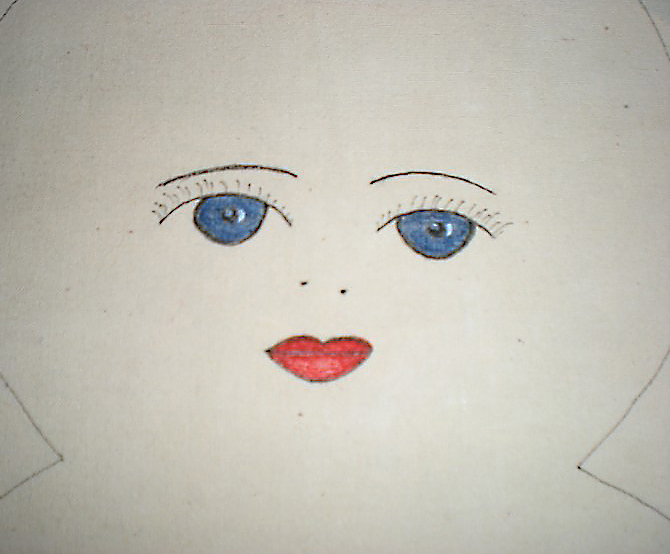
Start by making the faces. I often embroider them with embroidery floss. If you do so, I recommend you just trace the head/body pattern onto your fabric but don’t cut it out until after the embroidery is done. This gives you material for your hoop to grip onto. Or you can do like I did this year and color in the faces with markers. Make sure to use permanent markers that won’t run if they get wet.
I used my Pigma Micron Pen set in size 01 for the black outlines and red for the lips. I used the brush tip end of a Marvy Le Plume II
in Salvia Blue to color in the eyes. Don’t forget to add a tiny bit of white for the catchlights in the eyes. Acrylic paint on a toothpick will work nicely for that bit.
Cut out all pattern pieces from the indicated fabrics. In addition to the pattern pieces in the pdf, you’ll need to cut a 10″x40″ piece from each of the day dress and nightgown fabrics for the skirts and a 13″ circle from the nightgown fabric for the nightcap.
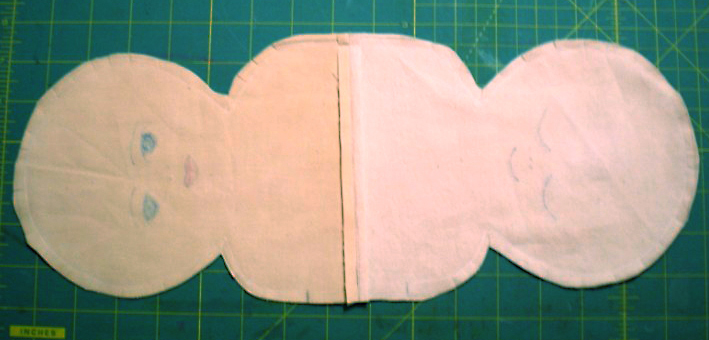
The head/body patterns in the pdf need to be joined together before cutting out. In the photo below you can see the shape you will have (weird, huh?) (You DO NOT need to have a seam at the waistline like I do. I had some small pieces of fleshtone fabrics that needed to be pieced this way.)
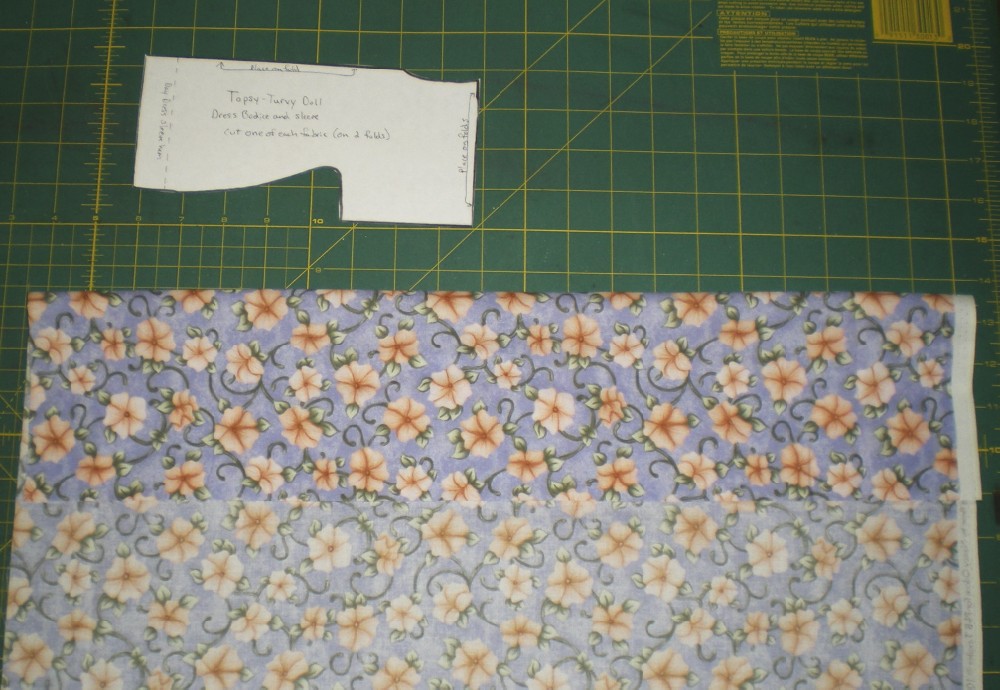
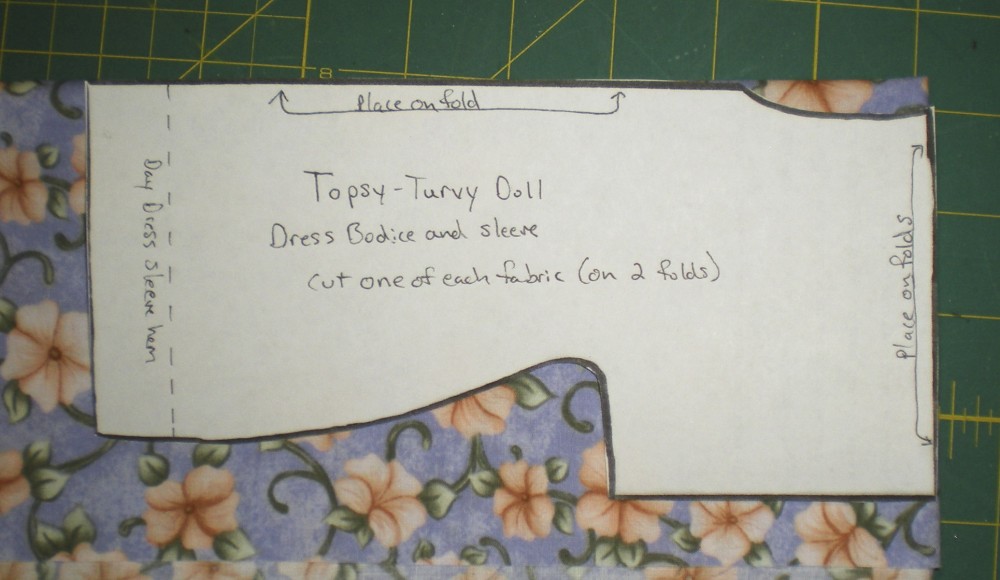
The bodice/sleeve pieces are a little confusing. They are cut on TWO folds.
*****Update 1/25/2012******
Several folks have been confused by this step, so I’ve added some photos that I hope will clear it up.
First, make a fold in your fabric that is a little deeper than the pattern piece, about 4.5″.
Next, fold the fabric again, this time perpendicular to the first fold.
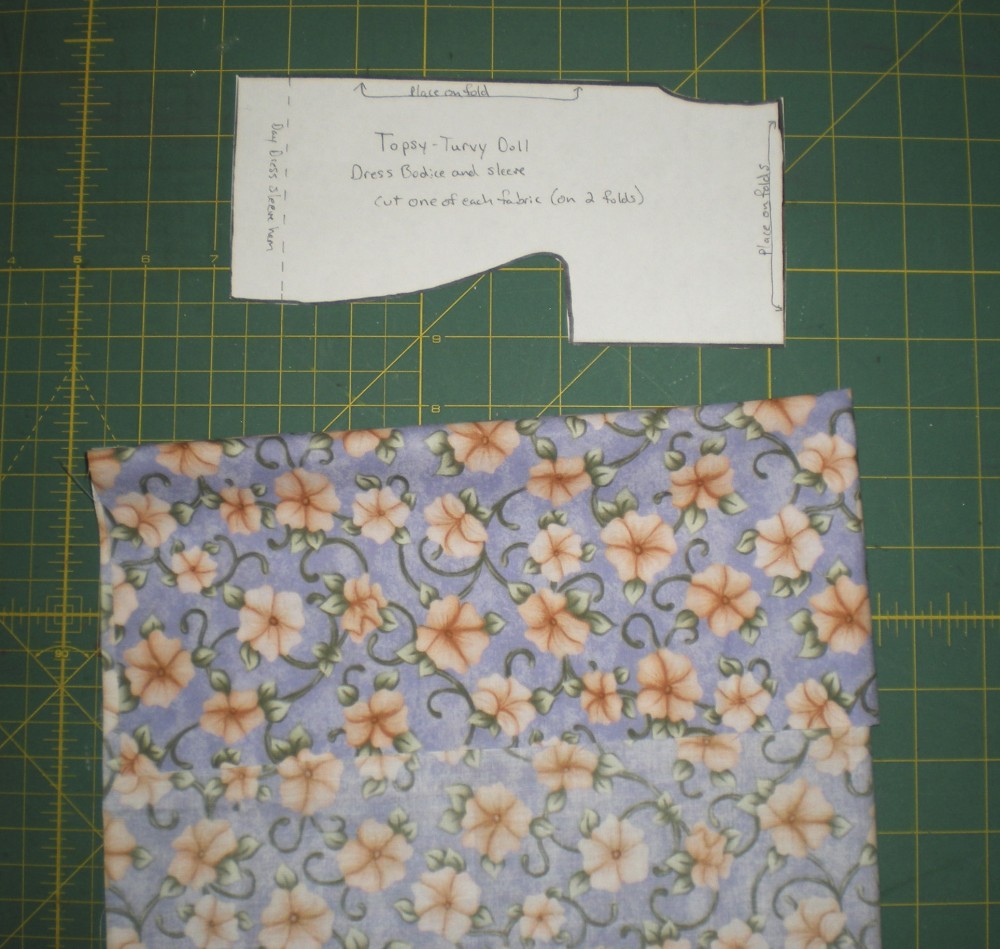
Now you have two adjacent folds, at a 90° angle to each other. Place the pattern piece on the fabric with the long “place on fold” edge along the long fold, and the shorter “place on fold” edge along the shorter fold.
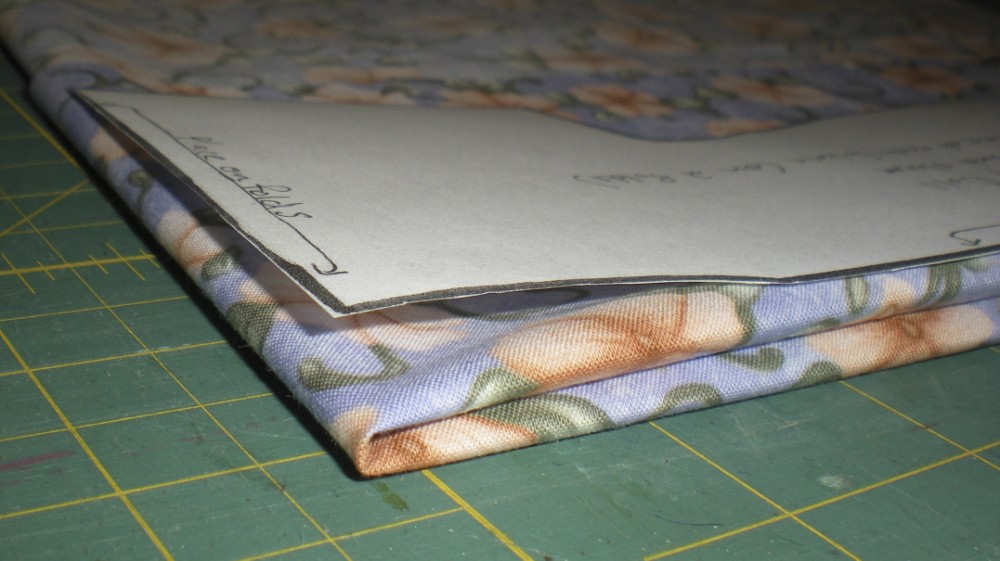
Here’s a close up of the corner when the folds meet. As you can see, you will be cutting through four thicknesses.
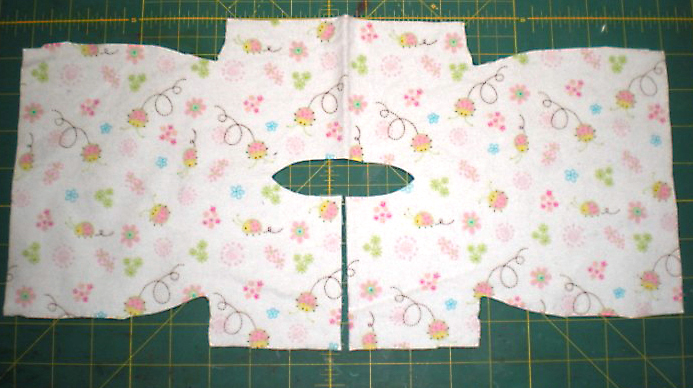
The resulting piece looks like this:
You will need to cut along one of the short folds to make the dress back opening.
Hope that is clear! Please feel free to contact me with any questions.
A 1/4″ seam allowance is used throughout, unless stated otherwise. (Seam allowances are included in the patterns.)
Once the faces have been completed you can sew the two body/head sections together, meeting right sides and leaving an opening where indicated. Also sew the arm pieces to make 4 arms.
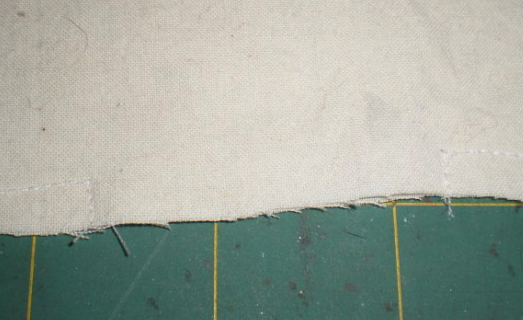
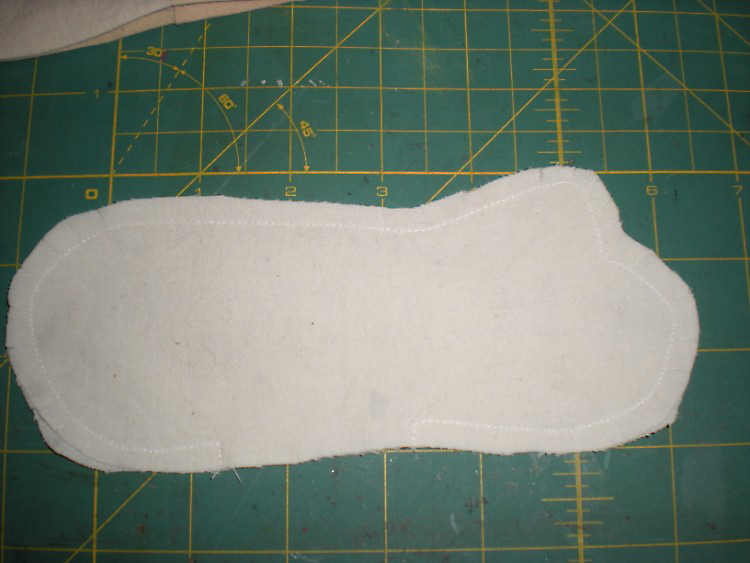 Here’s a great trick for any time you need to leave an opening for turning: Sew perpendicular to the seam from the raw edge in to the seam line, then sew your seam. At the end of the seam sew back to the raw edge. Now, when you turn your piece right side out, it’s very easy to find where you need to sew up the opening.
Clip all curves, turn all pieces right side out and stuff with fiberfill. When you stuff the hands, stuff the fingers only lightly, as later we’ll be machine stitching in lines to make fingers.
Here’s a tip for smooth stuffing: Whichever side of the project you want to look smoothest (the faces in this instance) have that side DOWN while you are stuffing. Don’t know why it works, but it always does.
Once all the pieces are stuffed, hand sew the openings closed.
I’m off to finish stuffing now, and then to bed. Check back tomorrow for more of the directions.





This is a beautiful project! I am excited to get started but wondered if you could provide a pattern for the clothes as well? I just see the pattern for the doll and her body. Thanks very much!
Blessings,
Nicole Roth
Roanoke, TX
Hi Nicole,
Thanks for stopping by. I’m glad you like the doll, she’s on of my favorites.
If you look at page two of the pdf, you’ll see one piece that is her dress bodice and sleeves. Make sure to look carefully at the directions to see how to cut that one out, it’s a little unusual. Her skirt doesn’t need a pattern, it’s just a rectangle, measurements are given in the directions. Her nightcap is a circle, again measurements are given in the directions. I’m pretty sure that’s all you need.
Let me know if you have any more questions, and I’d love to see a photo of your completed doll. 🙂
Happy sewing,
Sandy
I have been trying to print out the directions and it won’t print out.thanks for the help susan
Susan, what exactly are you trying to print? The pdf should have an icon that looks like a printer in the upper left corner, just click on that. If you want to print the directions from my blog posts, you’ll need to highlight them, right click on any of the words and select “print” from the little pop-up window. When your printer comes up, chose “print selection” and it will only print what you’ve highlighted.
Hope this helps. Happy sewing!
When I try to go to “pattern pieces in PDF’ it tell me
it can’t find it. Am I doing something wrong or need
to do something else. I’ve tried to access both pdfs (the patterns here) to get the print out of the doll pattern.
Can you give any suggestions, Both my girlfriend and
I would like to make this doll.
Thanks for any help.
Jean
Hi Jean,
I’m so sorry for the inconvenience. There were some minor issues and that file somehow went missing. It’s back up now, you can find it here http://www.keepsakecrafts.net/topsy_turvy_doll_pattern.pdf.
I hope you have fun sewing. I’d love to see photos of what you and your girlfriend create.
Happy Sewing!
Sandy
Thank you so much for taking the time to share this pattern and wonderful instructions for free.
I am making my daughter one but changed it up. Her’s is a girl/dog. I had glow in the dark trim so I used it instead of lace.
I had a time with the bodice (not cutting it that was easy) but when I realized I was being daff things started moving along a lot faster. I hope to be finished soon!
I am looking forward to tackling this topsy turvy doll!
Let me know how it comes out. I’d love to see pictures. 🙂
how do i print the pattern and instructions
You can just go here: http://keepsakecrafts.net/Topsy%20Turvy%20Doll%20pattern%20and%20directions.pdf and then print them off.
Happy sewing!
Making this! It is so cool, and I’ve wanted a good pattern for it for a while.
I’m so glad to hear it, Kassie. I’d love to see pics when you’r done.
I am so excited to make this. I am 78yr. old and my mother bought my sister and I each a doll for Christmas, when I was 6 or 7yr. old. Somebody my mother worked with was selling them.
I just loved this doll and was so amazed by it.
I know what you mean, Barbara, I’ve always thought they were fascinating, too. I would love to see photos when you finish your dolly! Happy creating. 🙂
ON THE PATTERN . IT IS WRONG ON THE FRONT HEAD. EYELASHES BELONG ON THE EYELID,NOT ON THE EYEBROW
Well spotted, Barbara! I wonder just how many of us went on our merry ways, not noticing…
Thank you, I’ll make a note of it, and change the pattern. 🙂
Seems like the width of 40″ is a lot of fabric for the skirt for a doll this size. Is this an error?
Hi Jeanette, Yes, the dimension is correct. The skirt on this doll is quite full, but it needs to be to hide the arms of the other doll underneath. You can experiment with making it less full if you like.
Happy creating!
Hi there! I made some of these 20 years ago and now the girls I gave them to want some for their daughters!!! I’ve lost my original pattern, but this is almost identical. One question: about how tall is the doll from bottom of skirt to top of head? Thanks!
Hi Erin, I’m glad you like the pattern. This dolly will be about 16-17 inches tall. Have fun sewing!
I want to make this doll and have studied the pattern and instructions but I do not find a pattern piece for the bonnet. What am I missing, where is it?
Hi Muriel,
I hope you enjoy making your dolly! In case you haven’t found it, I did update the pattern & directions and put them all in a PDF, which you can find here: http://keepsakecrafts.net/Topsy%20Turvy%20Doll%20pattern%20and%20directions.pdf
You are correct that there is no pattern for the hat. On page 3 of the PDF directions you’ll find instructions to cut a 13 inch circle for the nightcap.
Hope this clears things up.
Happy creating!
I am trying to download your topsy-turvy patterns and when I click nothing happens. Are they still available? I hope so because they are adorable!
I am trying to download your topsy-turvy patterns and when I click nothing happens. Are they still available? I hope so because they are adorable!
Hi Leslee, You can download the pattern here: http://keepsakecrafts.net/Topsy%20Turvy%20Doll%20pattern%20and%20directions.pdf The link is working fine, perhaps when you tried earlier I was doing site maintenance. 🙂
Happy creating!
Sandy
Hello. Can I use a smaller scale when printing the pattern for a slightly smaller doll? Or does it need to be this big because there is essentially 2 dolls? Thanks.
Hi Wendy,
That’s a great question! You can make the doll any scale you like, just keep in mind that you’ll need to adjust the sizes of the other parts, like the skirts and the bonnet as well.
Happy creating,
Sandy
It is May 2022.i just found a Black Girl Topsy Turvy at a Second Hand Shop.i looked for one like her and found this posting. She is beautiful! Green eyes, floral flannel colourful dresses and caps.So very well made and this is exactly the pattern. ! 💙💚💛
Hope you find the pattern helpful, Lucille.
Happy creating!
I was wondering if you are the creator of the the Kassie, Mindee and Cammy doll patterns? If so are they still available. There is also a boy pattern.
Hi Ella Mae,
No, I’ve never heard of those dolls and didn’t design them. Sorry I couldn’t be of help!
Happy creating,
Sandy
Hi Sandy
I have made a couple of versions of the topsy turvy doll using your pattern.
Very happy with the results.
I’m so glad to know you’ve enjoyed the pattern, Anita. 🙂 Happy creating!