


A friend came to me with a quilt her mother had made. Her mom has since passed and the quilt is precious. She’d like to display it in her home.
Sadly, though, the quilt is full of rips and tears like this one.
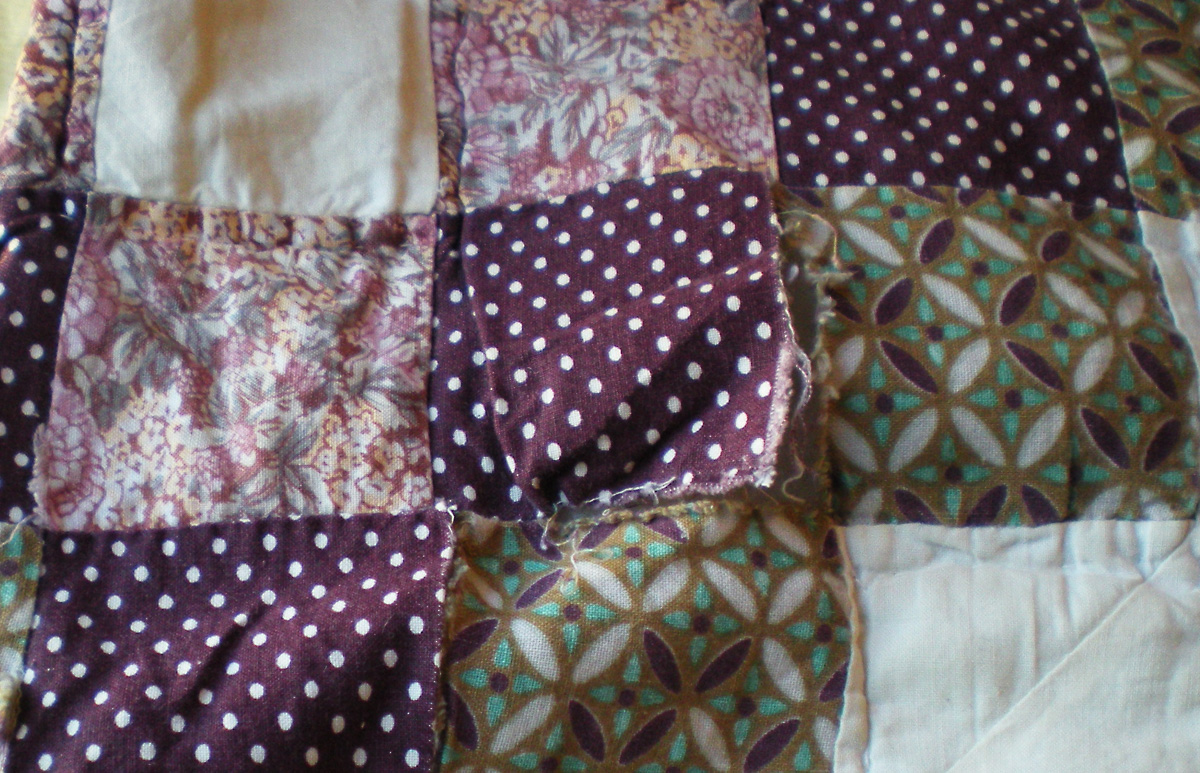
And this.

The quilt was hand quilted, so of course I did not want to remove her mother’s hand stitching. This is a very different kind of repair from the one I did here, where I took the whole thing apart to do the repairs.
The only way to do these repairs is to applique new patches over the torn and ripped sections. It would have been ideal if my friend had had matching fabric scraps from her mom’s stash, but she didn’t. Even if she had, they may not have matched so well after all these years of wear and fading. A little careful bleaching to fade them may have been necessary.
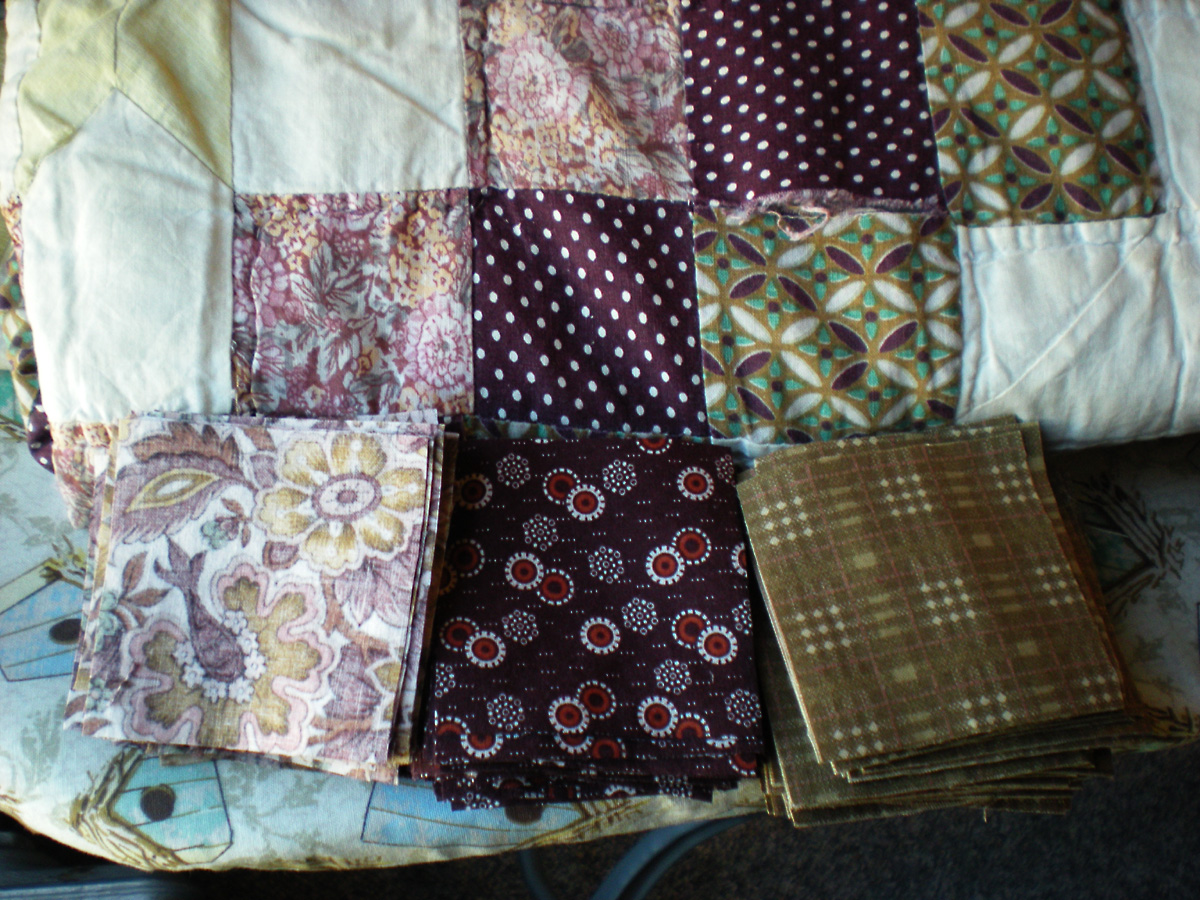
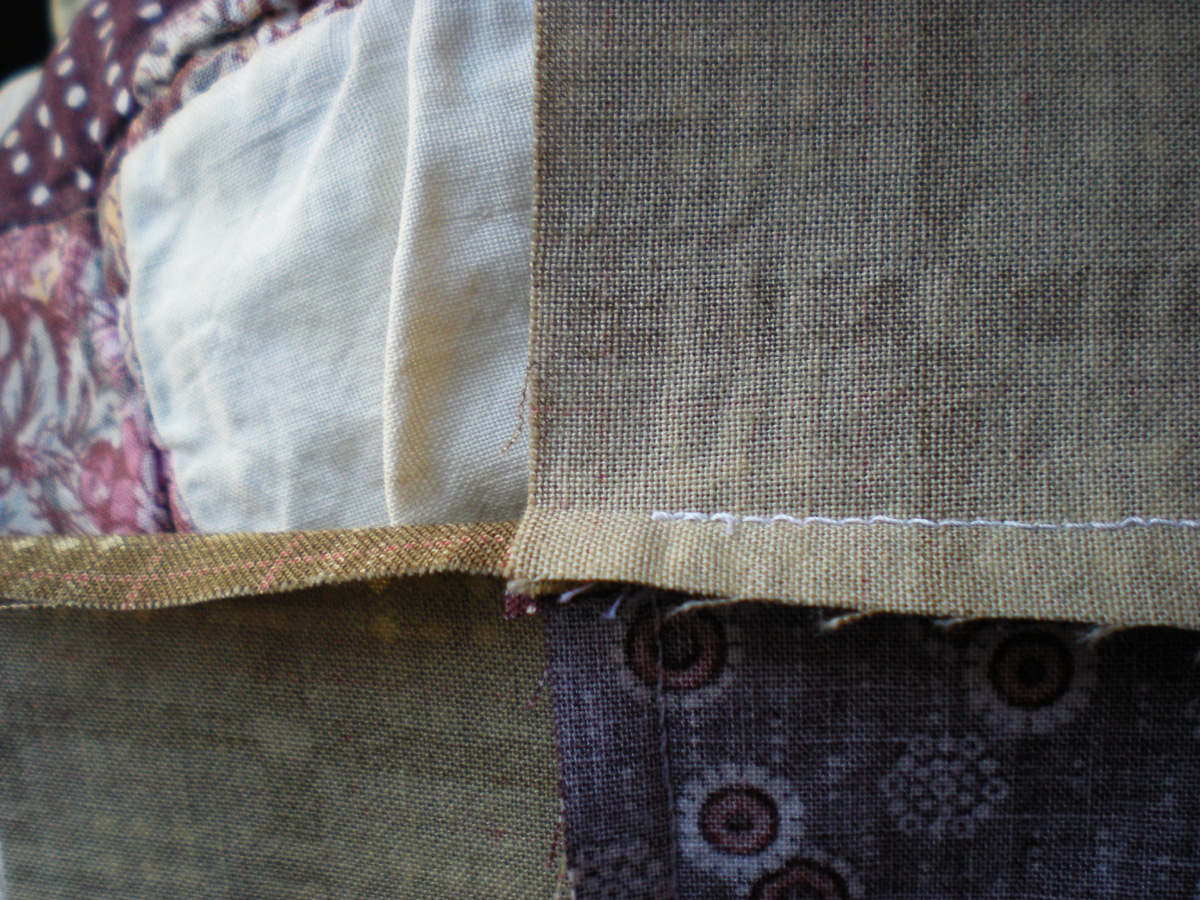
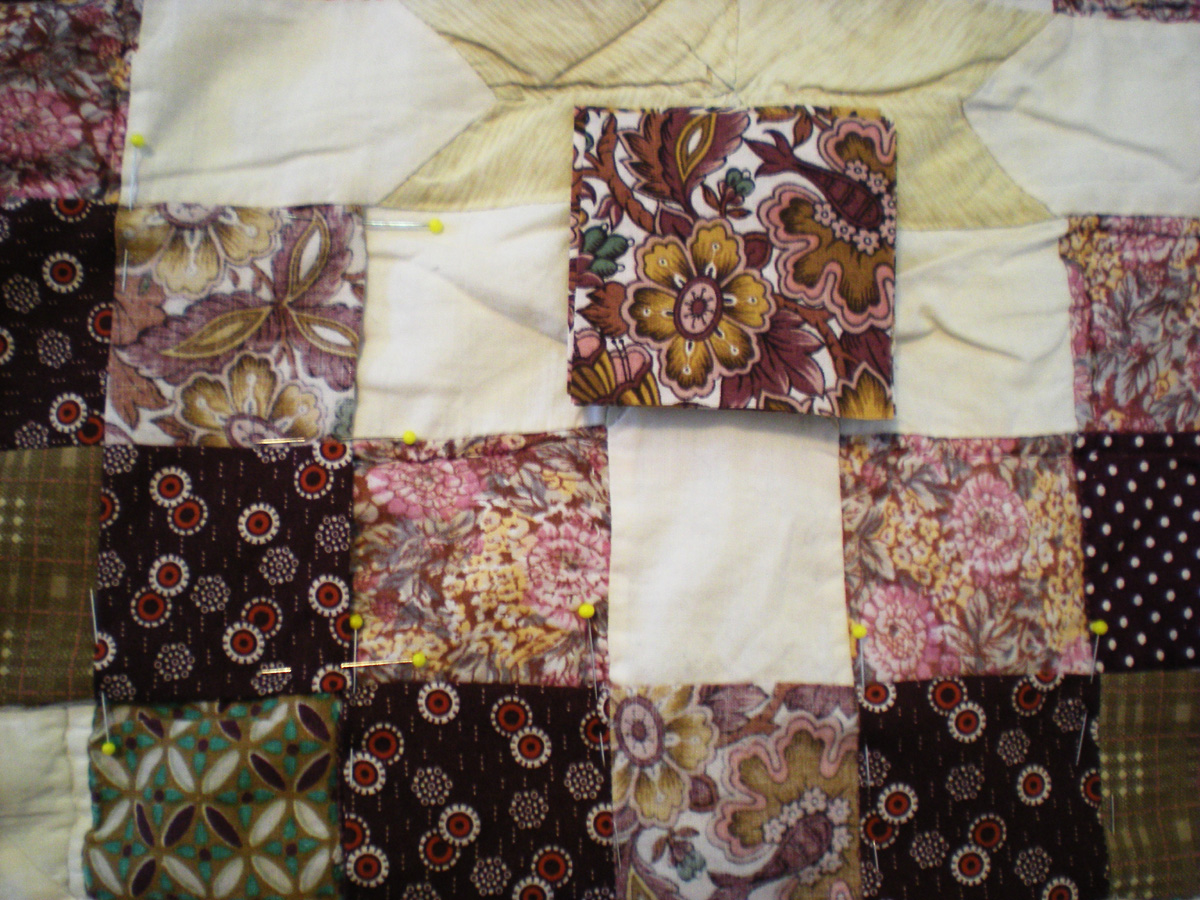
Instead I went shopping for fabrics that had the same look and feel as the patches to be replaced. (You may not think they match well from the photo, but you’ll be surprised at the finished result.) When shopping, don’t forget to check the backs of fabrics for a better match. The one on the left is the back of a Waverly print.
The next step was to cut squares to the same size as the patchwork, making sure to add in seam allowances. I was then able to machine piece together sections that matched ones needing replacement.
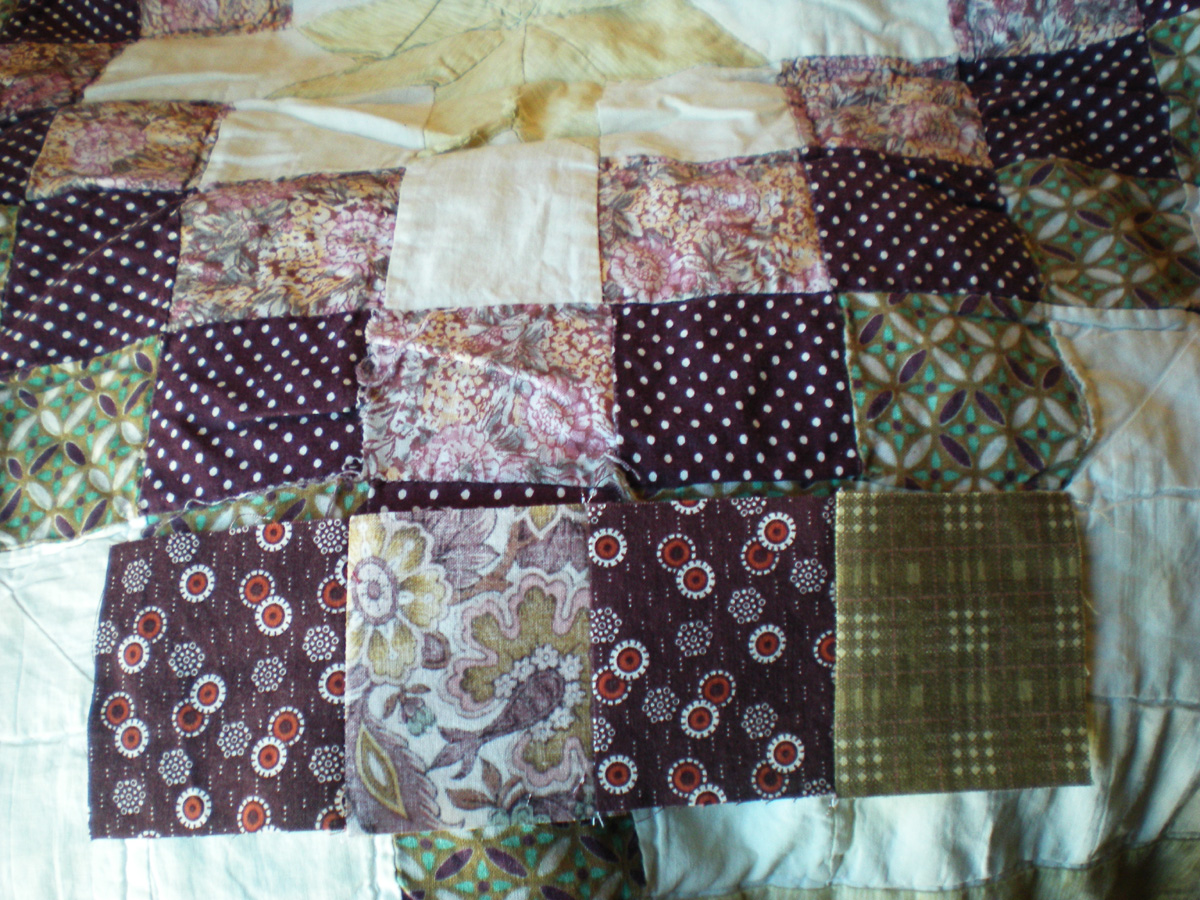
Once the sections are sewn together, press under the seam allowances and pin in place.
By the way, if you have sections with inside corners, you’ll need to not stitch the seam allowance in those corners. Stop right where the s.a. begins and then backstitch. This will leave the seam allowance free to be pressed neatly.
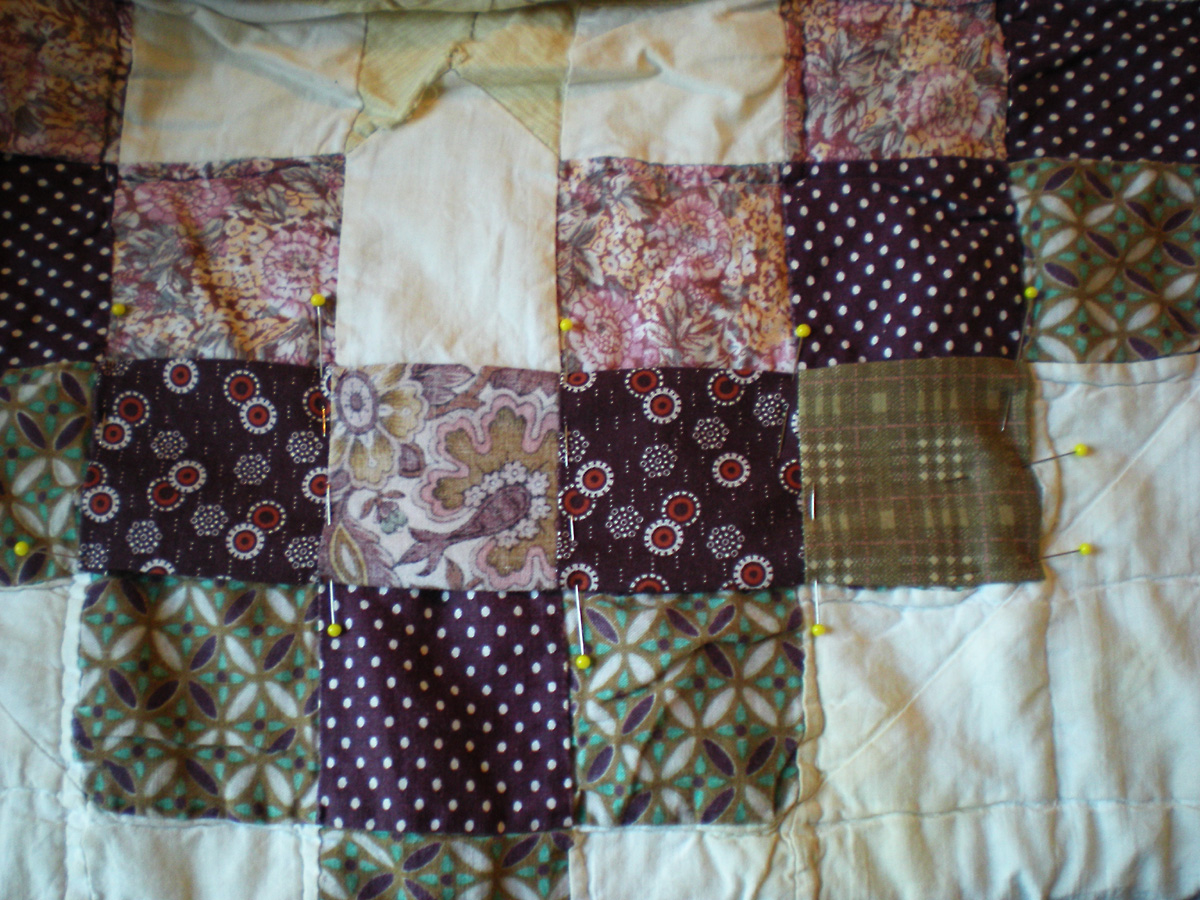
Now it’s time to hand stitch these patches into place. My favorite applique thread is 100 Weight Silk Thread. The 100 weight means it’s very fine, and the silk just melts into the fabric leaving your stitches invisible.
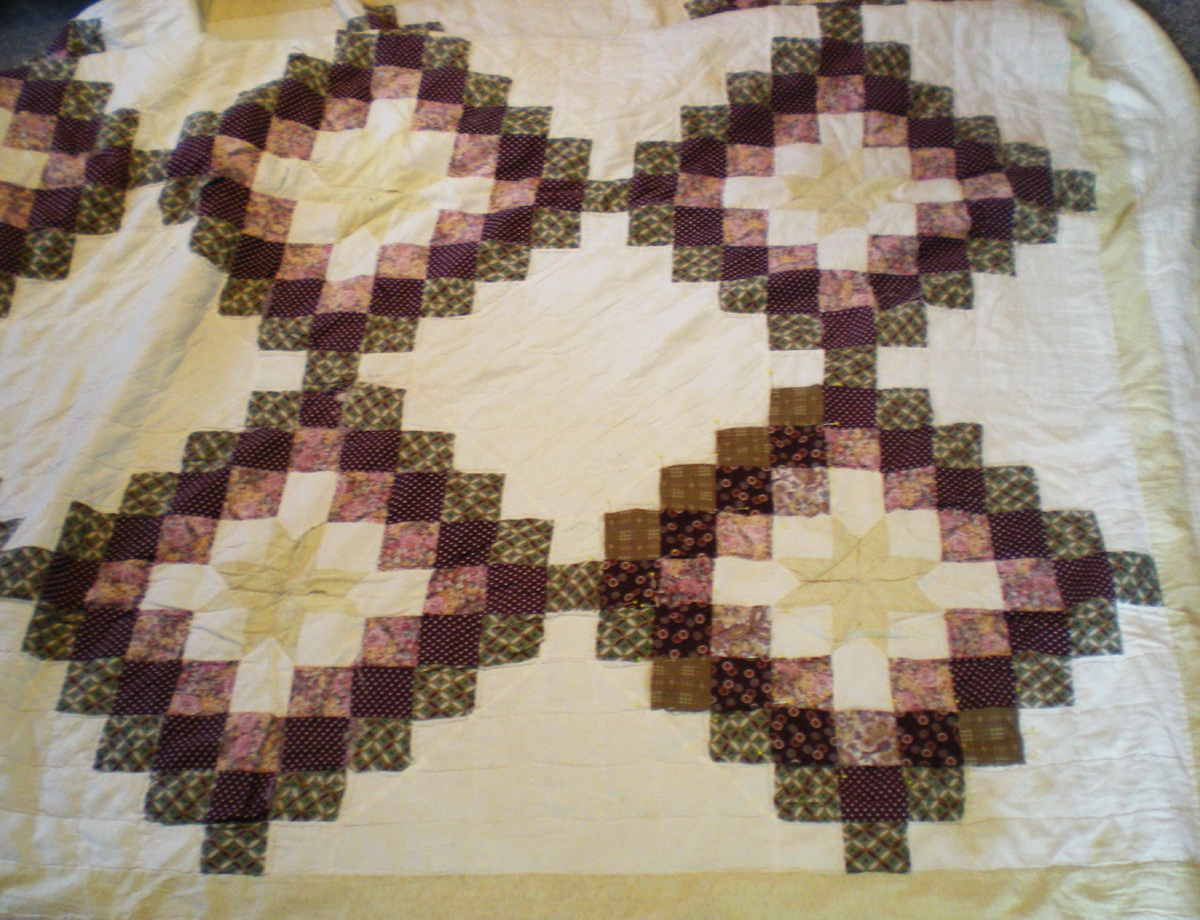
Here you can see just one of the diamonds has been repaired. It takes a bit of looking to find which one, eh?
By the way, this is NOT a quick fix. To date I’ve repaired all nine of the diamonds and a few of the stars. I’m coming close to 40 hours invested. It’s a good cool weather, work-on-while-sorta-watching-a-football-game kind of project.
If you have old quilts in need of repair, feel free to send me detailed pics and I’ll be happy to advise you on how to proceed. 🙂
Happy creating!

Great tutorial! You also have a great eye for fabrics. I can see how well your newly purchased fabrics match those in the quilt. Did you wash them first?
I washed them all twice, in hot water. I wanted to be very sure there would be no further shrinkage.
Was there any issue with the new fabrics being brighter than the old ones?
I’m not sure I know what you mean by brighter. If you mean the colors, that was a matter a fabric selection, making sure to compare new and old in different kinds of light.
Wow… this quilt is so beautiful after you repaired. Lovely. 🙂
Thanks, Meihsia. It was a lot of work, but the quilt is special and definitely worth repairing.