


A certain weekend last October was a High Point in my year. That was when Tim Holtz came to the Boston area and I got to take not just one, but TWO classes with him. It was awesome! He is such a nice guy and a fantastic teacher. What a privilege to get to spend an entire day playing and crafting with other creative people.
We used his new configurations line to make lovely Christmas shadowboxes. It was such a blast filling each little section with vintage bits and pieces that Tim has collected.
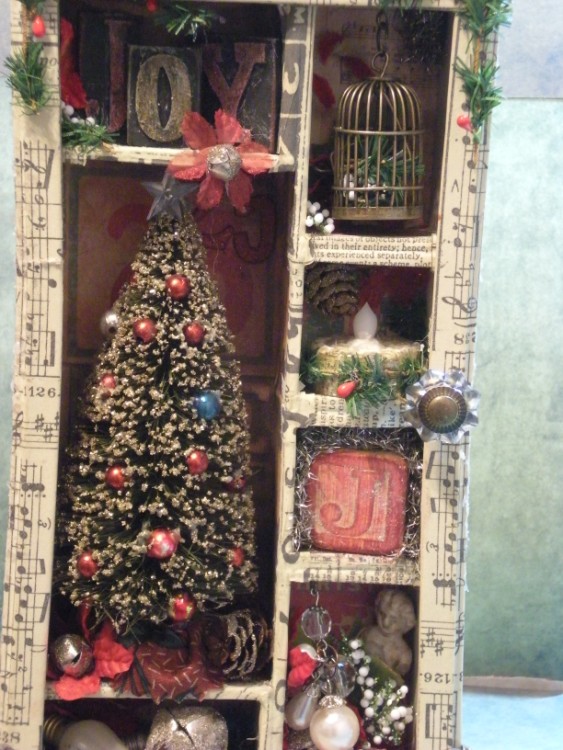
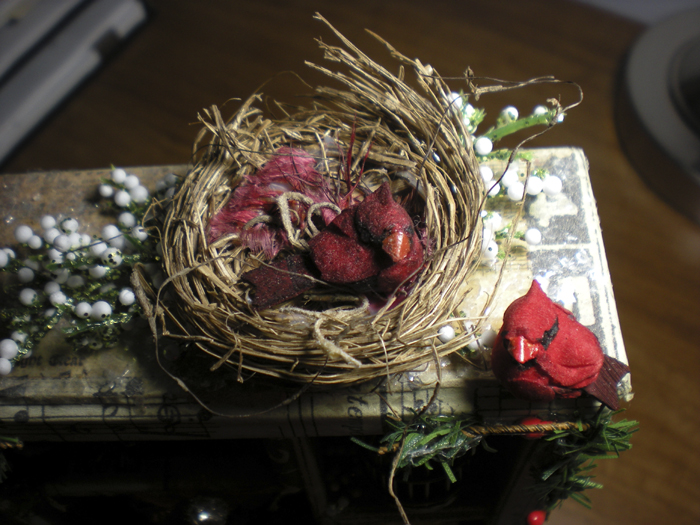
When I got home, I added a few things. The empty birdcage made me kind of sad, so I put the cardinals on the nest on top. I also cut a scrap of fabric to make a skirt for the tree, and changed the knob from a larger white one which seemed kinda clunky to me.
The package of cardinals I picked up had two bright red birds, which hardly seemed authentic to me. To make Mrs. Cardinal more brown, I dabbed her with ginger and espresso alcohol inks. (Yeah, um, then she started to fall apart! Apparently something in the ink dissolved her glue. All worked out well, though. I just had to wait until all the pieces were dry and then use Matte Multi Medium to put her back together.)
The Matte Multi Medium was one terrific thing I learned about in this class. It dries, well, matte, rather than glossy, so if you’re sloppy in your gluing, it doesn’t show. Brilliant!
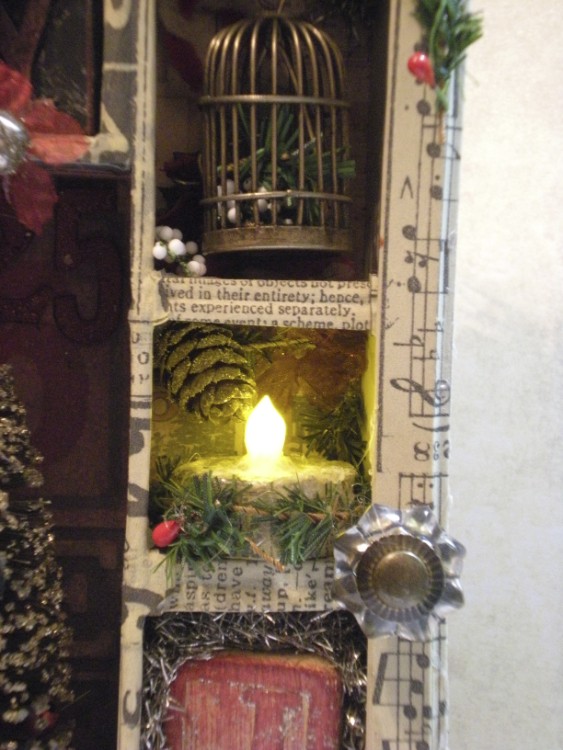
What a terrific idea, using the little flameless tea light, it adds so much!
Tim told me that the wooden blocks, the little ceramic dolls, the silver glitter and the mica we used to cover the outside of the boxes are all vintage items he’s found. And he shared them all with us! I felt so grateful!

He also taught us how to make faux print blocks just using grungeboard and chipboard. He. Is. So. Clever!

This is definitely one of my new favorite Christmas decorations!
Just a few of the many, many products we used:
5.75 X 10.75 Configurations Box
Symphony Tissue Tape
Seasonal Paper Stash Paper Pad
Advantus Corporation Grungeboard Minis, Plain Alphabet
Aged Mahogany Tim Holtz Distress Ink
Shabby Shutters Tim Holtz Distress Ink
Fired Brick Tim Holtz Distress Ink
Tim Holtz Baubles & Curio Knobs
Snow Cap Paint Dabber
Matte Multi-Medium 4Oz
Ranger 1/2-Ounce Adirondack Alcohol Ink Singles, Espresso
Ranger 1/2 Ounce Adirondack Alcohol Ink Singles, Ginger
Foundations Metal Feet
Everlasting Tealights Battery-Operated Flameless Candles with Soft Flicker, 12-Pack

Can you tell me where you bought the chip board pieces to mount the letters on?
Hi Sandy,
This project was done in a class with Tim several years ago. The blocks were layers of Grungeboard, I believe. They did come out with Grungeblocks shortly thereafter, I think, but I don’t know if they are still available. You could just stick together several layers of chipboard to get the same effect.
Happy creating!
Where did you get the tree and how tall 8s it?
Hi Eva,
Thanks for stopping by my blog. The trees were given to us as part of the class materials. I don’t think they have the green ones anymore, but I found white ones that you can color with inks or paint here: http://amzn.to/1LtTo1q. I believe the trees we used were 2 1/2 to 3 inches tall.
Hope this helps. Happy creating!
Sandy