


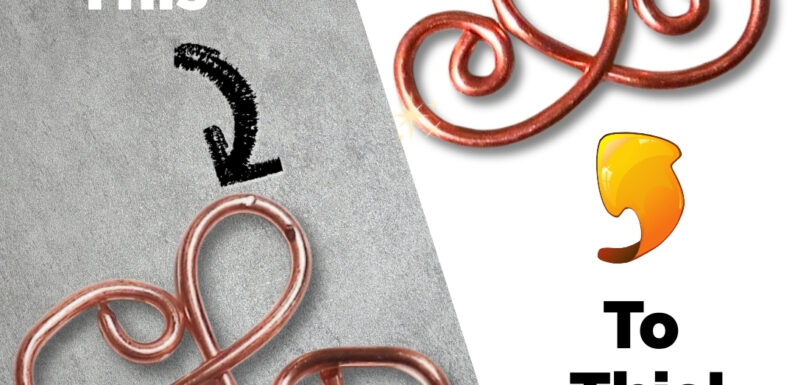
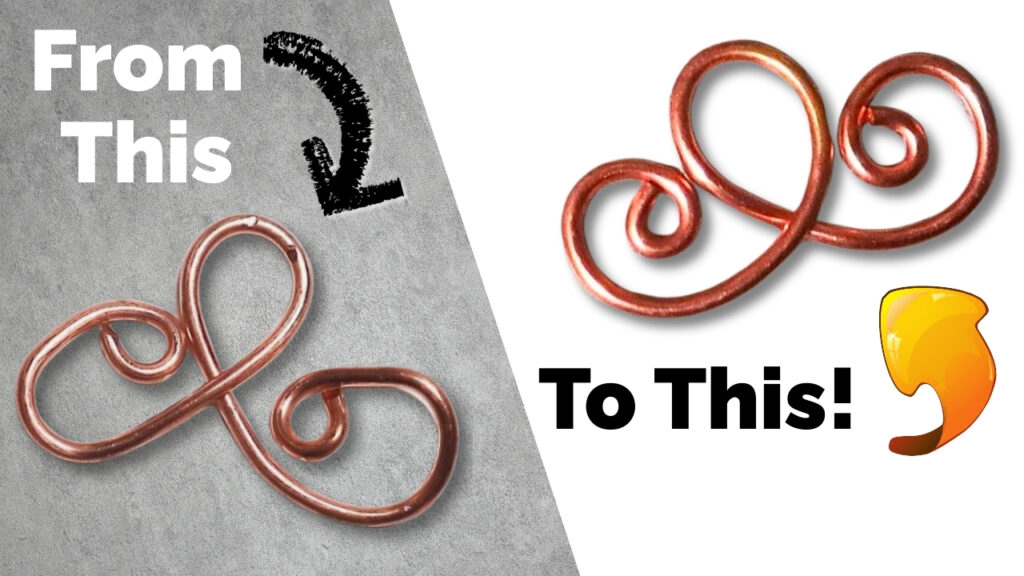
Have you ever made a piece of wire jewelry and felt like it looked more “homemade” than polished? Don’t worry, you’re not alone! In this video, I share 12 tips for how to get professional results in wire jewelry. With a few small changes, you’ll discover how to take your work from beginner to beautiful.
You’ll see DIY wire jewelry making techniques in action, including:
- Smart planning tips to ensure your pieces are not only pretty but also wearable
- Simple DIY wire shaping tricks for even loops
- Must-do techniques for smooth curves
- Suggestions for productive practice
- DIY wire wrapping tutorial steps that help your designs look intentional and consistent
- Small details that make a big difference
- Thoughts on the best tools for each job
- A quick DIY jewelry tools hack to help with tool marks
- An easy final step for a flawless finish
Tools & Materials I Used
- Artistic Wire Deluxe jig set
- 16 gauge bare copper wire
- 22 gauge craft wire, for practice
- My favorite ruler
- Ultra Fine point Sharpie
- Ring mandrel
- Bail making pliers, 13, 16 & 20mm
- Bail making pliers, 5, 7 & 10mm
- Chain nose pliers
- Bent chain nose pliers
- Round nose pliers
- Wire cutters
- Metal files
- Nylon jaw pliers
- Flat nose pliers
- Tool Magic doesn’t appear to be available anymore, but this should work the same way
- 220, 320 & 400 grit sandpaper
- Cup burr
Whether you’re brand new or looking to polish your skills, this DIY wire component tutorial will help you feel more confident in your jewelry making.
Be sure to watch to the end for a peek at my adorable and ever-so-helpful photographer’s assistant.
👉 Watch the full tutorial here and see how you can transform your wire jewelry with just a few thoughtful techniques!
When you’re done check out my Wire Wrapped Jewelry board on Pinterest for more ideas and inspiration.
Enjoy the video and happy creating!
