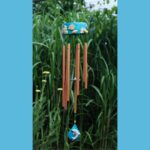
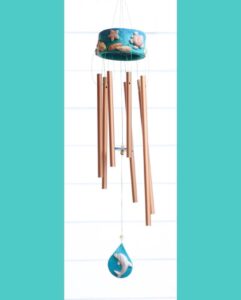
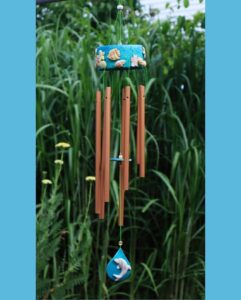
Hello, everyone! It’s Sandy here, and I’m thrilled to share my latest video with you: creating these beautiful Seaside Wind Chimes using upcycled materials and polymer clay. This is a fantastic outdoor garden trash to treasure project that will help you transform junk into garden decor beautifully.

Whether you’re searching for trash to treasure garden ideas or looking to enhance your summer garden decor, this tutorial has everything you need.
What You’ll Learn
In this class, I’ll guide you through:
- Planning and creating correct hole spacing for hanging your wind chimes
- Templates for perfectly spacing any number of chimes
- Steps for adding clay to cover an upcycled can
- A quick shortcut for choosing a color palette for your project
- The two essential things you need to get nice molded designs
- Inspiration for alternate materials and designs
- How to measure all your wind chime parts so they operate properly
By the end of this tutorial, you’ll have a stunning piece of art that not only looks beautiful but also sounds lovely. Let’s dive into the details and turn your garden into a summer paradise with these enchanting wind chimes!
Watch the Video
To see the full tutorial, watch my video on YouTube: Upcycle and Create Beautiful Polymer Clay Wind Chimes
Tools and Materials
Here’s a list of the tools and materials you’ll need for this project:
- Approximately 3-inch diameter aluminum can (cat food or tuna fish can)
- Polymer clay to cover the can (scrap clay works great)
- Polymer clay for decoration (blends, cane slices, sculpted designs, etc.)
- Acrylic roller and pasta machine
- Craft knife
- Clay blade
- Awl, hammer, and wooden surface to hammer on
- 1/16 inch drill bit
- 1 1/4” square cutter
- 2 3/4” round cutter (for striker)
- Liquid clay
- Ultra-fine point Sharpie marker
- Two texture sponges (aquarium filters or soap savers)
- Silicone molds (handmade or purchased, such as Sculpey Sea Life)
- 2”-3” shape cutter (for sail)
- Set of wind chime tubes
- small, very inexpensive set (has a nice tinkling sound)
- larger set of tubes
- nice options (some are laser etched) at Fire Mountain Gems
- Bead stringing wire
- Crimp tubes
- Wire cutters
- Chain nose pliers
- Beads and crystals for decoration
Additional Resources
To help you along the way, check out these helpful videos and extra tips and inspiration:
- Wind chimes diagram and spacing templates PDF
- A Simple Tool To Control the Width of Polymer Clay Blends
- Butterfly Wind Chimes
- Pinterest color inspiration board
- DIY Texture Sheets, Impressions and Mold of Anything with Silicone Molding Putty
- How to Make Two-Part Molds With Silicone Molding Putty
- How to Use Apoxie Sculpt Air Dry Epoxy Clay
- An Engineering Approach to Wind Chime Design
Conclusion
I hope you’re as excited as I am to start this project. Transform your outdoor garden with these trash to treasure garden ideas and enjoy beautiful summer garden decor all season long. I can’t wait to see what you create, so be sure to share your wind chime masterpieces with me!
Happy creating!
Sandy


