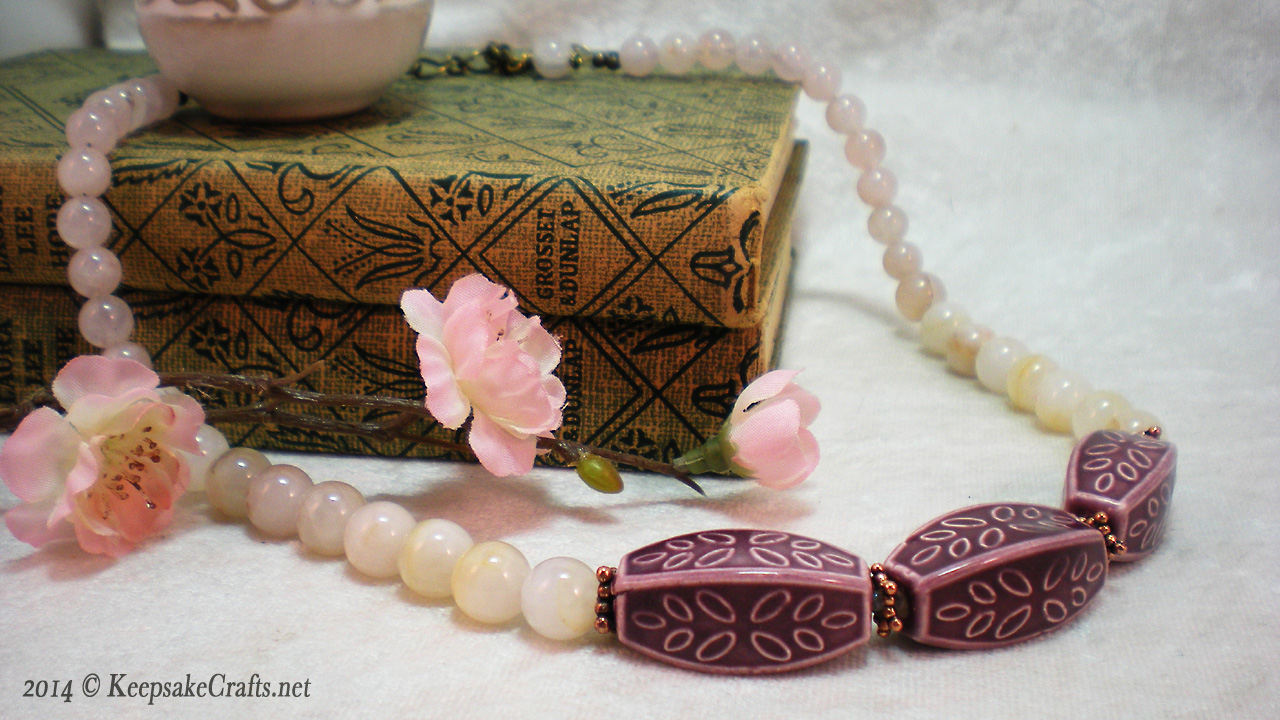
Today’s project is a study in simplifying. Rather then seeing how many elements you can add to a piece, how about figuring out how many you can eliminate?
I used rose quartz round beads, but you could just as easily use pearls. Instead of the ceramic beads, why not try some large, funky nuggets? While designing this I tried out a huge black lampworked bead that would have been interesting, if only I’d had other beads to go with it.
So, use this design as a jumping off point for your own jewelry, whether it be quiet & elegant, bright & crazy, or something else completely. 🙂
Enjoy the video and happy creating!
You can watch the Blushing Pinks Necklace Video Tutorial over at YouTube.
Materials:
- 3 31mm x 14mm ceramic beads
- several inches of clear seed beads (if needed)
- 4 copper spacer beads
- 18 10mm rose quartz beads
- 21 8mm rose quartz beads
- 25 inches bead stringing wire
- 2 wire protectors
- 4 crimps
- 4 crimp covers
- 2-3 inch piece of chunky chain
- clasp
- head pin
Tools:
- round nose pliers
- chain nose pliers
- crimping pliers
- wire cutters
- Bead Design Board
(for laying out your own design)
- Bead Stoppers
Directions:
- Add a Bead Stopper near the center of bead stringing wire. String on one copper spacer and seed beads, if needed (see video for details.) Add ceramic bead and another spacer.
- Repeat to add 4 spacers and 3 ceramic beads to wire.
- On one side of ceramic beads string 9 10 mm rose quartz beads, then 10 8 mm rose quartz beads.
- Onto bead stringing wire slide 2 crimps, then slide wire into one end of wire protector and out the other. Add loop of your clasp to the wire protector. Slide the wire end back through the crimps and bring crimps to within 1/8-inch of wire protector. Flatten crimps and squeeze ends of wire protector together. Cover crimps with crimp covers by picking up with crimping pliers, sliding over flattened crimp and gently squeezing pliers. Use crimping pliers to shape covers into round bead shapes if necessary.
- Remove bead stopper and repeat steps 3 & 4 to finish other end of necklace, adding piece of chain instead of clasp in step 4.
- Slide remaining 8mm rose quartz bead into headpin. Use chain nose pliers to grasp wire just at point where it exits bead. Bend wire at 90° angle. Grasp bend with round nose pliers and wrap wire around pliers as far as possible to start to make a loop. Reposition pliers to finish loop. Slightly twist loop open and insert end link of piece of chain. Close loop and hold with chain nose pliers. Use another pair of chain nose to wrap remaining wire around wire below 90° bend. Use wire cutters to trim, if necessary. Use chain nose pliers to tuck in end.


That’s beautiful! I do love the color; am already ready to get past Christmas red and green. :/
Ah. Well, there’s one benefit to refusing to do much of anything Christmas until mid-December.