Last winter I was flipping through the Dec/Jan issue of Quilting Arts magazine and saw their “Save My U.F.O.” challenge. The idea was to send in an UnFinished Object and have another quilter finish it for me. In return, I’d get somebody’s else’s UFO to work on.
Now, I don’t have time to do all the challenges out there, but this one sounded like fun, and I have found that there’s nothing like a good challenge to stretch one’s creativity in new ways and get one out of a crafty rut.
I had just the perfect UFO to send in and had just a few days before the deadline, and so decided to go for it.
Once I’d sent it, I anxiously awaited what kind of UFO I’d get.
Monday, March 28 – Received a HUGE box from Quilting Arts. Opened it very excitedly to find only a single, unfinished storm at sea quilt block inside.
Bleah.
Tuesday, March 29 – Put the single, unfinished quilt block on my design wall and stared at it.
Bleah.
Tried turning it on the diagonal.
Still bleah.
Wednesday, March 30 – Ignored the design wall entirely.
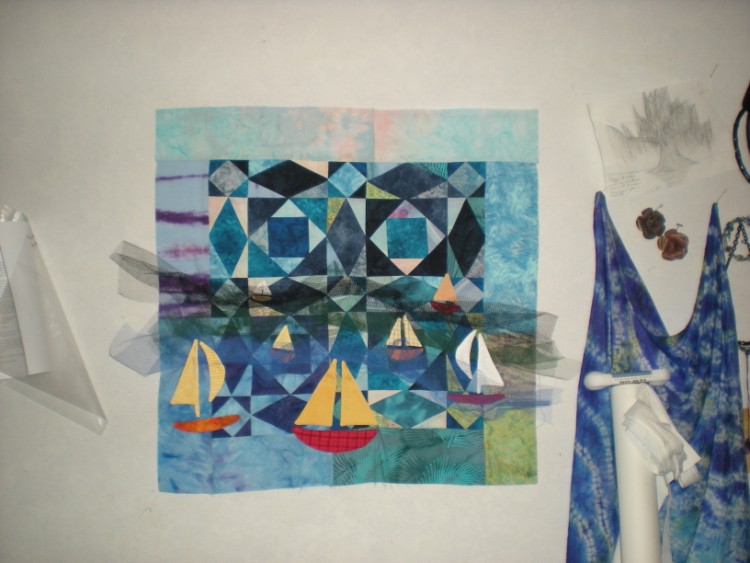
Thursday, March 31 – Started to have an inkling of an idea. What really is bugging me about that block is the unfinished state of the design. I’ve always loved the storm at sea pattern, so why not add three more blocks to make a small wall-hanging? Perhaps then I could appliqué on some waves, small boats, etc.
Friday, April 1 – Sat down with my Electric Quilt software to start working out a design. Feeling much better about this project now!
I’m thinking of using tulle or something else very sheer to make water and waves at the bottom. Hmmmm . . .
Saturday, April 16th – Just got back from my quilting group, so was in quilting mode. Using only fabrics from my stash I made the blocks to make one complete design. I really do love the Storm at Sea pattern, especially how it gives the illusion of curves where there are none. And I’m so glad the block I got was in blues and purples. If it had been in orange and yellows… well, I might still be stumped, lol.
Didn’t worry about any wonkiness, because, frankly, the block I got was quite wonky.
Tuesday, April 19th – Bought several colors of tulle at Joann’s. Naturally, I forgot to bring the completed blocks with me, so I bought 1/4 yard of every color that I thought might possibly work.
Saturday, April 30th – Looked at the calendar and realized I have less than three weeks to get this thing done. Yipes.
So, I made myself sit down, print out the boat templates from Electric Quilt and then started picking out fabric. I even sewed one of the little boats. I think I’m gonna like it. Now I’m thinking about white lace for froth on the waves, or maybe white pearl strands . . . and what kinds of embellishments can I do on the boats? Hmmmm . . .
Saturday, May 7th – It’s been such a busy week, that today I HAVE to make all these little boats. It feels like drudgery, but hey, where would the world be without deadlines?
Here’s how I made the 3D appliqués:
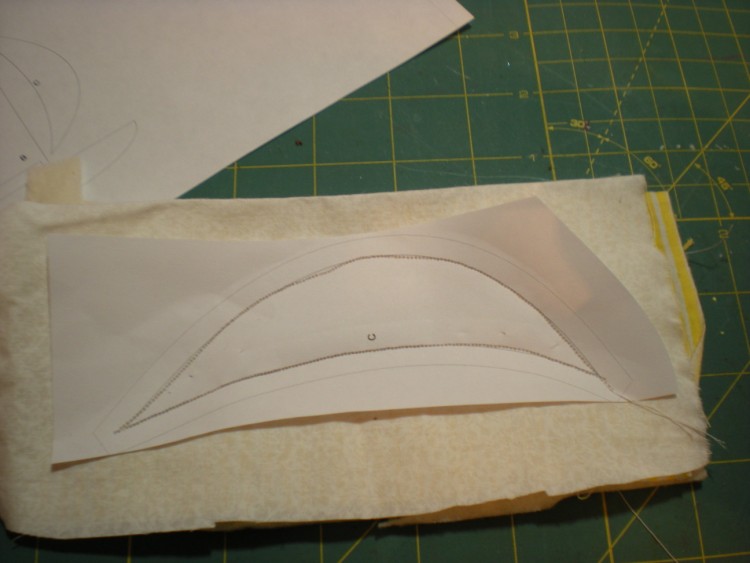
Print out or draw your design. Layer fabrics, right sides together and pin pattern to one side. If you want to add a thin layer of batting, add that to the wrong side of the fabric that will be on the right side of the appliqué. 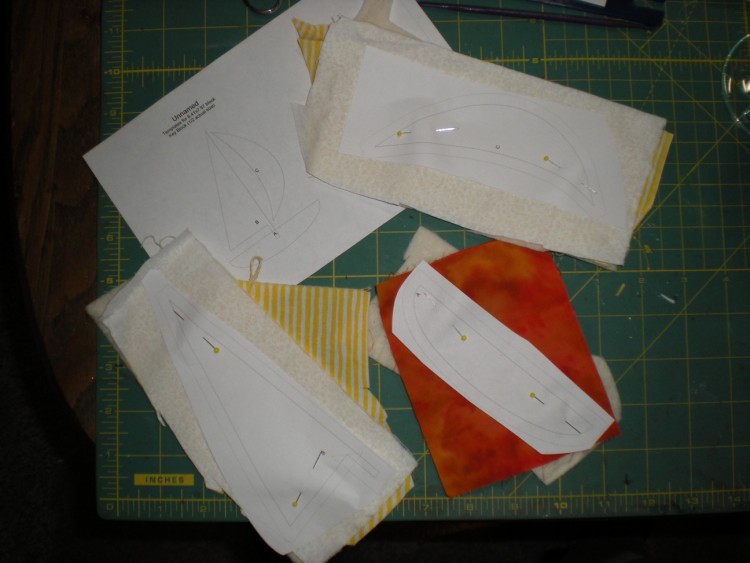 j
j
Stitch all the way around the design on the seam line. Use a slightly smaller stitch than usual, such as 2.0.
Trim around the appliqué, leaving about a 1/4″ seam allowance. 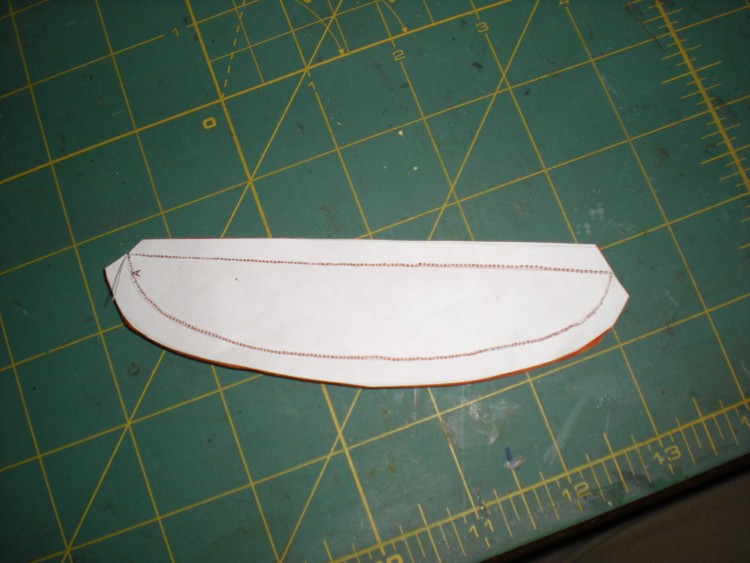
Carefully remove paper. Clip any curves and trim points.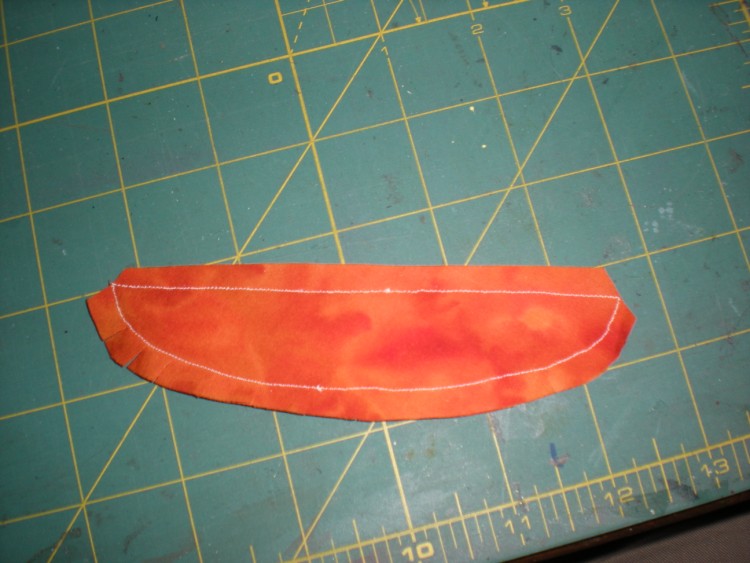
Make a slash in the fabric that will be on the wrong side. 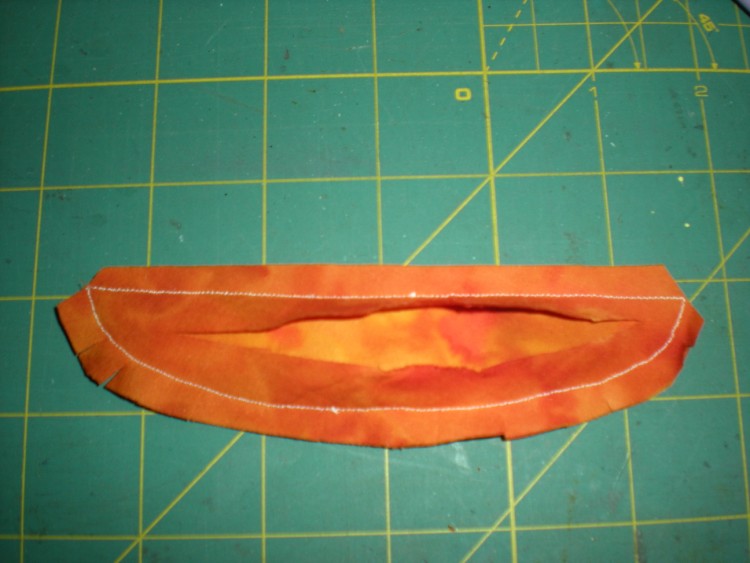
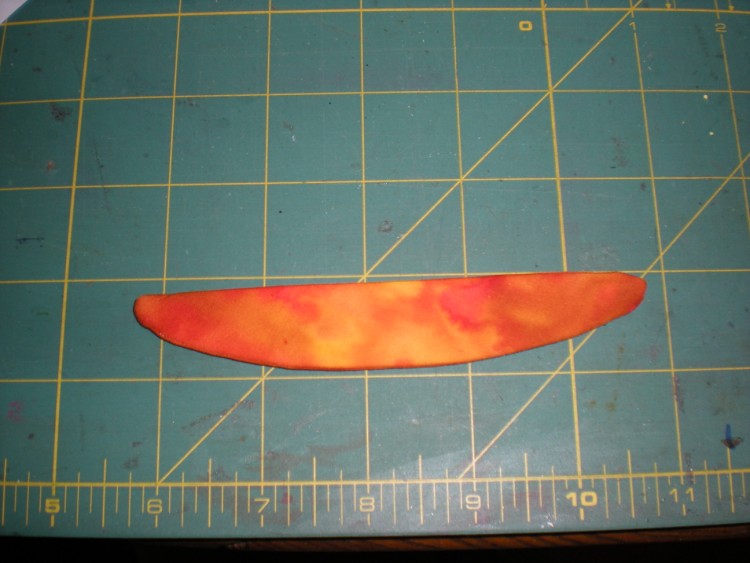
Turn right side out and press.
Tip: Only use batting on larger appliqués. I can guarantee you WILL lose your mind trying to deal with batting on itty-bitty appliqués. Ask me how I know…
The beauty of these appliqués is that you get the exact shape you want and you don’t have to finish the slit in the back. You can just add a layer of batting for dimension, or fill them quite firmly before sewing down to your project. They can be ruffled, gathered, pleated, shaped, stuffed or embellished to your heart’s content.
I kept these little boats simple, but here are some appliqués from a quilt I designed several years back showing lots of fun techniques: 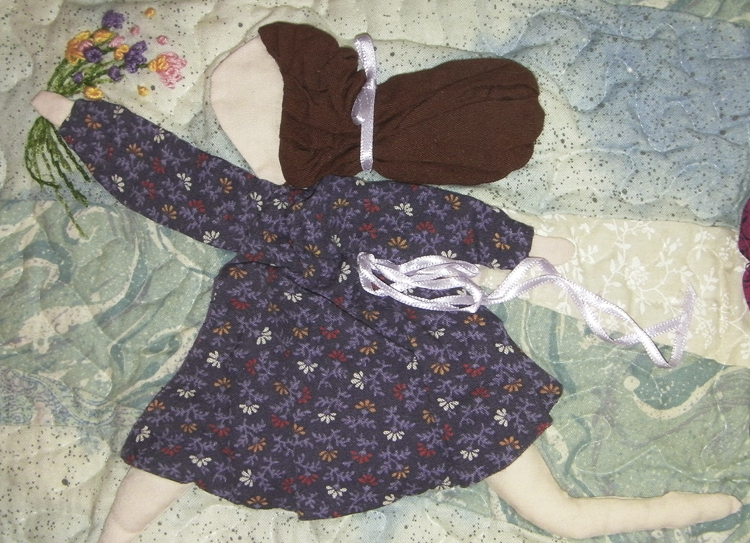
The dress and hair were gathered to give dimension, the legs were stuffed to give roundness and shape.
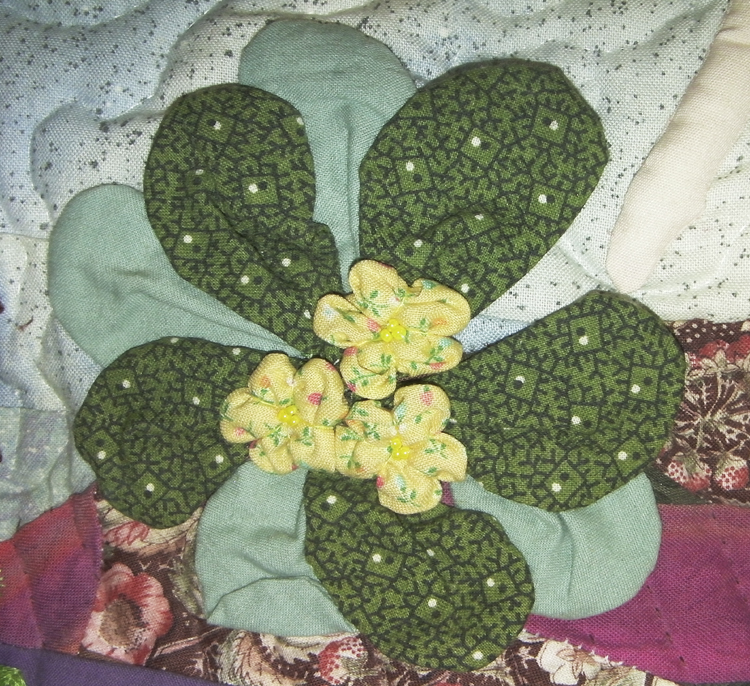
In the below example, the leave were pleated at the centers to give fullness.
So, back to the Storm At Sea quilt…
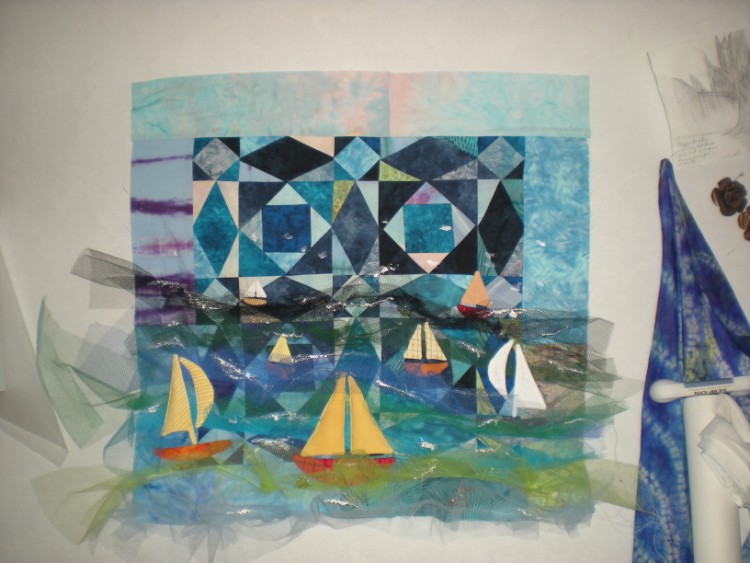
The tulle made perfect waves when stitched down all ruffled and crinkled. I layered it with the darkest in the back and brightest in the front to give the illusion of depth. The boats had to be appliquéd between the layers of tulle.
I used invisible thread to stitch down the waves and edge-stitch the boats. Have any of you found an invisible thread that isn’t irritating to work with? I love what you can do with the stuff, but hate dealing with it jumping out of the tension guides at random moments.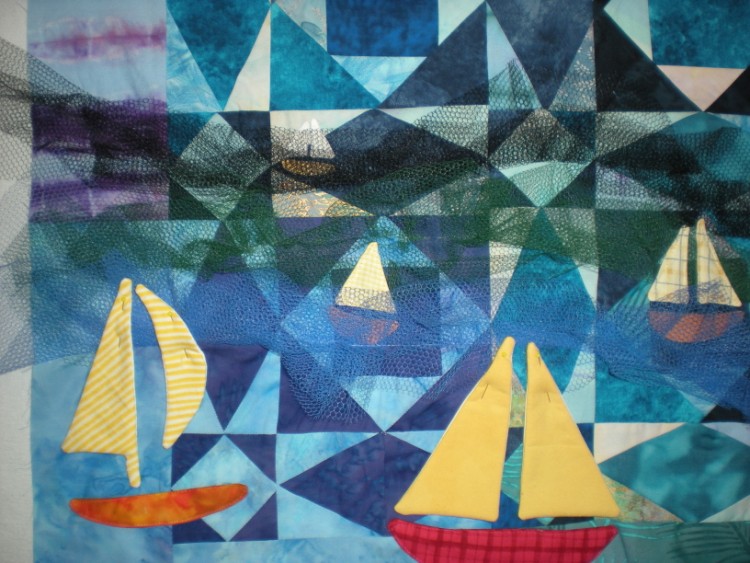
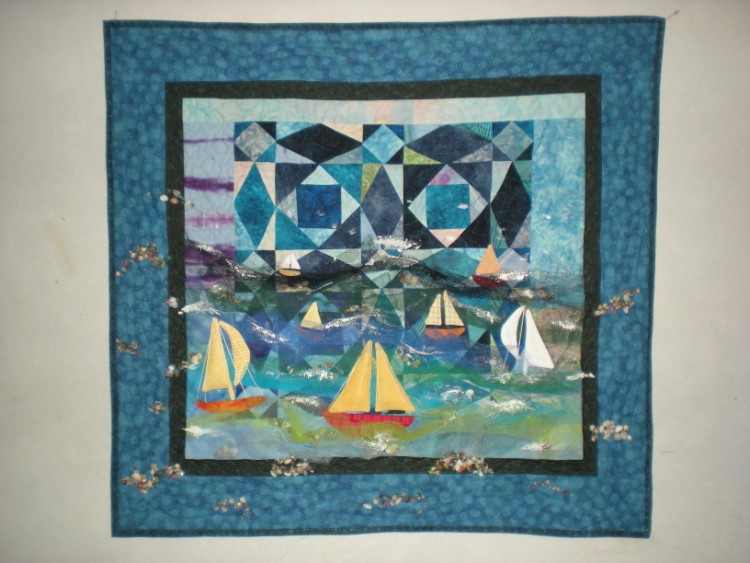
Once all the boats and waves were down I decided we needed whitecaps, so got out the white paint. THAT was fun. Splish-splash.
I also added some seashells, just for interest. I had some sand/glue mixture for scrapbooking that I thought of trying out, but decided this quilt was more about the storm at sea than the beach.
White embroidery floss added a bit more dimension as rigging and the borders frame it nicely. 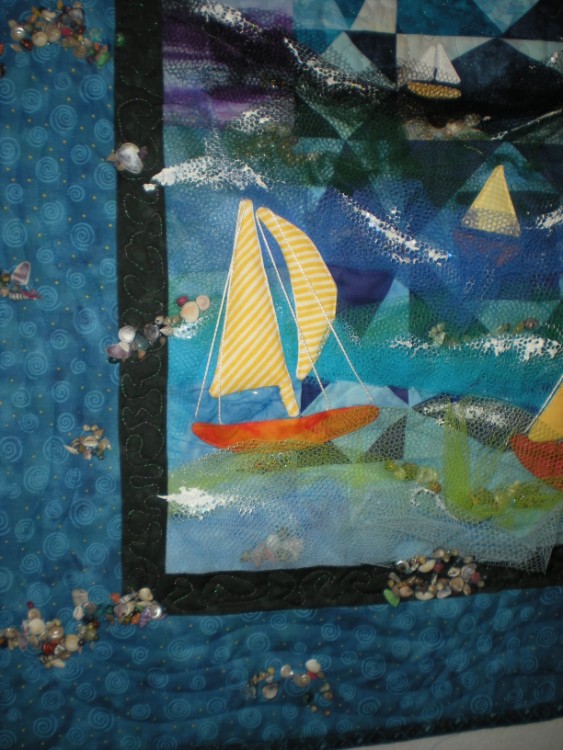
Don’t know but that I went a little overboard adding the shells to the edges. Ah well…
This was due in to the offices of Quilting Arts by Friday, May 20th, and I managed to get it in the mail on Monday, the 16th. They received it on Thursday the 19th, so Phew!
Wednesday, August 31 – Finally got my hands on a copy of the August/September issue. Sadly, my quilt didn’t make the cut. (The quilters online rated it 4.75 out of 5. Woot!) That’s ok, it was still an interesting and worthwhile experience.
You can see all the transformations here. Some are excellent and really, really well done, and some are just “meh,” I’ll leave you to judge for yourselves which are which. 🙂
Happy creating!
P.S. Speaking of being creative, I won’t be around this weekend, as my brother-in-law will be getting married… on top of a mountain. Here’s where we’ll be staying, after we hike up there. Should be fun! Gotta go pack my rucksack now…



That’s FABULOUS, Sandy! Super details and such a creative use of materials. I seriously love it.
Have fun at the wedding!