Here’s a great little project you can make in next to no time. In fact, I made three in just a couple hours. It’s called a mobius or infinity scarf because it has a that single twist, just like a mobius strip.
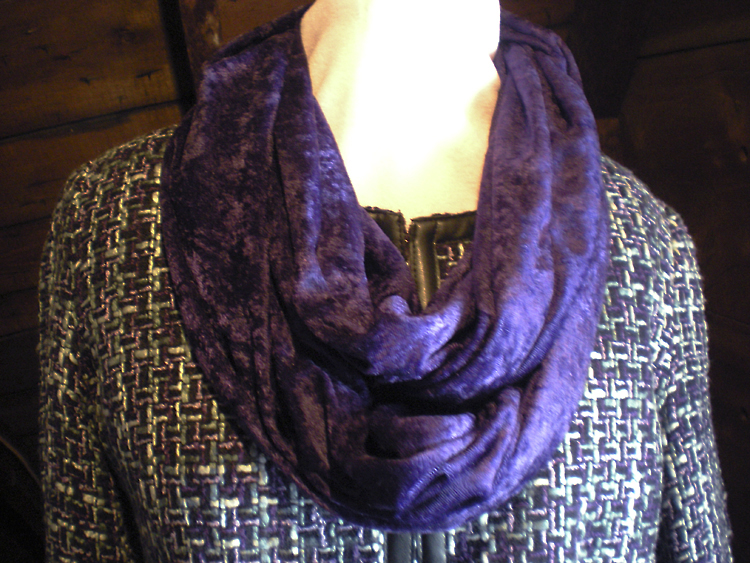
Here’s mine. I love wearing it with this jacket because the jacket is collarless and my neck gets cold (and I’m not fond of turtlenecks.) The scarf is wrapped around twice in this photo.
If you want to make one, you’ll need a 2 yard long by 20″ piece of fabric. If you’re buying yardage, you can get two out of 40″ wide or three out of 60″ wide.
Here’s how I did it. You can also find a short tutorial here.
If you have 40″ fabric, fold it in half, meeting selvedges and cut on the fold to get two pieces for your two scarves.
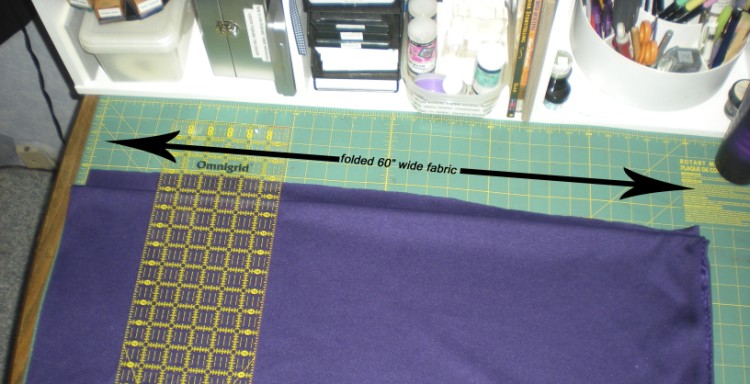
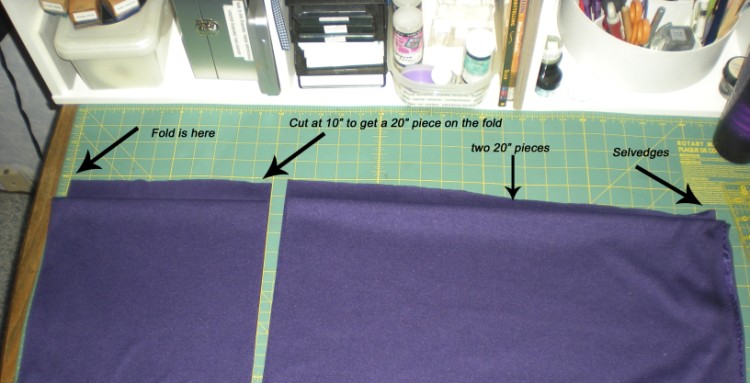
Here’s how I laid out the cutting for my 60″ piece. I first folded it in half, meeting the selvedges. Then I folded the two yard length in half twice, so the 18″ would fit on my cutting table and I could cut the whole length with one cut.
Line up the fold at 0″ and then cut at 10″ and again at 30″. (I didn’t bother to cut off the selvedges because I used my serger to sew the first seam.)
Now you have three pieces with only one cut!
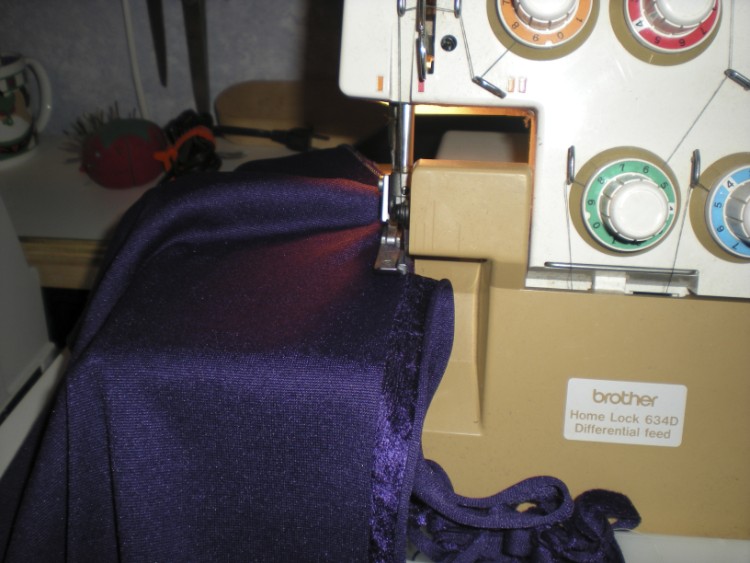
Next, you need to fold each piece lengthwise and sew the 2 yard seam, making a long tube.
Here, I’m letting the serger cut off the selvedges for me.
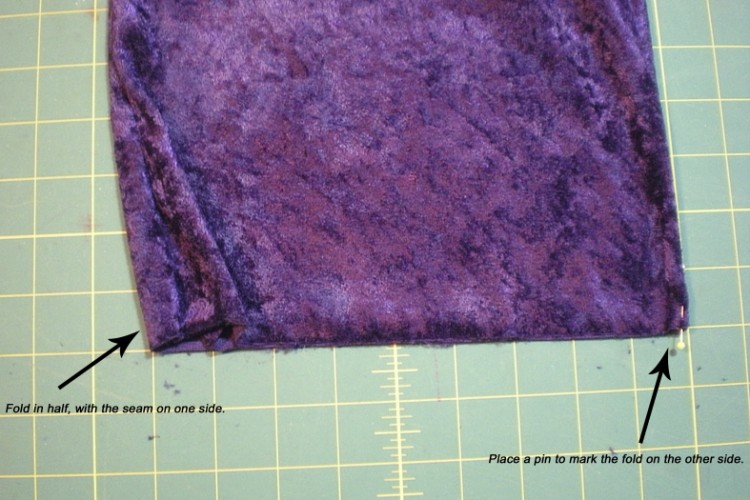
This is the part that gets some folks confused. You’re going to sew together the two ends of the tube, but with a twist. To make this easier, follow the directions in the photo above. (Fold the tube in half, with the seam on one fold. Pin mark the fold on the opposite side.) Do this for both ends of the scarf.
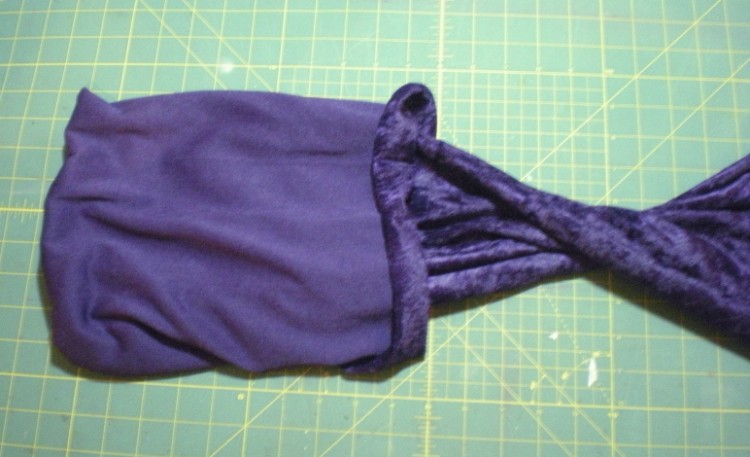
Next you’ll pull one end of the scarf up over the rest of it.
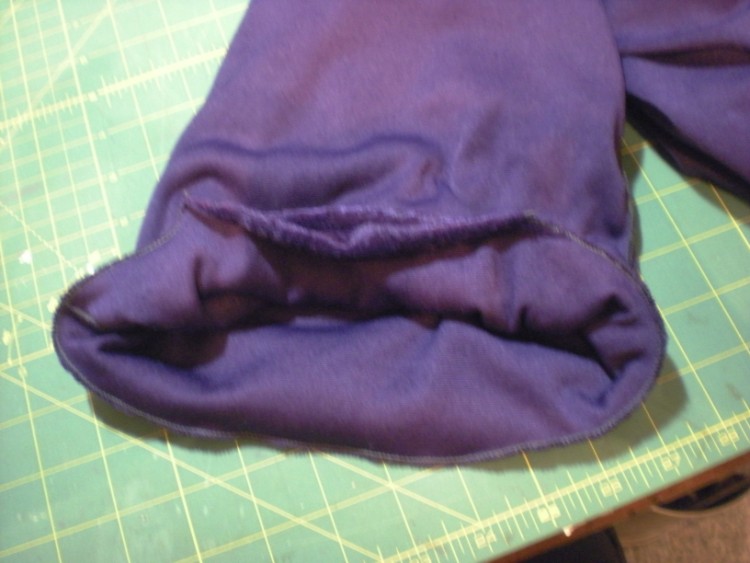
This photo shows pulling the tube up over a twist, but you don’t need to bother with the twist now. Just pull it up over itself until the two ends meet. Meet the pin on one end to the seam of the other, meet the remaining pin to the remaining seam. The automatically builds in the twist. Now sew all the way around, leaving an opening for turning. (Sorry about the blurry photo! I’m usually having so much fun sewing I don’t slow down to check that my photos are clear. Gotta work on that.)
Now pull your scarf out through the opening. (I think this is the fun part.)
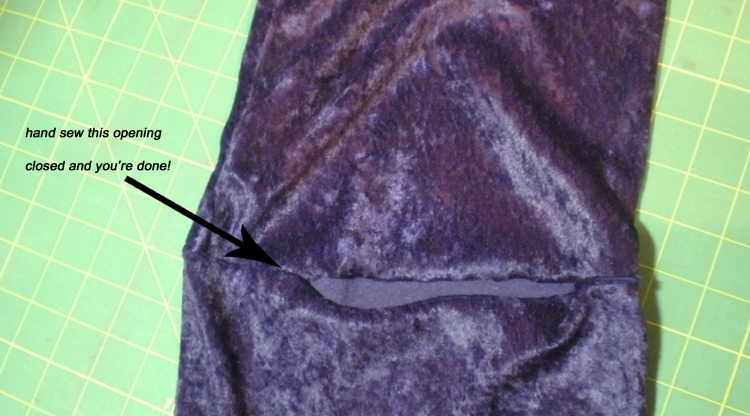
Hand sew the opening closed and enjoy your new creation!
I made mine from a polyester stretch velvet, but consider the possibilities: chiffon for an evening scarf, sweater knit for something really warm and cozy, fun fleece prints for the teens or little ones . I even saw a suggestion for using two old sweater arms. Hmmmm . . .
Whatever you decide to use, have fun! And be sure to send me pictures!





Hi There,
Great tutorial,and lovely scarf,I can’t wait to make one. I’ll send you a pic when I do.
Best wishes,
Cathy.
Thank you, glad you liked it. And, yes, please do send me pics!