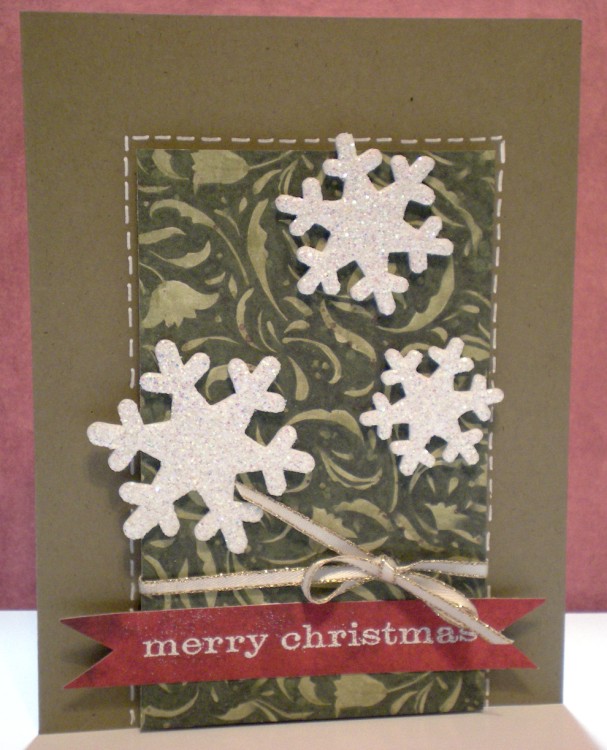
There’s something about these glittered snowflakes that I just LOVE, but I’ve had them for over a year and never could seem to find a use for them. When I saw Kristina’s day 15 card, I said, “AHA! Sparkly snowflakes, here we go!” (Yes, it made me very happy. Simple things, you know . . . )
This is another extraordinarily easy card that can be made in multiples. The steps for a 4 1/4″ x 5 1/2″ card:
- Cut patterned paper to 2 1/2″ x 4 1/2″
- Adhere with dimensional adhesive. (Being sure to NOT put adhesive where the bow will go.)
- Draw faux stitching around patterned paper. (This is one of Kristina’s signature elements. It really does add a nice touch.)
- Stamp sentiment on red paper. Cut into banner shape. Adhere to card.
- Adhere snowflakes.
- Tie on ribbon for bow.
Here’s a stamping tip for you: You don’t always have to use the entire stamp. The stamp I used for the sentiment has a border which I didn’t want.
There are a few ways to get around using the whole image. I was embossing, so I used an embossing pen to only color in the sentiment. Alternately, you could stamp the entire thing on the ink pad, then carefully wipe the ink off the areas you don’t want. Also, you can use markers to color in just the areas you want. This makes your stamp collection much more versatile!
Supplies:
Paper: Seasonal Paper Stash Paper Pad (Tim Holtz), Glad Tidings Card Make Paper Pad
(K & Company)
Adhesives: Squares Foam Tabs, Mono Adhesive Dispenser Permanent
Stamp: Merry Christmas stamp, Studio G
Ink: Ranger Tim Holtz Distress Ink Pad, Clear For Embossing
Embossing Powder: Zing! White Opaque Embossing Powder 1 oz
Gel Pen: Uni Ball Signo Gel Pen Broad Point
Glittered Snowflakes: Nicole Arts Glittzers, Adhesive backed embellishments
Gold edged 1/8″ white satin ribbon
Embossing pen: Embossing Pen (Inkadinkado)


