


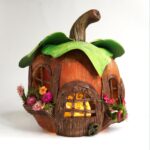
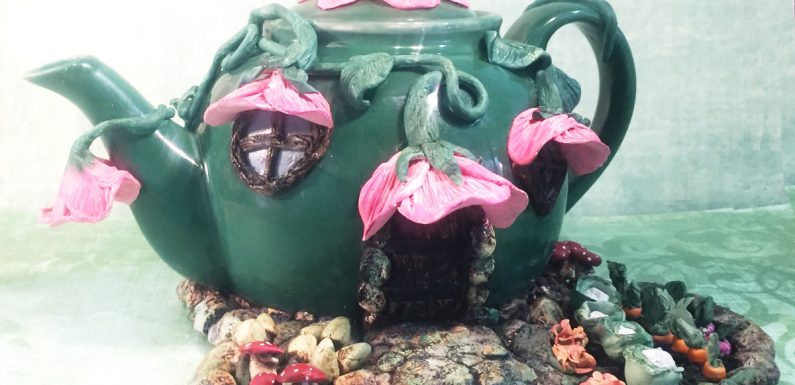
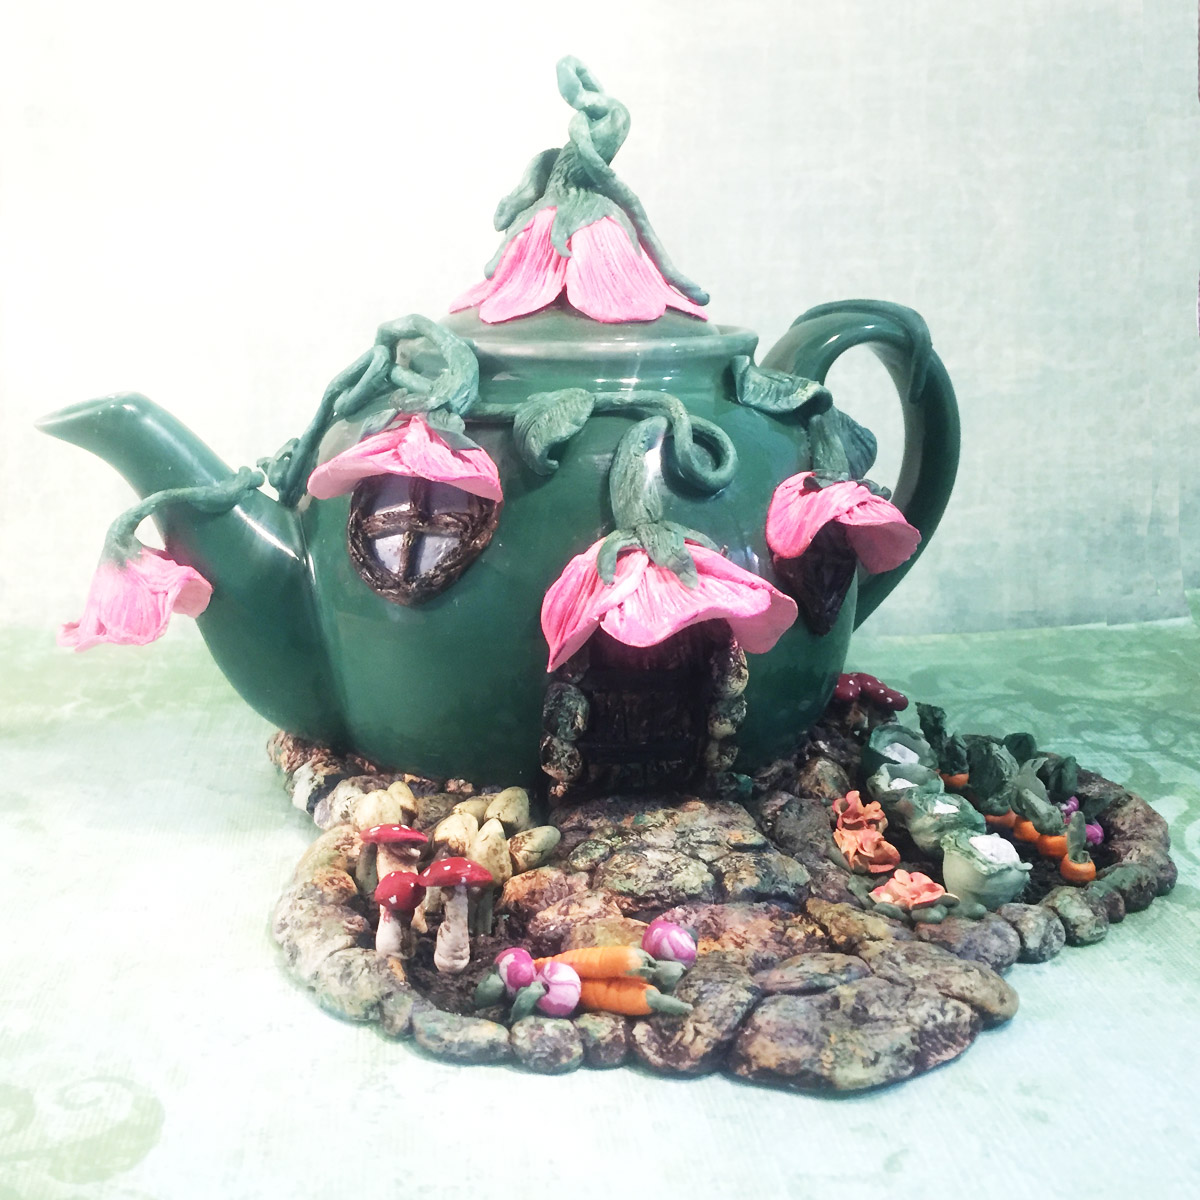
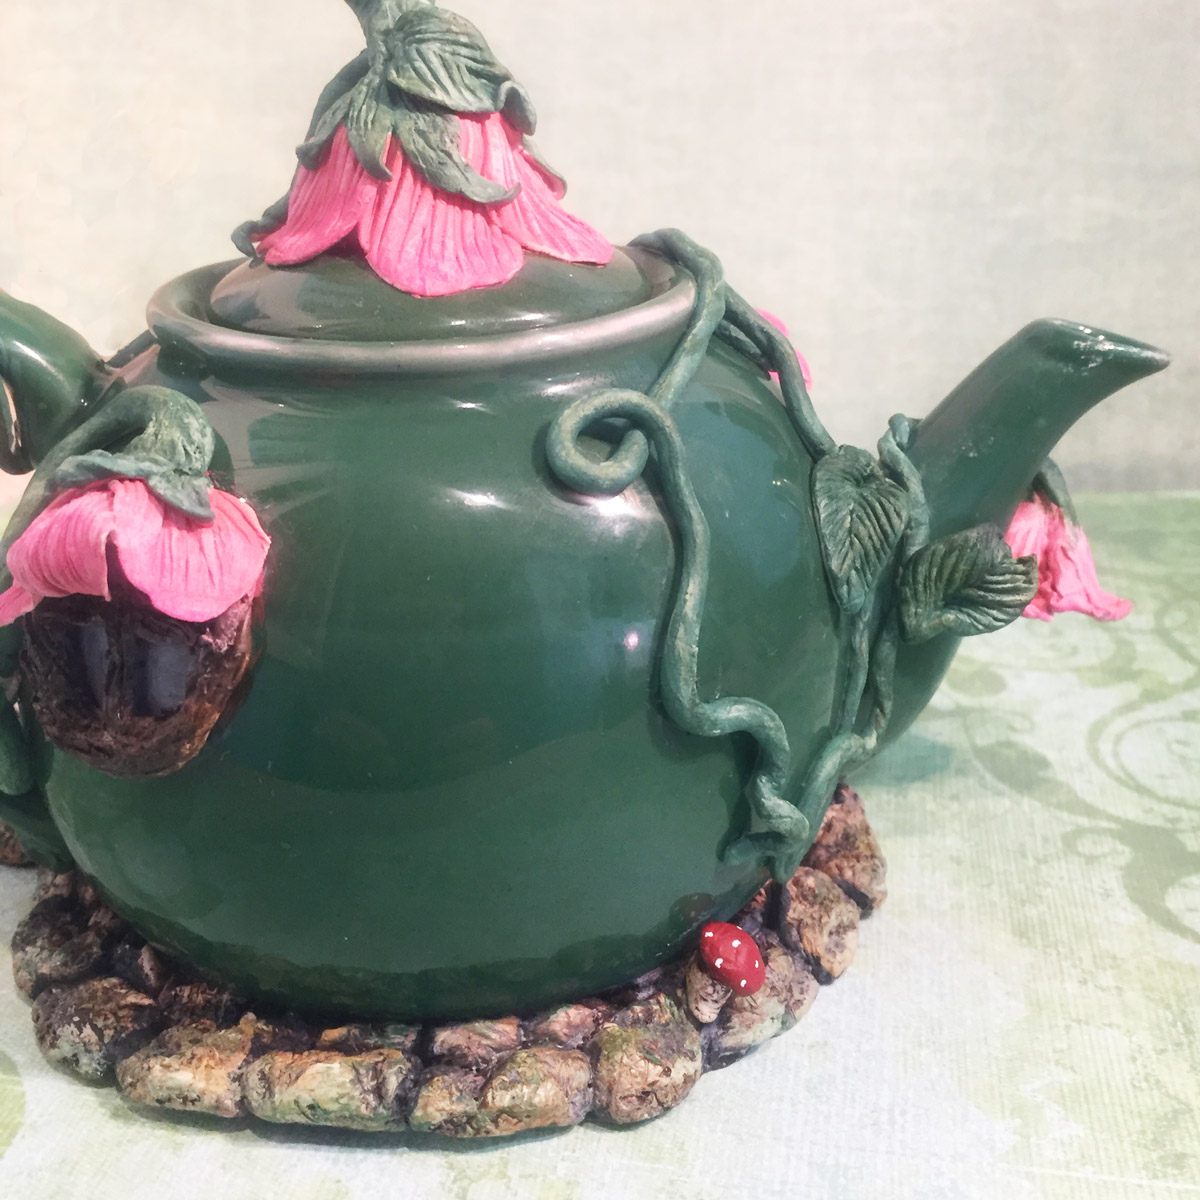
This was a fun and a really interesting project to work on. It’s based on Marlene Brady’s 2016 Polymer Clay Adventure class on making a fairy garden teapot. I found this teapot at the Salvation Army last fall for two dollars, and it’s been sitting on my desk, patiently waiting ever since.
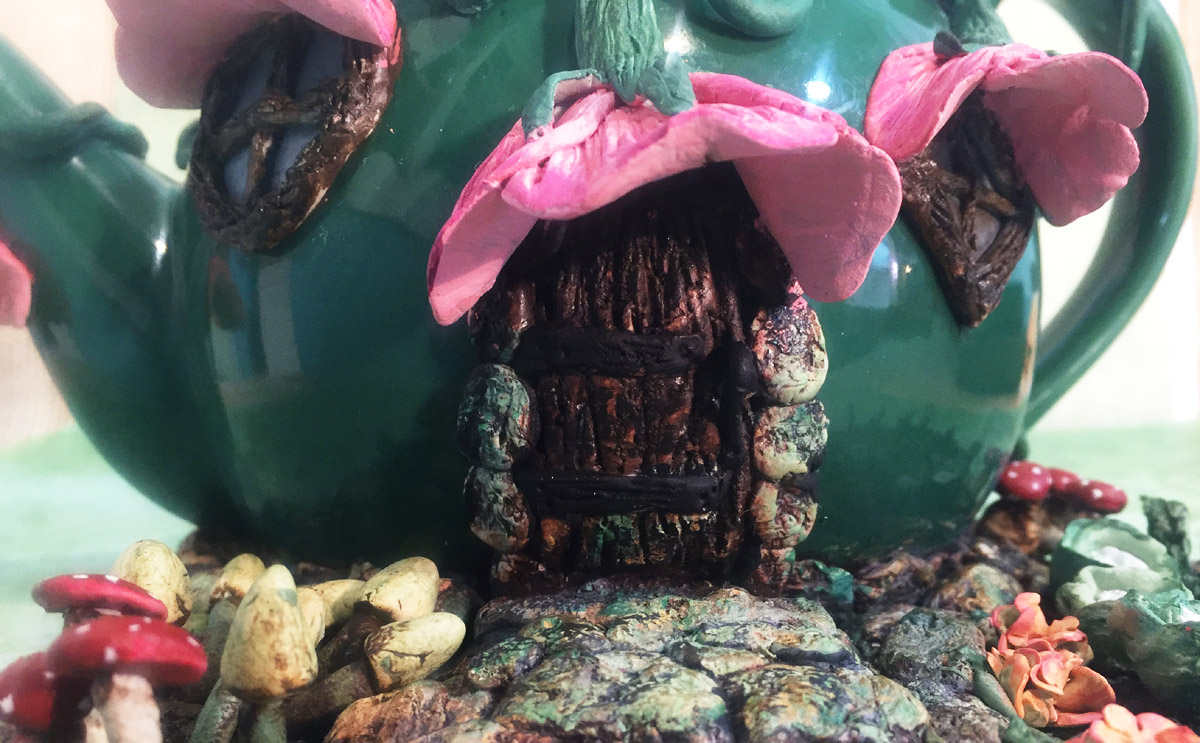
Marlene made mushroom awnings over her doors and windows, which I thought was utterly adorable but wanted mine to be different. So I made flower blossom awnings over the doors and windows.
I had envisioned doing some vines and leaves trailing around the teapot and then connected the ideas and now have the flowers looking like they’re growing along and up the teapot in order provide the shade. It’s a fun kind of whimsical touch that I love.
My first thought had been to use polymer clay and not the Apoxie Sculpt clay that she suggested, however I decided to order some Apoxie Sculpt and give it a try. I ordered the 1 lb. set of Apoxie Sculpt and used a little less than half of it for this project. If I decide to work with it more I’ll definitely order the 4 lb. set as that’s much more economical.
The nice thing about Apoxie Sculpt over polymer is that it is stuck quite permanently to the teapot, there is no need to lift it off and glue it back down. It also dries very, very hard and is not flexible at all like polymer clay, which depending on your application, can be a plus or minus.
One thing I did not like about working with the Apoxie Sculpt over polymer clay was working with the white clay and then having to paint it afterwards. It was especially a pain to paint the vines that were right up against the teapot without making a mess at the edges.
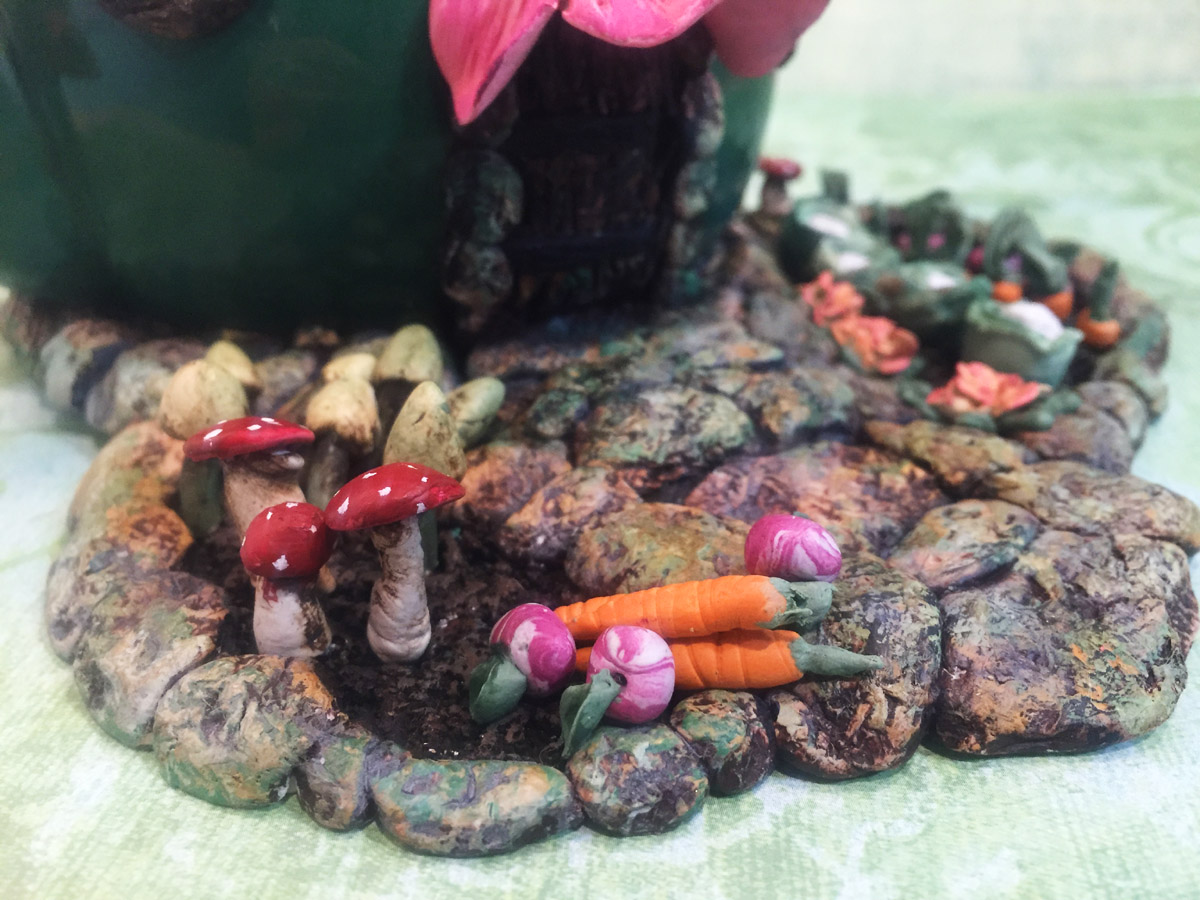
For the little veggies and mushrooms in the garden I decided to color the clay with acrylic paint before sculpting and save myself the painting steps. This changed the clay in an interesting way. It made it more pliable, it was easier to roll and stretch out thin snakes. However, it was also stickier and made shaping difficult, especially while wearing plastic gloves.
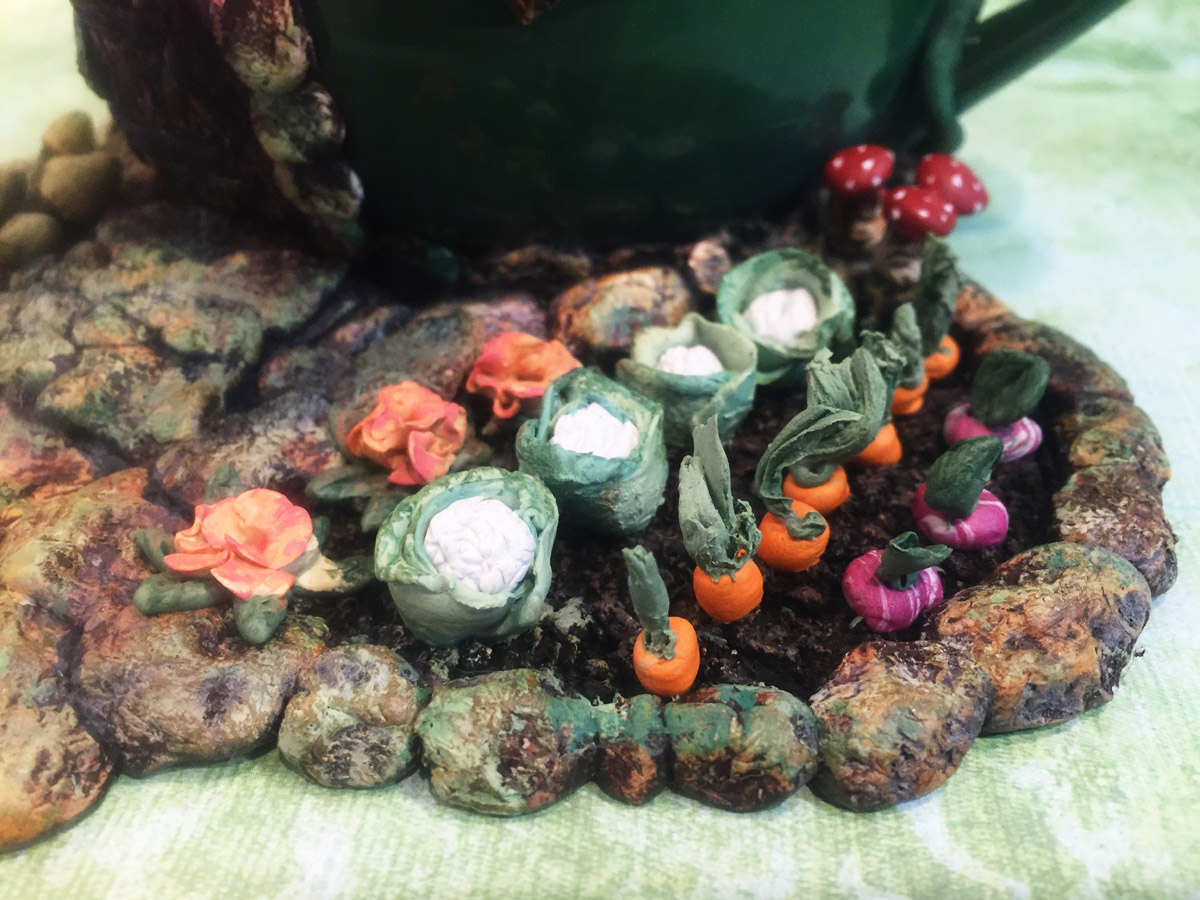
The teapot is 7 inches from spout to handle and about 4 inches tall. The cauliflower are about 1/2 inch wide and the carrots are between 1/8 and 1/4-inch wide. Sorry that I keep forgetting to put something in the photos to give you a size reference!
When I got down to creating the itty bitty leaves on the turnips and carrots working with this clay had started to drive me crazy. One trick I found is that when the Apoxie Sculpt starts to get too sticky to manage you can spritz it with a little water and that will help act as a release and allow you to handle it firmly without it sticking all over the place.
All in all this was a fun project. I love sculpting little tiny things and I think it came out really cute.
I actually picked up yet another teapot a couple weeks ago and have some ideas for doing perhaps something Alice themed. We’ll see.
A few things I learned about working with Apoxie Sculpt:
- DO wear gloves! You don’t want it drying on your skin
- If you are mixing up large amounts, use a scale for accuracy
- Only mix up what you think you’ll use in about an hour
- Because the clay is white, it’s difficult to mix in paint and get dark colors. Just mix in some paint and then finish the darker details by painting afterwards.
I’ll likely be doing a Friday Findings video on this interesting medium soon and will have more helpful info for you then.
Have any of you taken classes at the Polymer Clay Adventure? And if so have you made any of the projects?
Happy creating!

Oh, Sandy, what a so cute teapot: so poetic, I do love everything in this project.
The flower blossom and the little garden make your teapot so wonderful!
Please, make some day Alice themed 🙂
Marie
Thanks, Marie! I’m glad you like the idea of an Alice teapot, I’ve got several ideas bouncing around in my head that will be fun. 🙂
this was adorable. I have a few teapots and need to do this project
Thank you, Debbie! It was a fun project, but I definitely think most of the time I prefer polymer clay to the Apoxie Sculpt, but it has it’s uses. 🙂
Hi Sandy. I love your teapot. It is adorable! I am just curious about using the Apoxie Sculpt. Is this project something you cannot do with polymer clay? I am motivated to try this. Thank you so much for sharing.
Hi Lila,
Thanks, I’m glad you like the teapot, it was a fun tutorial by Marlene Brady.
That’s a very good question!
You definitely could do this with polymer clay. The nice thing about the Apoxie Sculpt is that it will be stuck permanently to the teapot after curing. This is unlike polymer clay, which you’d have to pop off and glue back on (or be sure to wrap around to have a mechanical bond.)
It’s also rock hard and probably even longer lasting in the outdoors than polymer would be. Apoxie sculpt is marine grade and often used in boats. It’s amazing stuff!
Have you seen my YouTube video on Apoxie Sculpt? There are a few different things to keep in mind when working with it. https://youtu.be/nYFYDUAGz4w
Hope this helps,
Sandy