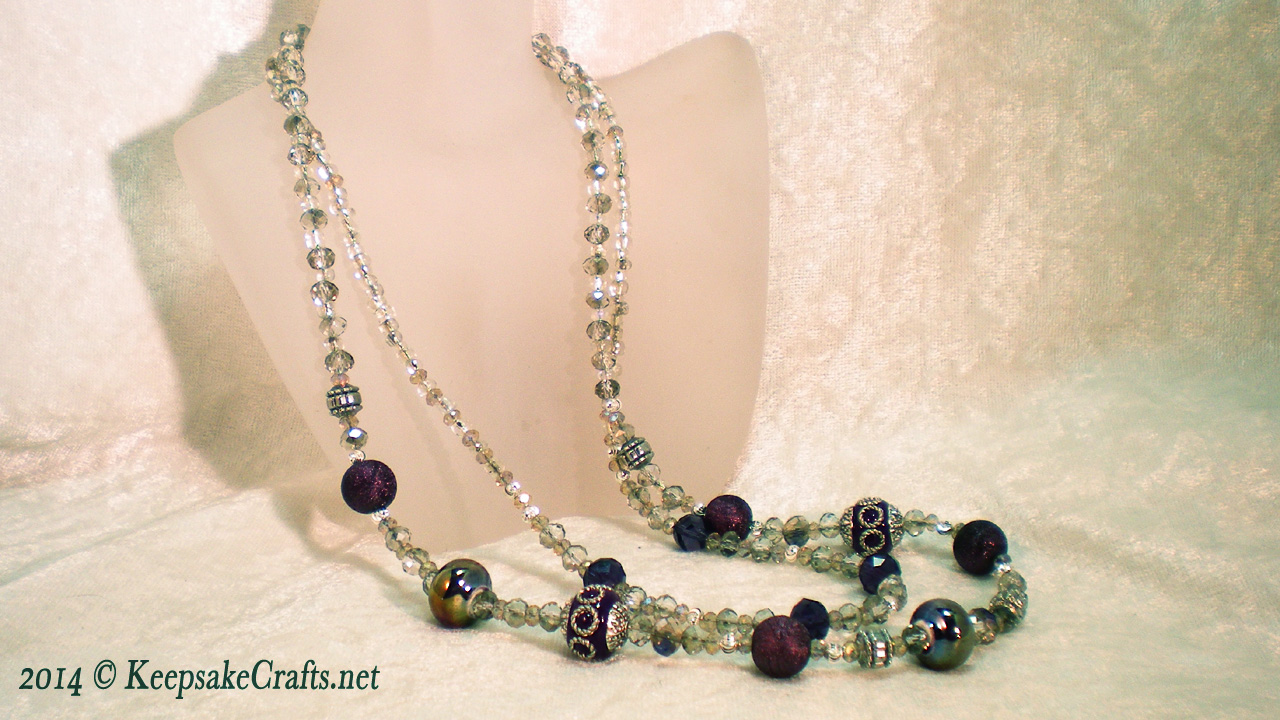
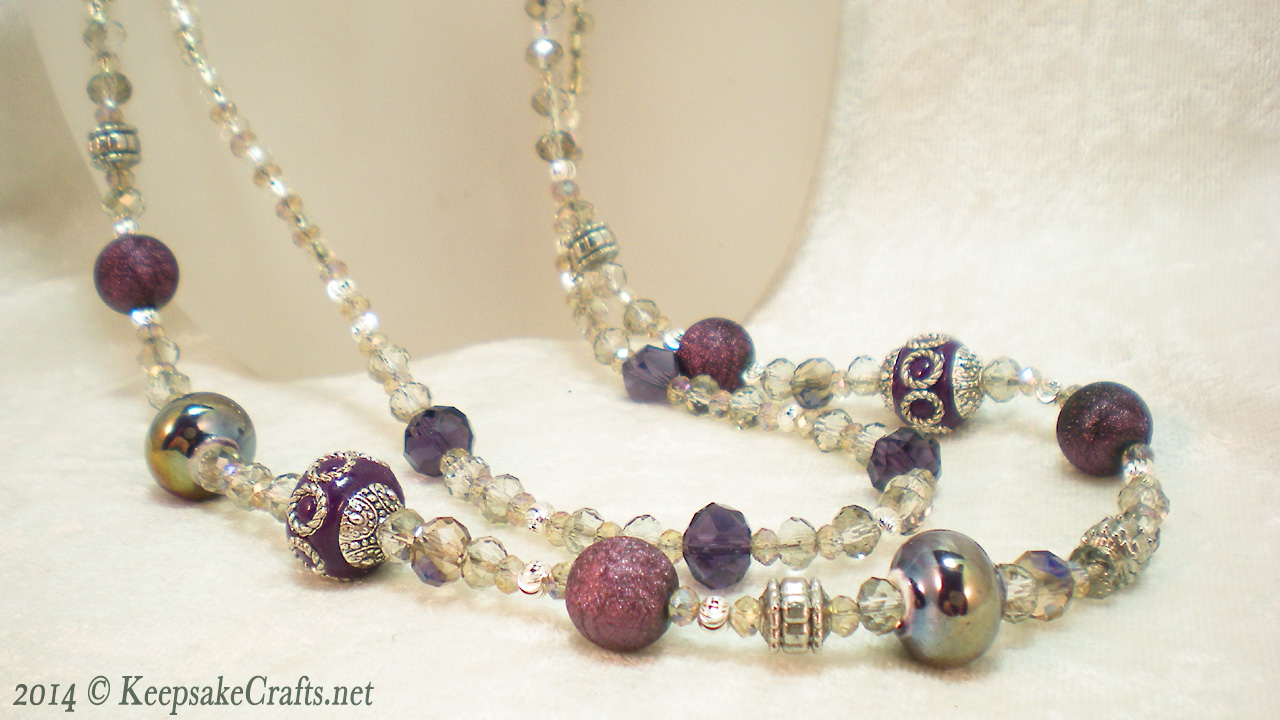
Here’s another necklace I’ll be teaching soon at my local Joann’s. We’ll be focusing on the basics of bead stringing.
As I mention in the video, the stringing of beads is the easy part. Just use the wire like a needle & thread and slide on your beads. The real work is in the arranging, designing and of course, making sure you have secure closures.
We start out by using quite inexpensive beads (would you believe most of those purple ones are plastic?) but you can still get a pretty piece of jewelry. Plus it’s good to learn on something that won’t break your heart if the closures let go. 🙂
Enjoy the video and happy creating!
YOu can watch Bead Stringing 101- Beaded Necklace Video Tutorial over at YouTube.
Materials:
- 7” strand assorted 10mm-15mm beads in colors of your choice
- 1 strand 4mm crystal beads to coordinate with 7” strand
- 1 strand 6mm crystal beads to coordinate with 7” strand
- 1 hank clear large glass seed beads
- 1 spool bead stringing wire (.018, 49 strand)
- silver plated lobster clasp
- 3 – 6mm silver plated jump rings
- 4- 2x3mm silver plated crimp beads
- 4mm silver plated round spacer beads (the package I got had 16)
- optional (4-6 inch piece of chunky chain)
Tools:
- crimping pliers
- chain nose pliers
- wire cutters
- bead design board
- Bead Bugs Bead Stoppers
- tape measure
To make necklace:
- Open assorted bead strand onto longest channel in bead design board.
- Open each strand of crystal beads, silver plated beads and large seed beads into a separate compartment in bead design board.
- Remove 3-5 beads from Jesse James assortment to use in second strand. Arrange these in another channel in board.
- Arrange crystal beads and silver plated beads around focal beads in a pleasing design.
- Use large glass seed beads to fill in length of necklace, especially going around the back.
- Leaving bead stringing wire on the spool, string beads onto wire. When length and arrangement are to your satisfaction, cut off the wire, leaving 3 inches extra wire on each end.
- Make sure to secure each end with a Bead Bug.
- Repeat stringing, cutting and clamping for second strand of beads. It should be slightly shorter than the first strand.
- Remove bead stopper from one end of longer bead strand. Slide on a crimp tube and a soldered jump ring.
- Slide wire back through crimp tube, pull snug to jump ring. Use crimping pliers to squeeze crimp, first using round portion then “U” shaped portion of pliers.
- Test hold of crimp by pulling on jump ring. Once it is secure trim excess wire.
- Repeat steps 9-11 to add one end of shorter strand to same jump ring.
- Repeat steps 9-12 to add two remaining wire ends to another jump ring.
- Use wire cutters to make a split in a jump ring. Use this jump ring to attach lobster clasp to one of the soldered jump rings.
- Optional: To add length to your necklace and make it adjustable, use a split jump ring to attach a piece of chain to the other soldered jump ring.


You must have an enormous selection of beads–those all go beautifully together. I’m envying the Joann’s customers in your area.
Thanks! But actually, the beads were all from the Joann’s store. It is rather fun to plan a project while pulling supplies right from the aisles. 🙂
Aha. Clever girl. 😀
Hello Sandy,
I love, love your video’s on youtube. I am a self taught beader and I’ve began by making Purse Charms, then graduated to Charm Bracelets. As I made these I found that people loved my work and began ordering them. Now I am trying to expand my knowledge, but I’m having a hard time understanding the metric system as opposed to inches. I never have been good at match..lol
I have been making necklaces for a short time now and my critics say they are very nice, but I am now trying to make 3 layered necklaces and I’m really struggling with all the many findings to use as well as, the terminology which is driving me crazy…:-) I seem to be spending more time looking through every findings, and components ..ect… Is there any advise you could give me to help me? my confidence is taking a beating and I sure could use a boost by someone as professional and as knowledgeable as you!!
Sincerely,
VaL.
Hi Val, Thank you for the nice comment. Good for you for working at your jewelry making and selling your pieces!
I’m not sure what it is you are looking for as far as information on findings, but I think you will find my weekly series, Friday Findings, helpful. I’ve done over 100 videos on various topics about jewelry making tools, findings and supplies. You can look at the playlist here: https://www.youtube.com/playlist?list=PLg8Lpg6u0akgSxH9p6IL1d9x5InASIDfv and watch the videos on topics that interest you.
As far as metric goes, it actually involves less and far easier math than the imperial system! I started to really get a grasp on it once I got myself an inexpensive brass caliper like this one: http://amzn.to/2gG51uT.
Happy creating!
Thanks for this great video. I’m 52 and am just taking up jewelry making. This step by step was so helpful. I bought all of the supplies before doing anything and now I just need ideas and direction. I will be watching more of your videos.