Have I mentioned that I love all things Tim Holtz? (Maybe once or twice, lol.) Last fall I got to take not one, but TWO classes with him. It was a blast, and a highlight of my year.
I’ve already posted one of the projects we made, the Christmas Configuration. The other was this book made of grungeboard, which I LOVE so much, it’s been sitting out in my craft room as decor. One of these days I may put photos in it, but I think it’s fantastic just as it is.
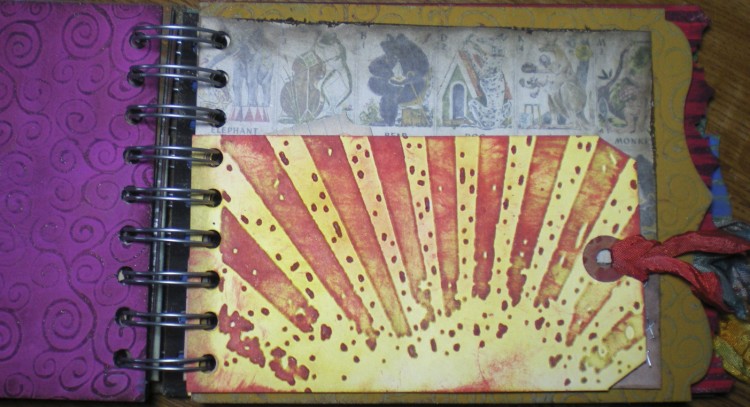
The front & back covers and all of the pages are made of Grungeboard. (This link leads to a pack of 10 sheets which will make the entire book, with 2 sheets left over.) The pages were embossed with a variety of embossing folders, including the Swirls Textured Fades Embossing Folder. (You can see this one on the magenta page on the left, below.)
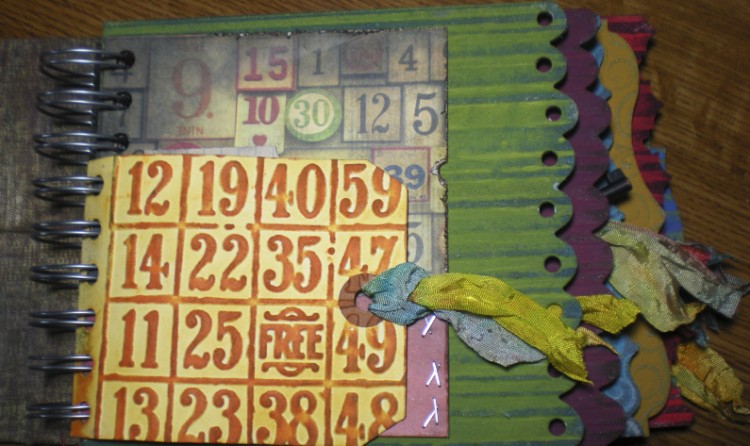
One side edge of each page was cut with a Sizzix Alterations on the edge die. My favorite of these is the Scallops On The Edge Die. (Used on the green and magenta pages below the cover.) The Bracket On The Edge Die is also great, it’s not too busy and works well for manly or feminine uses. (Used on the turquoise and mustard pages.) The Scrollwork On The Edge Die is used on the cover. (I own that one, too, it’s quite fancy and nice for girly pages and cards.)
The first step in making our pages (once they were cut to right length) was to paint them all with paint dabbers. I tell ya, if you haven’t tried them, you need to, paint dabbers are terrific! Instead of having to get out paint, paintbrushes and a dish for the paint, you simply pick up a paint dabber, give it a squeeze and use it like a marker. No mess and so easy!
Some of the colors we used:
Pitch Black Adirondack Acrylic Paint Dabbers
Pearl Adirondack Metallic Paint Dabber 1 Oz.
Lettuce Adirondack Acrylic Paint Dabbers
Cranberry Adirondack Acrylic Paint Dabbers
Espresso Adirondack Acrylic Paint Dabbers
Red Pepper Adirondack Acrylic Paint Dabbers
Bottle Adirondack Acrylic Paint Dabbers
Denim Adirondack Acrylic Paint Dabbers
Stream Adirondack Acrylic Paint Dabbers
Eggplant Adirondack Acrylic Paint Dabbers
Tim warned us while we were painting to only put on one thin coat of paint, or we would regret it. You see, the next step after the paint dried was to use the Sanding Grip and sand the paint off the raised areas and the edges of the pages, exposing the raw grungeboard.
To give them a wonderfully distressed and aged look (and quite change the colors) we then inked our pages with Distress Inks. The paint resisted the ink, but the exposed grungeboard took it, resulting in awesome looking pages. You can see this page below was painted with a Lettuce Paint Dabber, sanded, then inked with Faded Jeans Distress Ink . It was great fun trying out different combinations of paint and ink colors! (After you apply the ink, use a damp paper towel to wipe the excess off the painted areas.)
For additional pages we make little pockets out of Tim’s Lost & Found Paper Stack. I asked Tim where he got all these images (license plates, game pieces, and bottle caps, to name a few, all vintage) and he told me that he owns all of it! It all gets laid out and then scanned to make the paper. That is ONE serious collection. Wow.
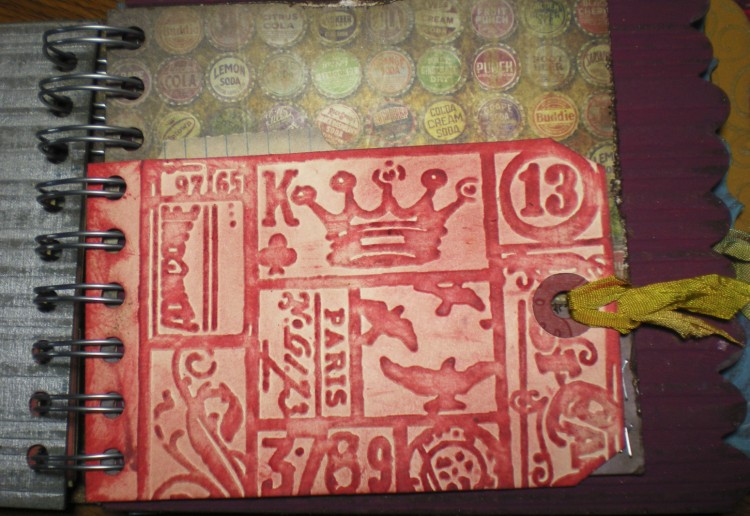
We also got tags to ink and bind into our books. They were embossed with several different embossing folders, including, Tim Holtz Rays & Retro Circles Sizzix Textured Fades Embossing Folders , the Tim Holtz Bingo & Patchwork Sizzix Textured Fades Embossing Folders , Tim Holtz Damask & Regal Flourishes Sizzix Texture Fades Embossing Folders and the Tim Holtz Bricked & Woodgrain Sizzix Texture Fades Embossing Folders. (The Bingo folder is used on the tag above, the Patchwork folder on the tag below.)
We also colored the silk ribbon from the Lavish Trimmings set. (It started out white.) First it got dipped in water, then wrung out so it was just damp. Then we swiped a variety of distress ink colors over the ribbon, crumpled it in a ball and set it aside to dry. Once it had dried the colors had transferred and bled from different areas and it was just gorgeous! This one yard piece got snipped into seven pieces and tied to our tags. Yummy.
We used the Cinch Book Bindery Tool to put everything together (a very cool machine, I think I gotta get me one) and then got to decorate the cover.
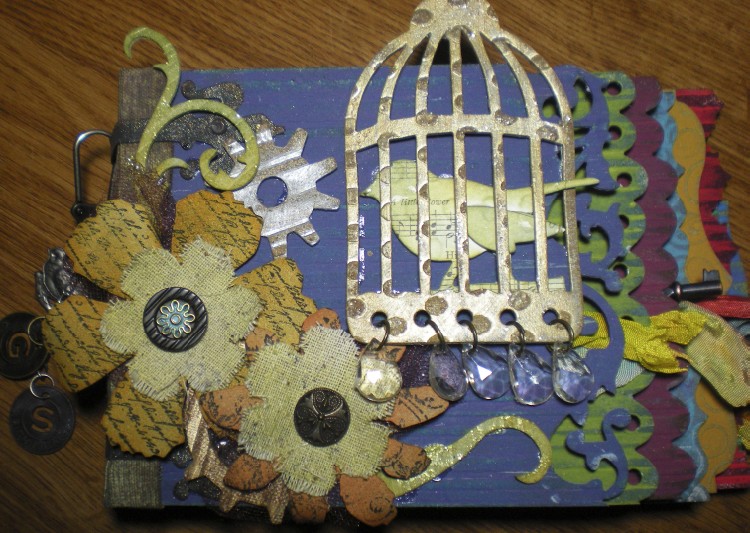
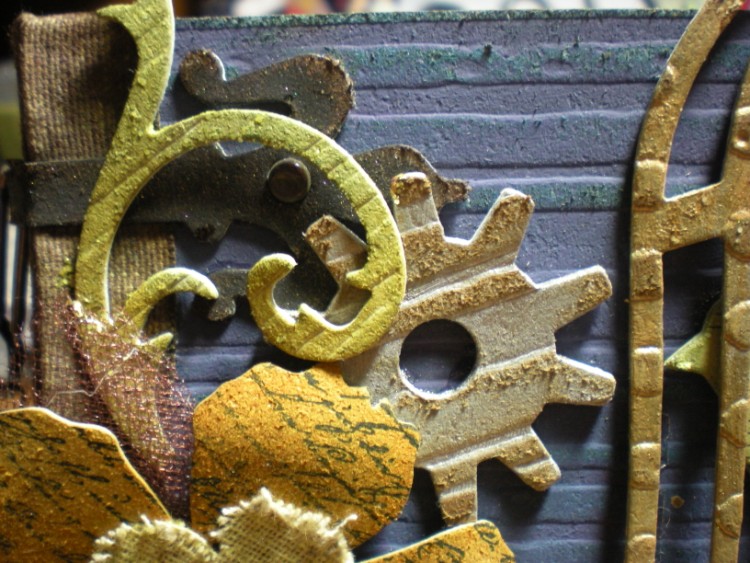
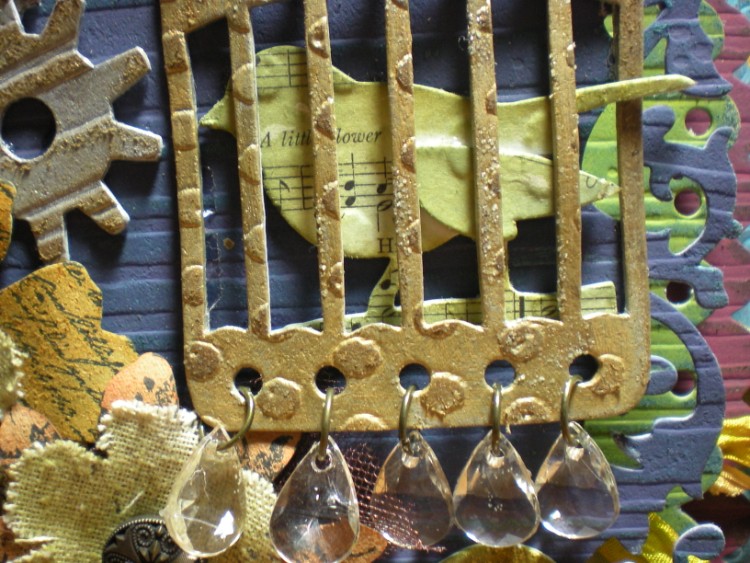
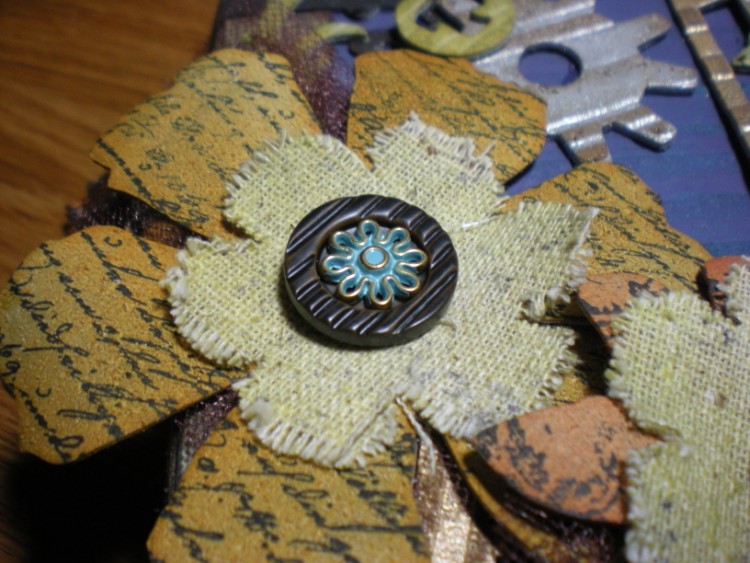
The cover was decorated with grungeboard cut with the Tattered Florals Bigz Die, Hardware Findings Bigz Die, Gadget Gears Bigz Die, Elegant Flourishes Bigz Die, and the Caged Bird Bigz Die. These were all painted with paint dabbers, sanded, scratched with the Craft Scratcher, then inked with Vintage Photo Distress Ink and Walnut Stain Distress Ink.
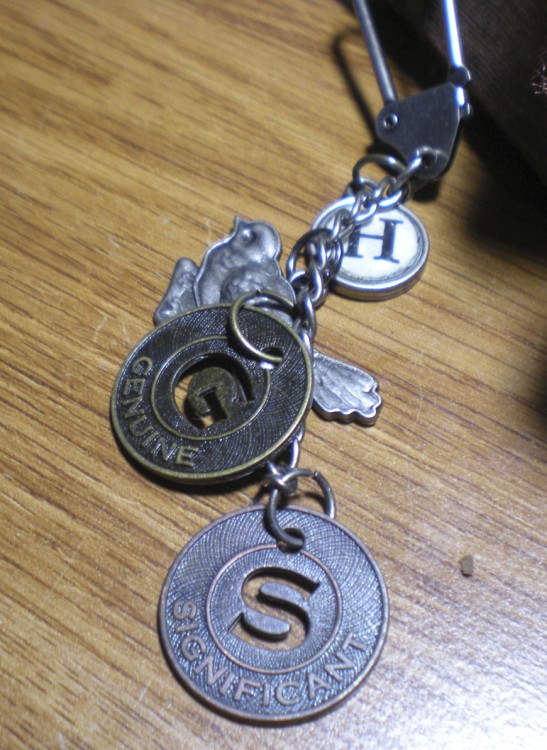
As finishing touches, we hung crystals on the bird cage (you could use Baubles,) glued Accountrements to the flower centers and used a Swivel Clasp to hang Adornments, Type Charms, and Muse Tokens from the spine.
If any of you would like complete directions, including a supply list, all dimensions, all techniques and how to assemble the covers, leave me a comment and let me know and I’ll get it right out to you.


