


Sometimes the trickiest part of making custom polymer clay jewelry pieces is locating findings that enhance and work well with them. We can easily solve this problem by creating our own findings out of yet more polymer clay.
It’s not only solves the problem but actually makes our pieces even more unique and creative.
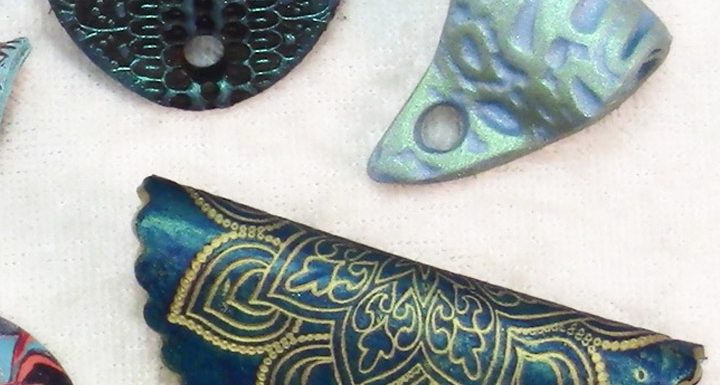
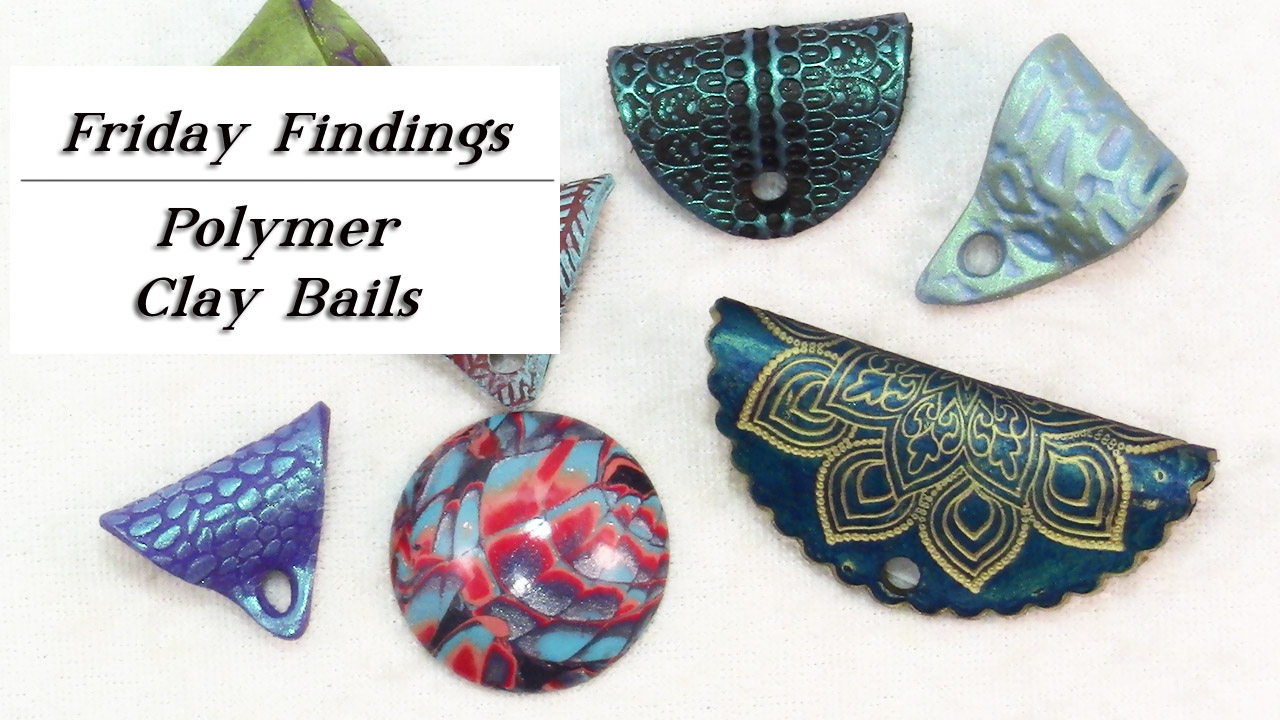
In today’s video I will show you how simple it is to make fancy, decorative tube style bails for your clay or other pieces.
I show enhancing them with textures, mica powders and Gilders Pastes, but you can be as decorative as you need to be in order to get a cohesive look in your jewelry.
Tools and Materials:
- Polymer clay in colors of your choice
- Armor All, or you can just use water as a release
- Texture stamps
- Cutters, symmetrical shapes such as diamond, round, oval & square are easiest but you can use any
- Mica powders
- Gilders paste
- Small Kemper cutter set
- Clay blade
- 1/4 inch wooden dowel, or other mandrel
Enjoy the video and happy creating!
Watch the DIY Polymer Clay Jewelry Bails-Friday Findings Tutorial video on YouTube.

Thanks so muchh for sharing your ideas and supply lists. It makes learning polymer clay very easy to have such generous mentors.
Hi Carol,
Thank you for taking the time to contact me. I’m so glad to hear that you’ve found the supply lists and tutorials helpful!
Sometimes when doing all this work on the other side of a computer screen I question whether any of it matters at all, so it’s nice to hear from someone that it does. 🙂
Happy creating!
Thank for showing how to make bails. I am new with this art and was wondering what was the best idea for pendants and have a nice finish to the piece. I have a lot to learn and do not want to spend a lot of money.
Hi Lucy,
Thanks for letting me know you like the video. Hope you found it helpful!
To answer your question, there is no one right way to hang a pendent. It depends on the style, size and your creative intention. Sometimes a drilled hole is fine, or there are purchased bails that can accent the right piece nicely.
Just keep learning and experimenting.
As for creating a nice finish, be sure to look over your pieces carefully before baking to remove any flaws like dust or fingernail dings. Also, be sure to finish the sides and back neatly and in keeping with the whole design.
The more you create and learn, the better you’ll get!
Happy creating,
Sandy