


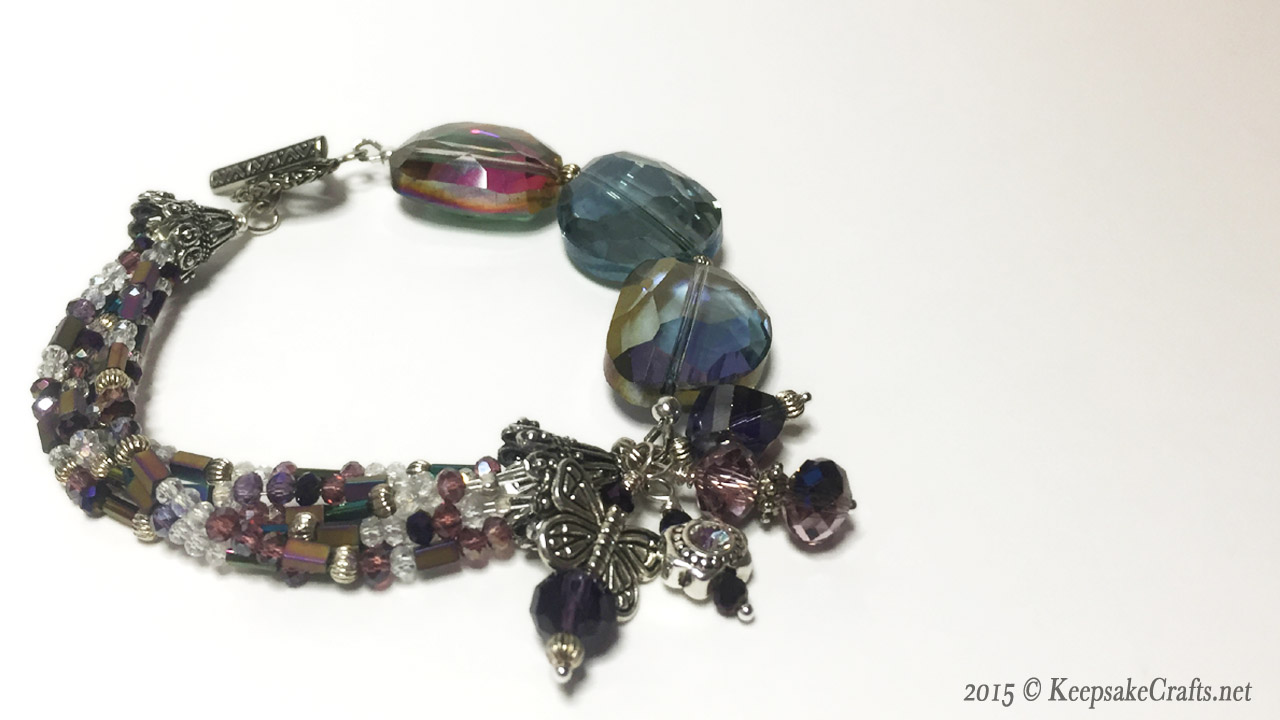
Although it’s hard to tell from the photo, those three larger beads are actually clear glass crystal. They have a very thin coating of metal that gives them an iridescent effect, changing colors as you change the angles.
This coating was developed by Swarovski in the 1950’s and was named Aurora Borealis after the northern lights. You can learn more about AB coatings here and here.
What I love about designing with this type of bead is that you can play off any or all of the reflected colors. In this bracelet I’ve chosen to focus on the purples, but you could just as easily pull out the greens, blues or the fuchsia. Or use all of them. 🙂
Enjoy the video and happy creating!
You can watch the Aurora Borealis Bracelet Video Tutorial over at YouTube.
Materials:
- 3 large focal beads 20-25mm
- 18 inches of small beads: 2mm-4mm, seed beads and the like
- several medium size beads and spacers for dangle accents
- head pins for bead dangles
- 2 bead cones
- toggle clasp
- crimps
- wire protectors
- crimp covers
- split ring
- bead stringing wire
- 2 3-inch pieces 20 gauge wire
Tools:
- round nose pliers
- chain nose pliers
- wire cutters
- crimping pliers
- split ring pliers
Directions:
- String medium size beads onto as many headpins as you’d like dangles and make wrapped loops. Use split ring pliers to open a split ring and slide on all the dangles. Set aside.
- Onto bead stringing wire add three inches of small beads. Onto one end slide a crimp. Slide the wire back through the crimp, leaving a 1/8-inch loop of wire. Flatten the crimp and trim excess wire. Repeat on other end. Make as many of these three-inch sections of beads as you like. (I used six in my bracelet.)
- Make a 90° bend in a three-inch piece of 20 gauge wire. Use round nose pliers to make a loop at the bend and add one wire loop of each of your strung bead sections. Make a wire wrap to secure and trim excess wire. Slide wire into a bead cone.
- Make a wrapped loop with the remaining wire coming out of the bead cone.
- Onto bead stringing wire slide the three focal beads, separated by spacers if you like. Onto one end slide a crimp and a wire protector. Add one half of the toggle clasp to the wire protector. Slide the wire back through the crimp. Flatten the crimp and cover with a crimp cover.
- On the other end slide a crimp and a wire protector. Slide the split ring with dangles over the wrapped loop made in step 4. Add the wrapped loop to the wire protector. Slide the wire back through the crimp. Flatten the crimp and add a crimp cover.
- Repeat step 3 to secure remaining ends of the short beaded sections. Check bracelet for fit and add more beads to wire, if necessary.
- Make a wrapped loop with the remaining wire coming out of the bead cone, adding other half of toggle clasp before wrapping.

I love your bracelets. I can’t seem to get enough of them. 😀
I so glad you like them!
The front left corner of my laptop is all scratched up from wearing bracelets all the time. A small price to pay for beauty. 😀