


Sorry folks that I’m over a week late with dragon #6. But now she’s done, finally!
To learn why I’m making a dragon every week check out this post on Errol, dragon #1, for the details.
Click on any of the photos for a closer look.
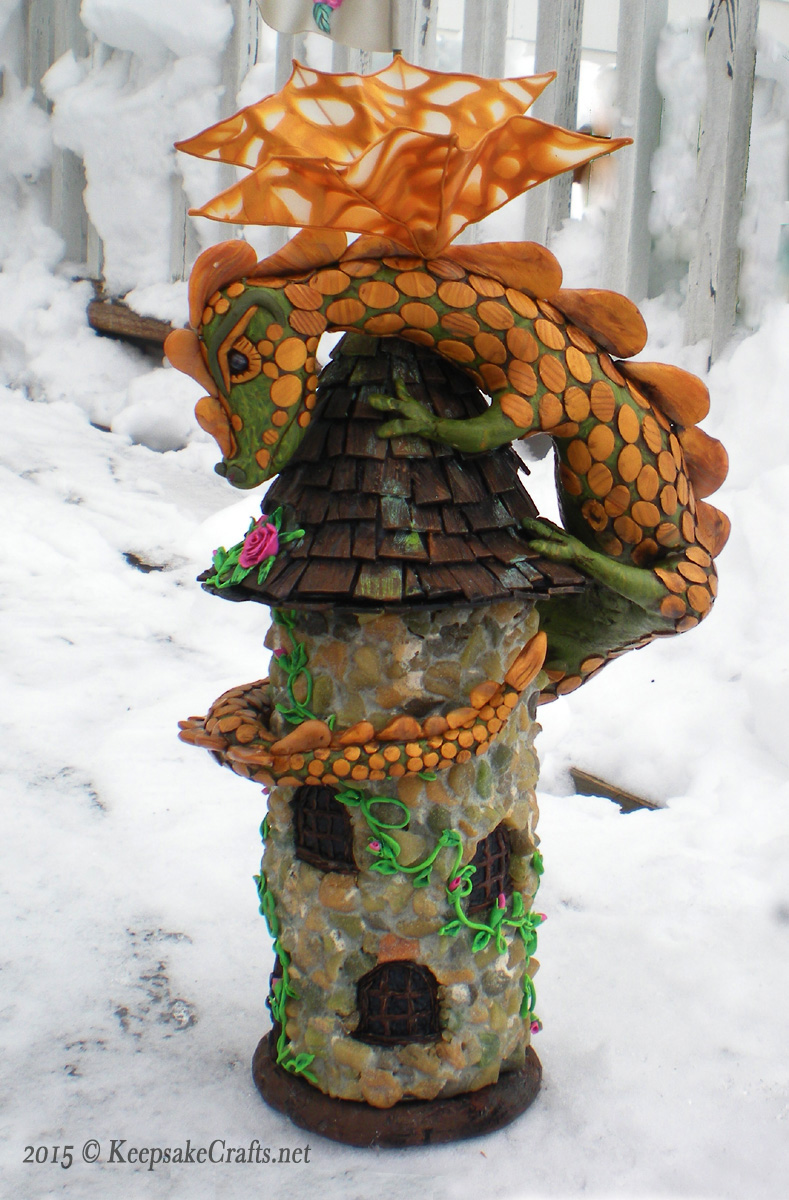
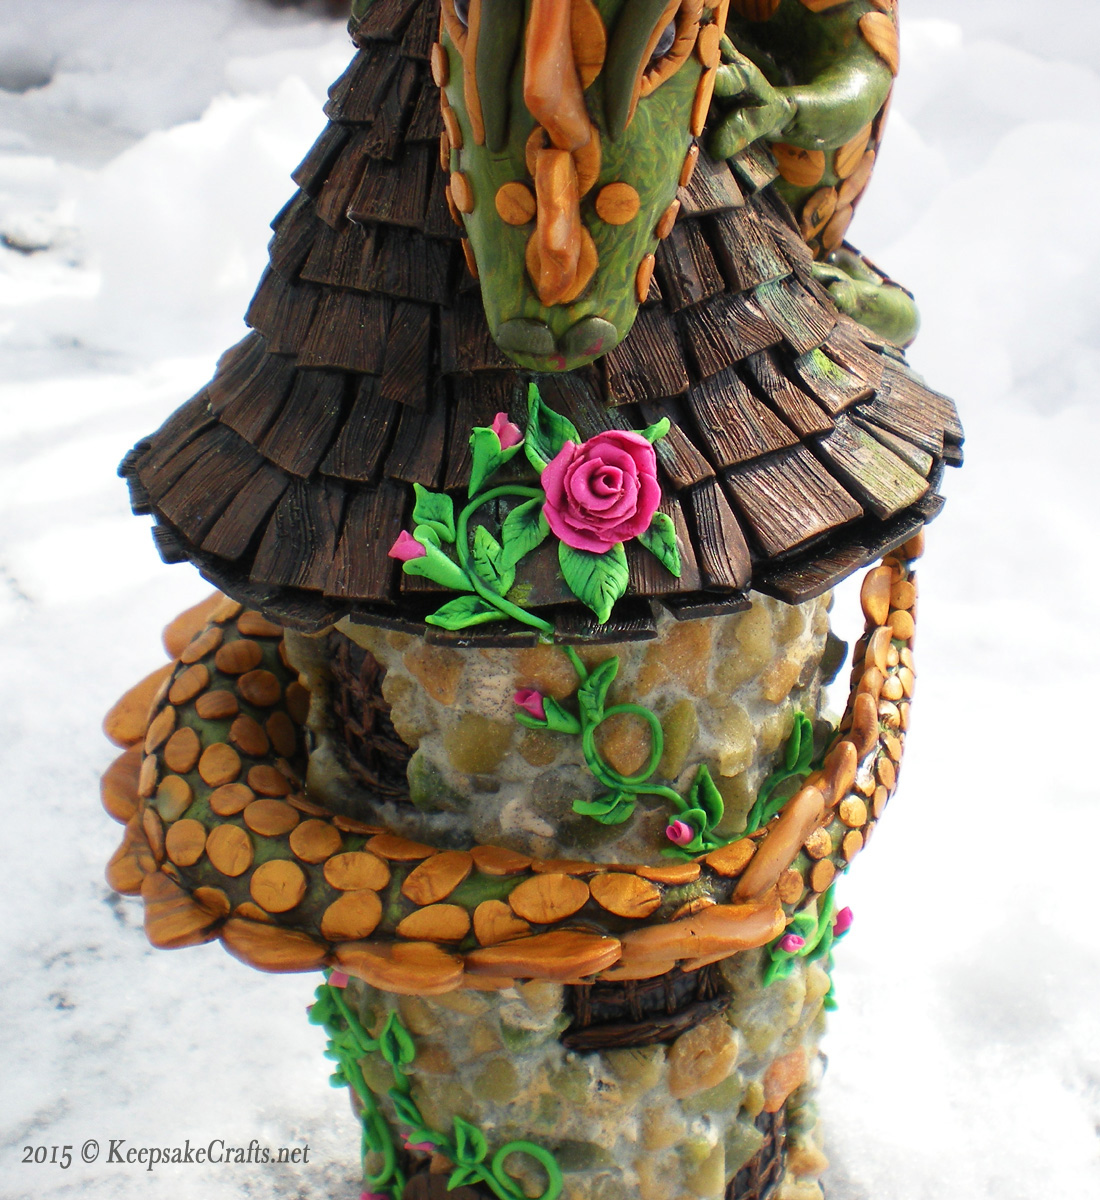
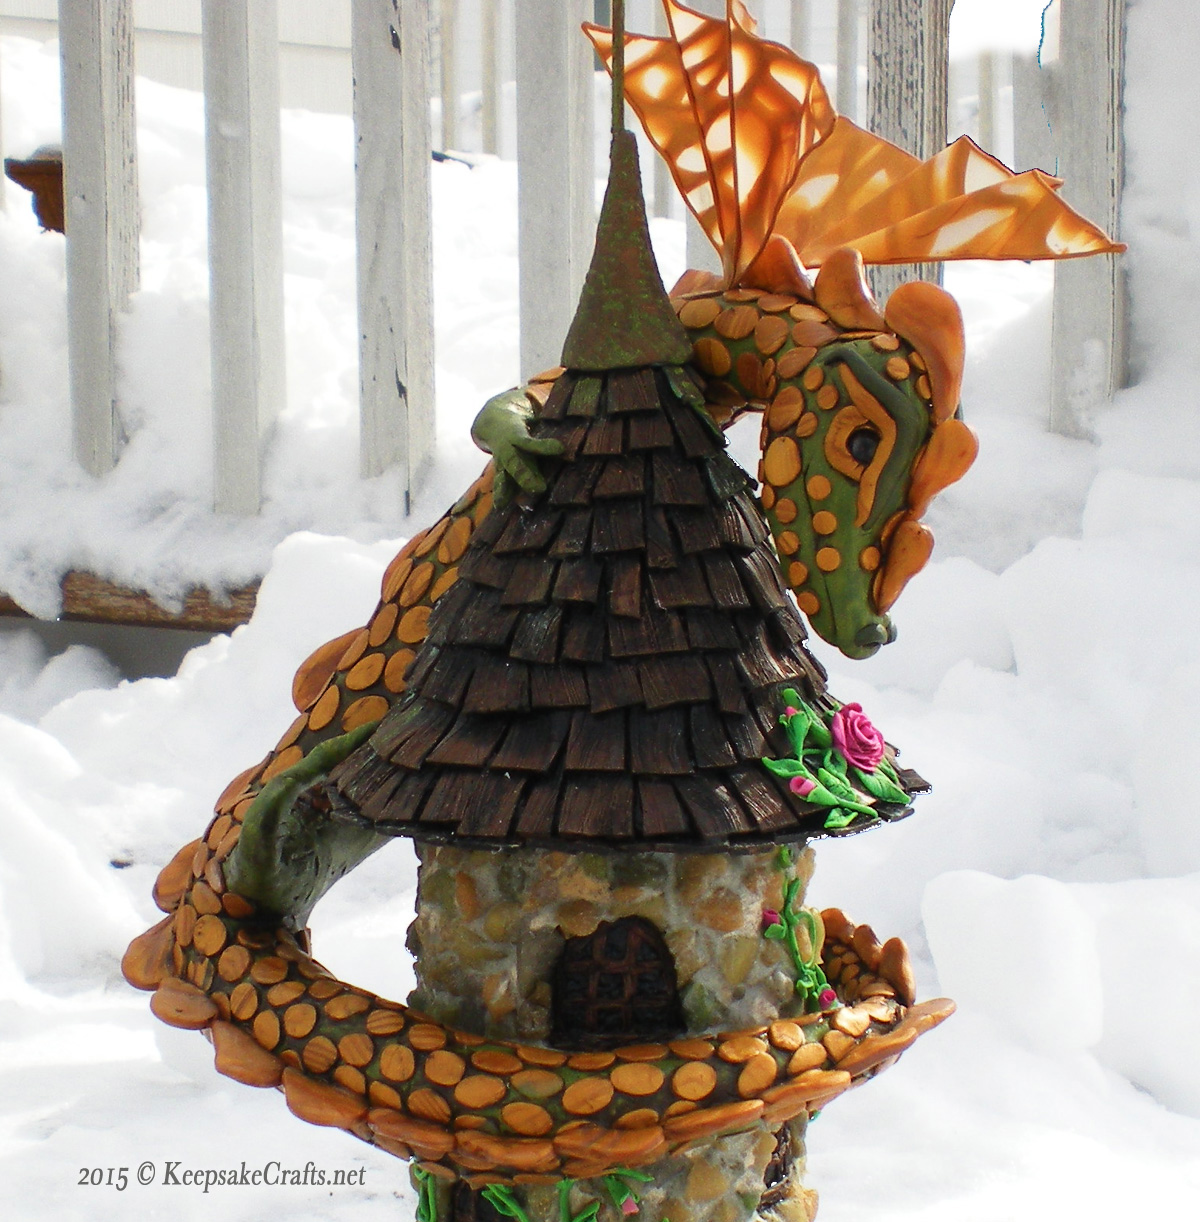
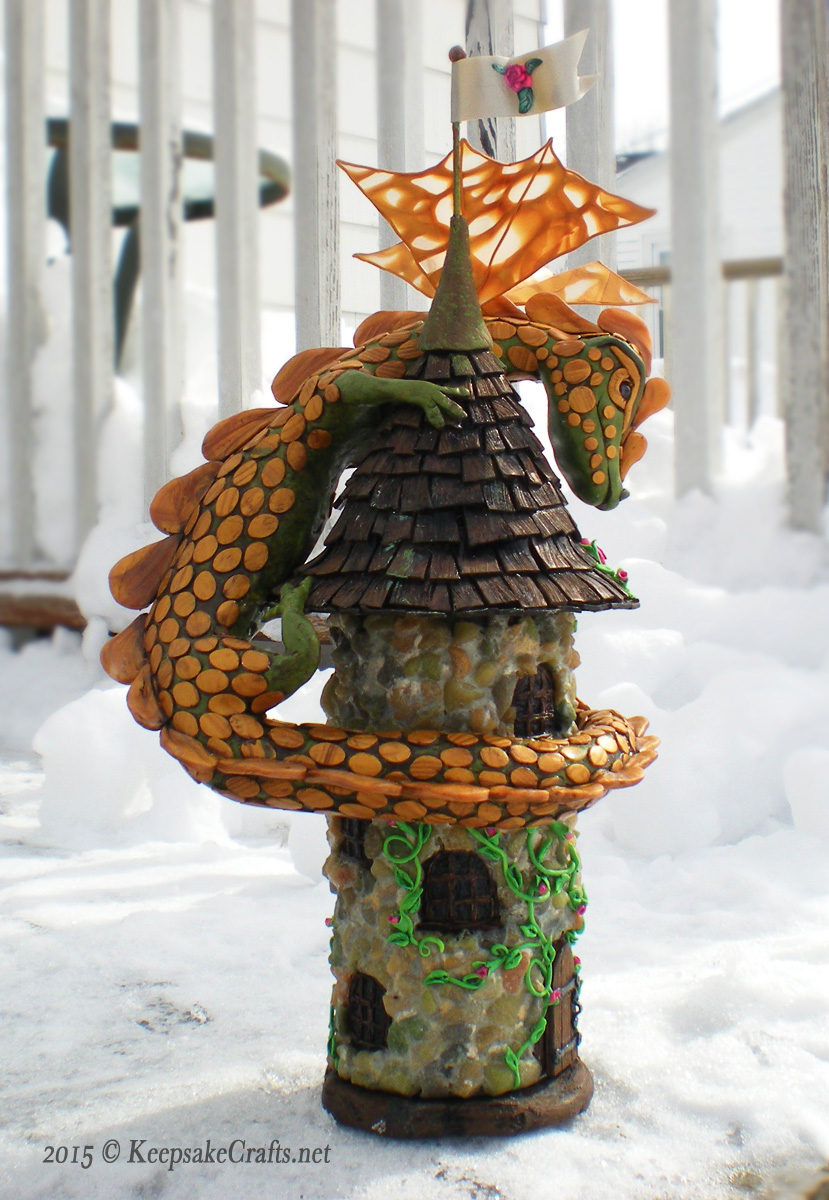
As you can see, Rosalita has climbed up on top of the castle to take a closer look at the first open rose of spring.
This project is one that’s been in the back of my mind for a long time. Ever since over a year ago a friend gave us a cylindrical tin of tea bags and every time I looked at it I pictured a castle turret with a dragon climbing on top. 🙂
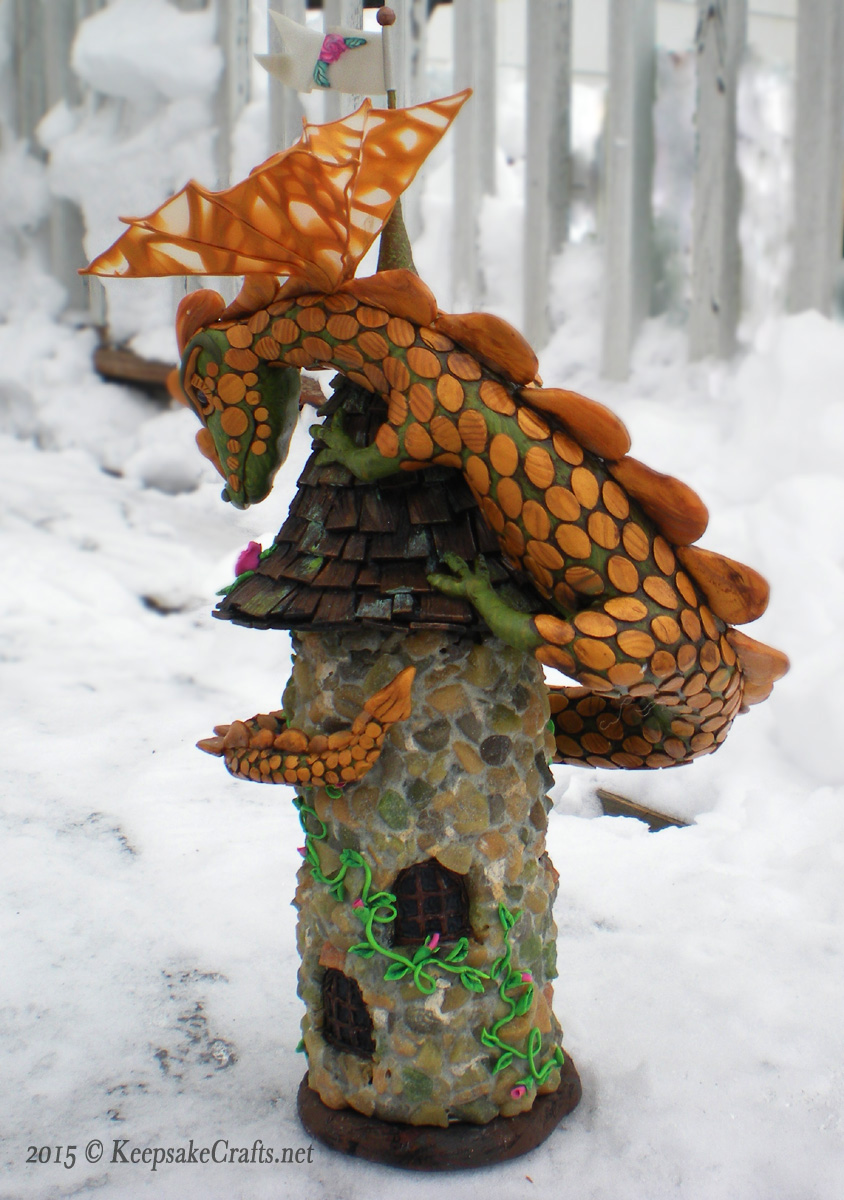
The tin is 2 1/2 inches in diameter and 6 inches tall, but I never imagined the project being SO HUGE.
Well, huge for what I’m used to. The finished sculpture is 14 inches from the base to the top of the flagpole. (The flagpole is a toothpick, just to give you an idea of scale.)
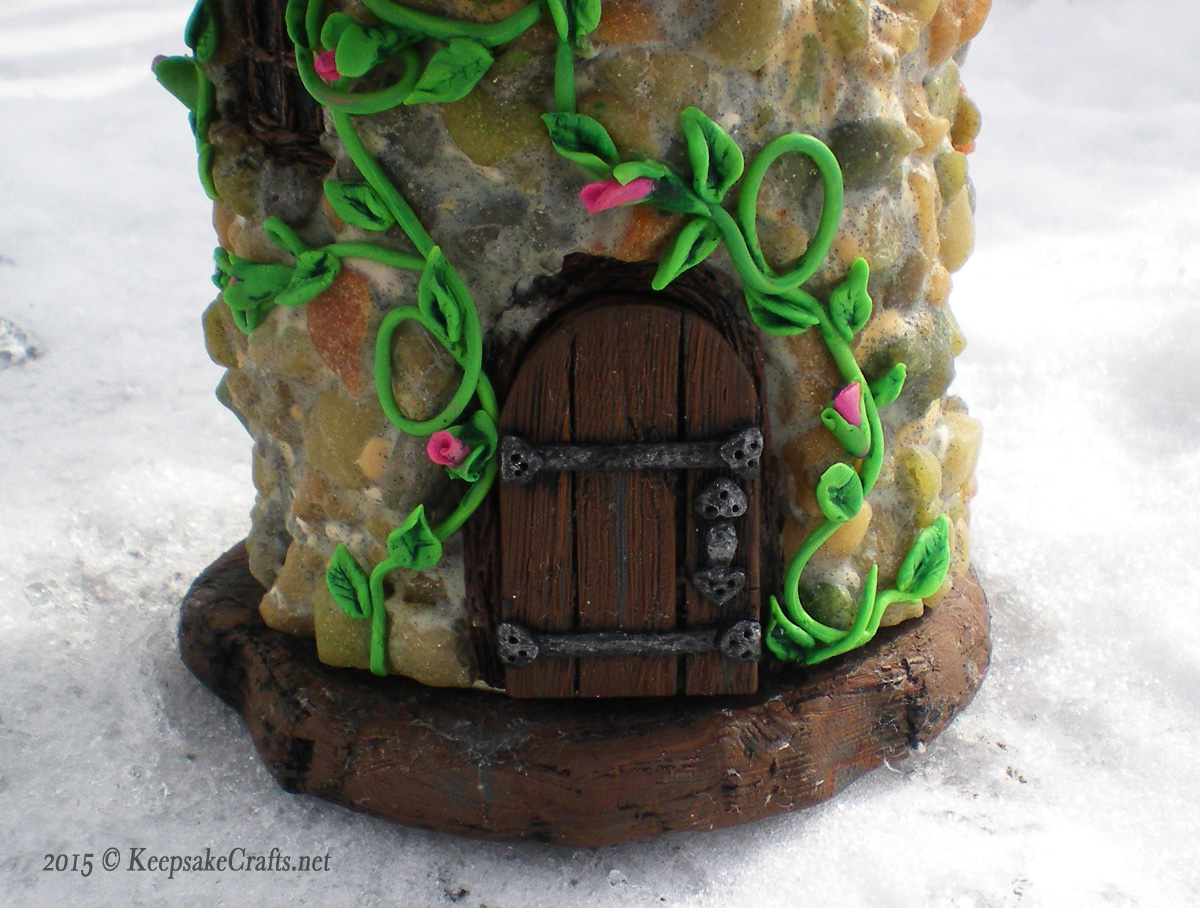
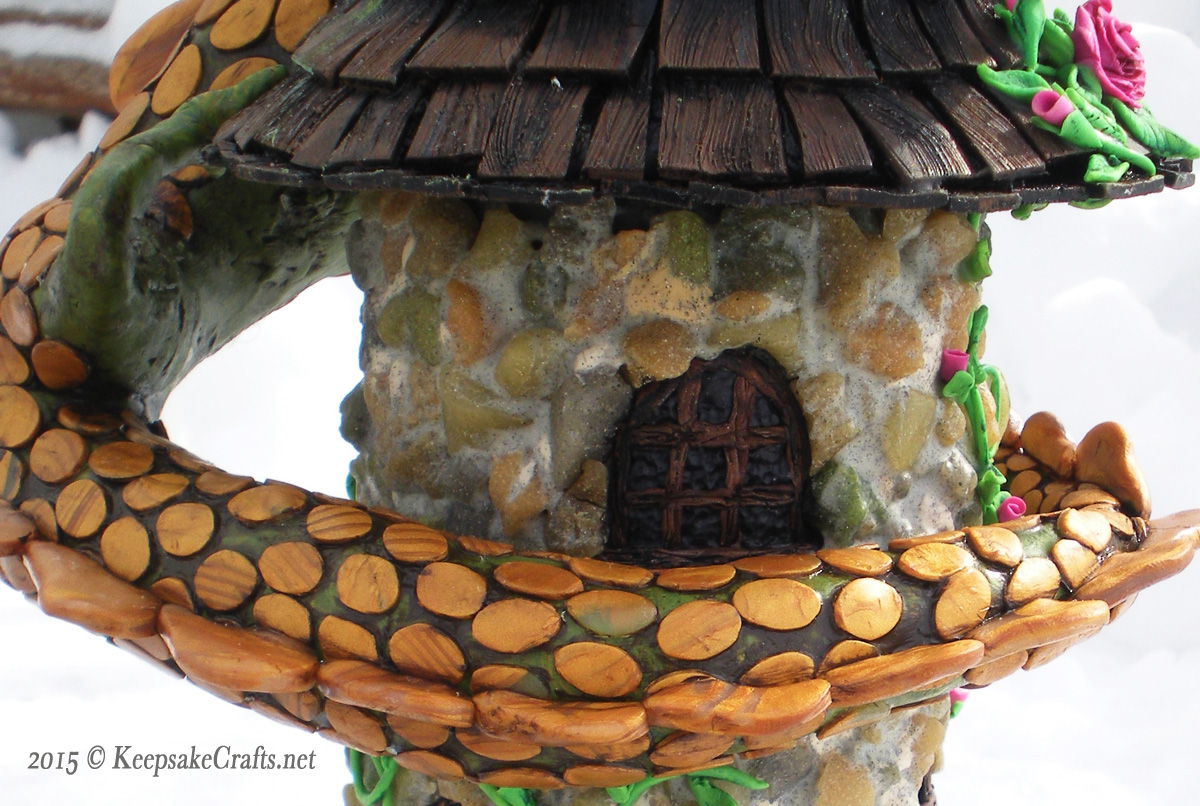
The stone work, windows and turret top alone took a week.
Then it was time to start on the dragon.
Somewhere in the middle of the project it became “that danged dragon” (or slightly stronger words which I shall not repeat.) 😀
I got discouraged along the way, but decided not to give in to the temptation to rush just to get it done. If I did that I knew the outcome would certainly be disappointing.
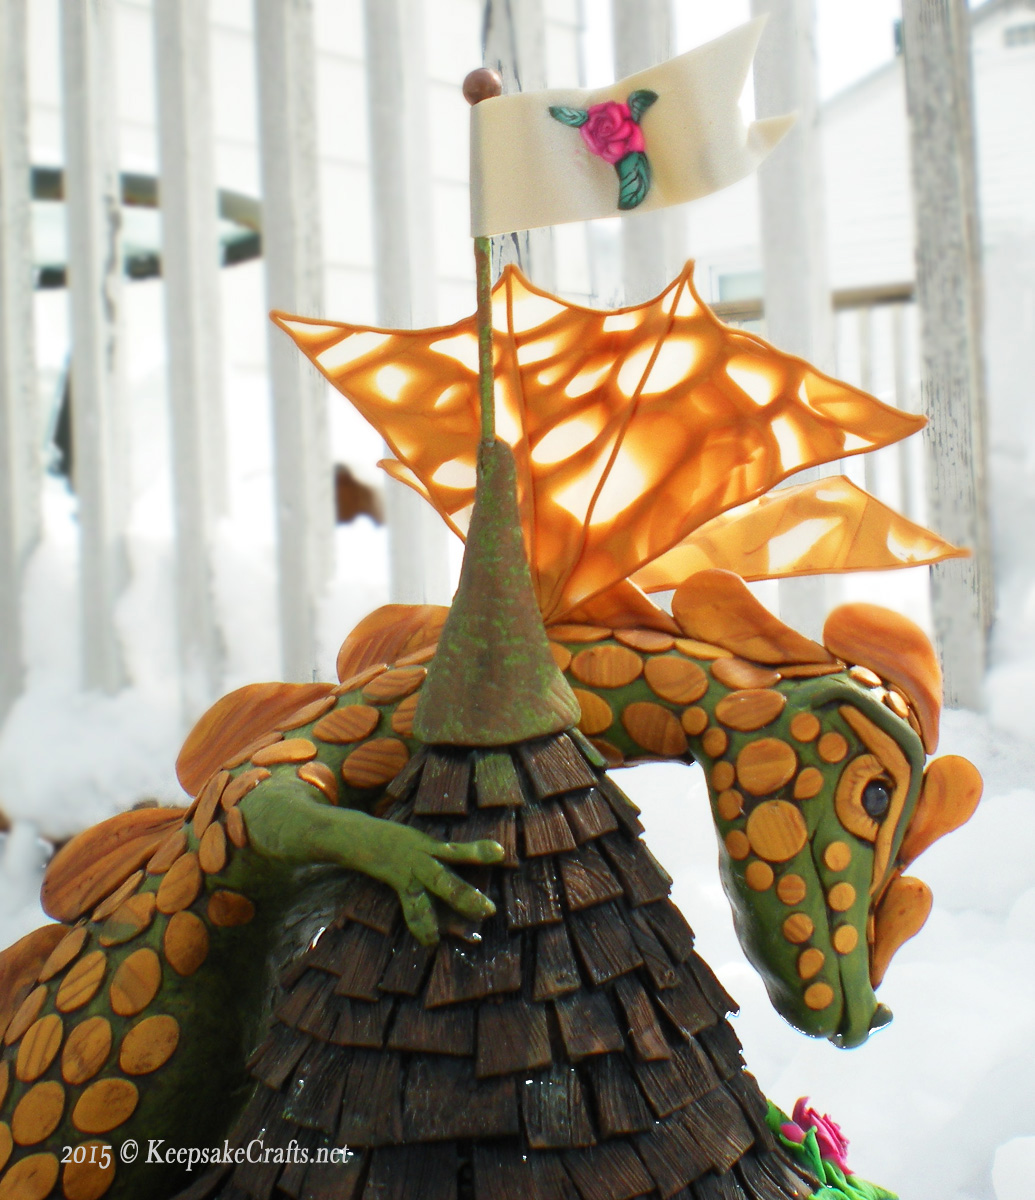
Yesterday (Friday) I finally got to the final details: the base, the door, the wings and the flag.
Yes, I made a rose cane just for the flag. I used an excellent tutorial over at Polymer clay central by Leigh Ross for the rose and the leaves.
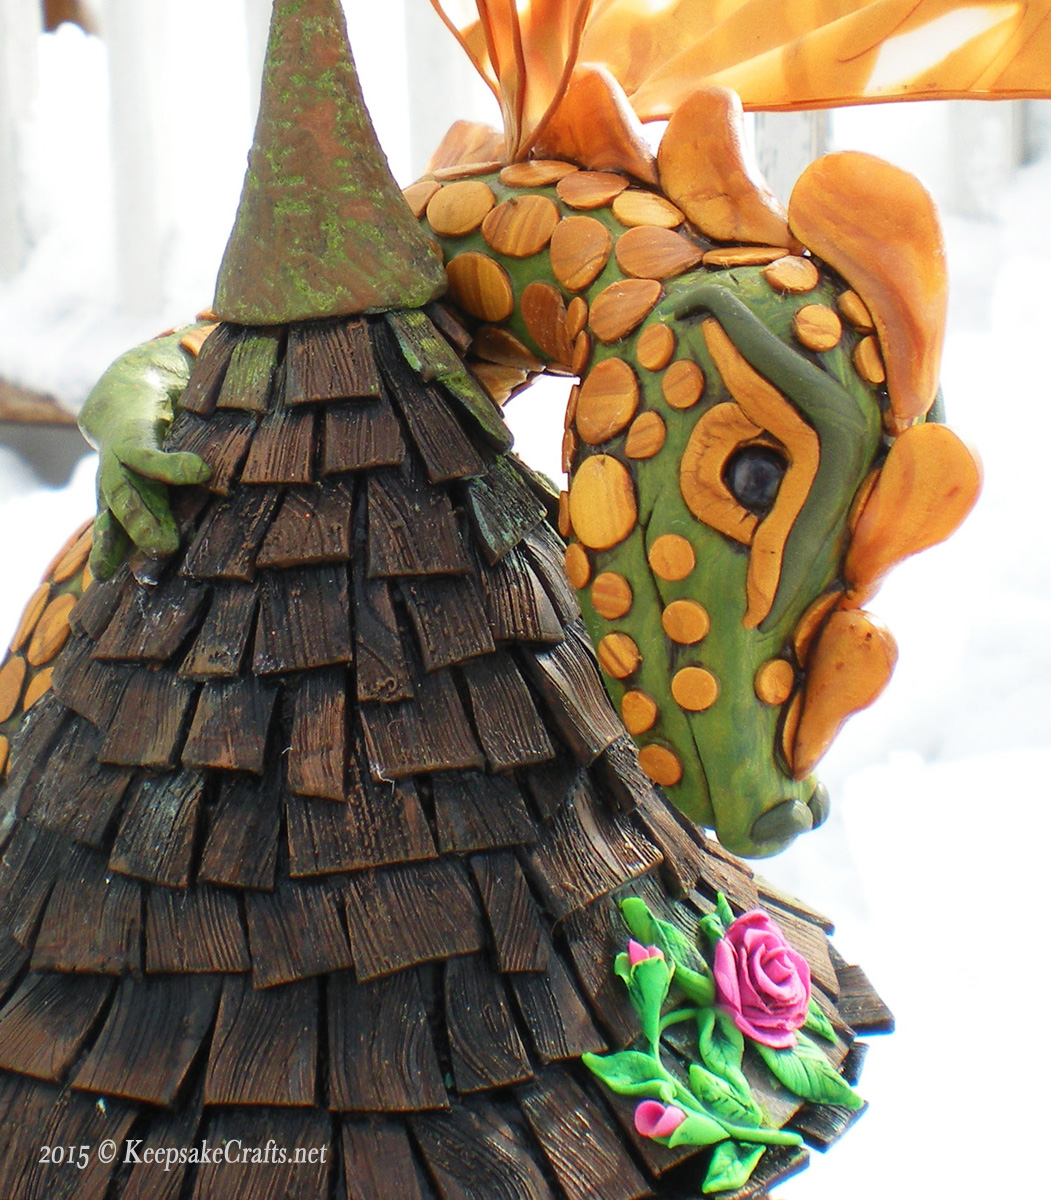
It was quite a trick figuring out how to make the cane into a flat flag with the cane showing on both sides, but it worked out.
Some things I’ve learned in the past two weeks:
- Things always take longer in reality than you might think. (Well, I knew that one already, but this really drove it home.)
- Creativity is sometimes just plain hard work!
- My favorite parts of sculpting are adding texture and detail, so sticking to a smaller scale would be wise from now on.
- Baked polymer clay can be heated with a heat tool (like scrapbookers use for heat embossing) for about 15 seconds to soften it. It will then be flexible enough to slightly reposition. This was how I got the dragon’s feet to cling to the tower. That and super glue.
Gosh, there were a lot of other tips and tricks I utilized or figured out, but that’ll do for now.
On to dragon #7, which I can promise you will be a lot smaller!
If you’d like to keep up with my dragon creations this year, I’ve made a Thursday’s Dragon Pinterest board just for them.

That was worth waiting for! Priceless!
I’m glad you think so.
I’m glad you think so. It was quite the learning experience!
Omg! Amazing! A lot of work for a stunning piece!
I am a great fan of your jewelry videos and today followed the link to your dragon page on Pinterest.
I have decided that Rosalita is my favourite especially after reading how much work went into making her castle etc.
Sandy, I am in awe of your talent and grateful you share it with us, so that we can have some beauty in our lives.
Thank you so much for the kind words, Beth! I’m glad you like the dragons. Rosalita is still one of my favorites, and she definitely took the most time of them all so far.
I’m glad you enjoy the jewelry videos, too. It’s nice to hear from you.
Happy creating!