


I just love any project with the “how did they do that” factor. This necklace fits that bill perfectly, with the illusion that the crystal beads are suspended on the wire.
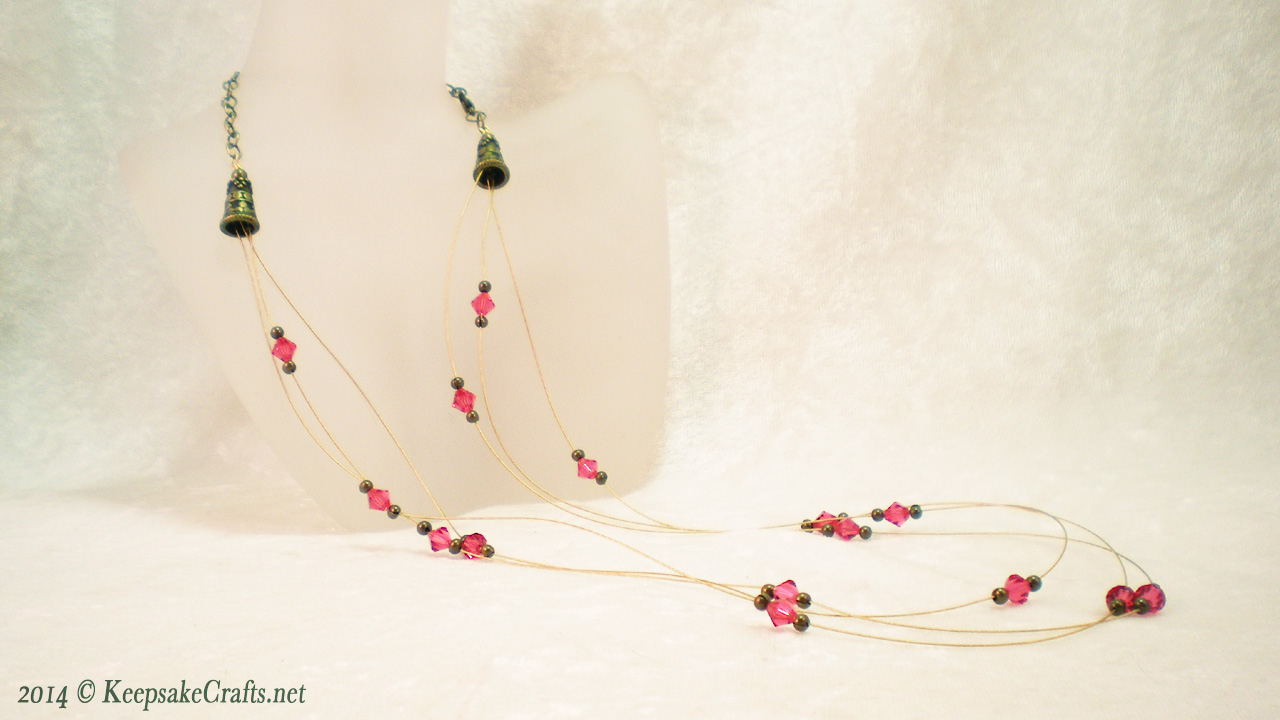
The secret is in the use of crimp covers, little doo-dads that disguise the flattened crimps and look like beads when closed.
Btw, yes, I did misspeak in the video, you only need two jump rings, not three. Also, I tried this on and think I’m going to add another 4-inch piece of chain to the other side. That’s the beauty of knowing how to make your own jewelry!
Enjoy the video and happy creating.
Materials:
- 3 pieces colored beading wire, 19 strand or higher, cut to 28-inches, 25 inches & 23.5 inches
- 15 6mm Swarovski crystal bicone beads, Indian Pink
- 30 crimp covers
- 36 2mm crimp beads
- 2 bead cones
- 2 3-inch pieces 22 gauge craft wire
- 4-inch piece chunky chain
- 2 jump rings
- lobster clasp
Tools:
- chain nose pliers
- round nose pliers
- wire cutters
- bead design board
- Arrange the 15 Swarovski crystal bicone beads on the design board with six beads in the outer channel, five in the center and four in the inner. Space them out filling in between the 12-inch marks on either side of the board. (For 24-inches of beaded wire.)
- Slide a crimp onto the longest piece of wire and use chain nose pliers to flatten bead near the center of the wire.
- Hold a crimp cover with pliers and place the flattened crimp inside, squeeze the pliers gently to close to crimp cover.
- Slide a Swarovski crystal bicone bead onto the wire, then add another crimp and flatten the crimp on the other side of the crystal. Cover the crimp the same way as in step three.
- Slide on another crimp, place the first crystal down in its place on the design board, then slide the newest crimp up next to the nearest crystal. Flatten in place with chain nose pliers and repeat steps 3 & 4.
- Continue in the same manner to add all 15 Swarovski crystals to the wires, each with a flatten crimp covered by a crimp cover on either side.
- Hold the three strands up to yourself in a mirror and determine the desired length and position of each strand. Tape both sets of ends in place, leaving at least 1.5-inches of wire sticking out from the tape.
- Choose the shorter wire in one group of three and slide on a crimp. Slide the wire back through the crimp until there is a 1/8-inch loop of wire remaining. Flatten crimp with chain nose pliers. Repeat with other two wires in the bundle, making each loop the same length. Repeat with other set of three wires & remove tape.
- Grasp a 3-inch piece of craft wire at its center with chain nose pliers and make a 90° bend. Grasp bend with round nose pliers and wrap wire around pliers as far as possible to start to make a loop. Reposition pliers to finish loop. Slightly twist loop to open and slide on three of six loops made in step 8. Close loop, hold with chain nose pliers and use another pair of chain nose pliers to wrap remaining wire around wire below 90° bend. Use wire cutters to trim, if necessary.
- Slide a bead cone onto wire to cover all crimps. Use chain nose pliers to grasp wire just at point where it exits bead cone. Bend wire at 90° angle. Grasp bend with round nose pliers and wrap wire around pliers as far as possible to start to make a loop. Reposition pliers to finish loop. Slightly twist loop to open and slide on one end of a piece of chain. Close loop, hold with chain nose pliers and use another pair of chain nose pliers to wrap remaining wire around wire below 90° bend. Use wire cutters to trim, if necessary. Use chain nose pliers to tuck in end.
- Repeat step 10 to add a bead cone and a jump ring to the other end of necklace.
- Add lobster clasp with a jump ring to end without chain.

Wow! This is elegant.I’d like to see your revised version as well.
Lovely necklace. So light and airy looking!