


It is so utterly freeing to be able to make everything in your jewelry, rather than having to rely on components and findings you get in the stores. It’s also great for those of us who are picky and want it to be just a little bigger/smaller/rounder/squarer or whatever-er. 🙂
Not only that, but hammering out wire is fun! I love watching it transform from something boring that was inside electrical lines (hubby reclaimed this wire for me) into something interesting and beautiful.
Of course, these would be beautiful in silver or brass wire as well. Whichever you choose, enjoy the video and happy creating!
Materials:
- 10 – 12 inches 14 gauge copper wire
- 25 – 30 inches 28 gauge copper wire
- 20 – 30 3mm beads
- 2 ear wires
Tools:
- chasing hammer
- bench block
- file
- 7mm bail pliers or 7mm round object
- wire cutters
- chain nose pliers
- 26mm x 20mm oval mandrel (or similar shape object to wrap wire around)
Directions:
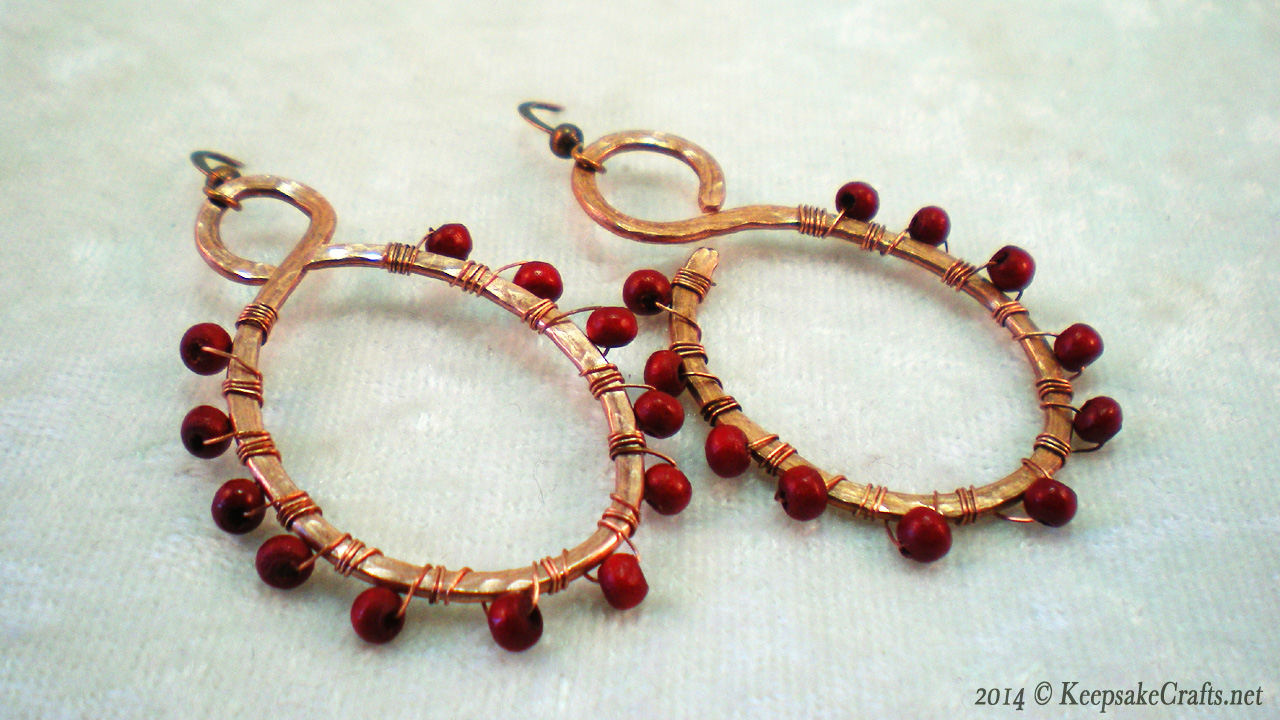
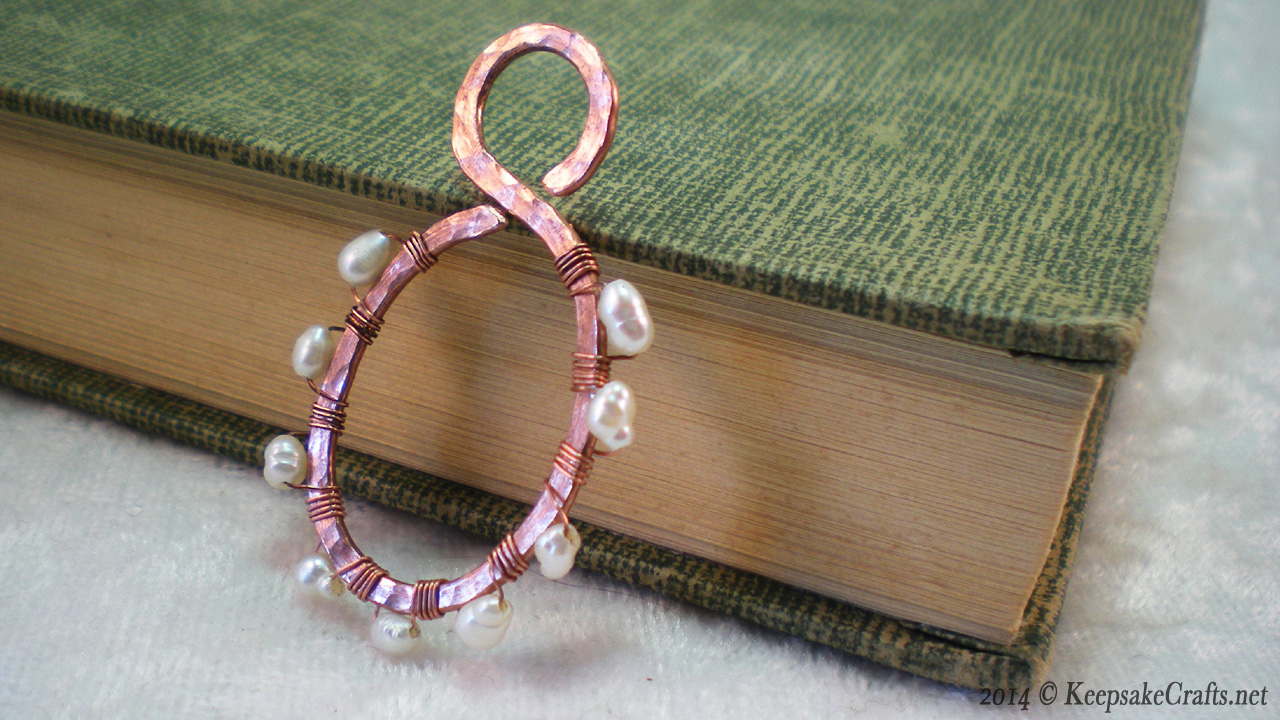
- Leaving wire on spool, wrap 14 gauge wire around 7mm mandrel or pliers to make a complete loop. Place section of loop where wires cross each other at narrow end of oval mandrel and wrap wire around, making one complete wrap. Trim excess wires so you have a figure “8” shape, with one smaller round loop and one larger oval loop. Repeat to make second matching shape.
- Use your fingers to gently shape wire frames to your liking.
- Use chasing hammer and bench block to gently hammer frames to an even thickness all around. (Frames will change shape slightly and loops may open. You can fix this after hammering.)
- If desired, use round end of hammer to create a dimpled texture on both sides of both frames.
- Use the file to smooth out wire ends. Use chain nose pliers to close any open loops.
- Wrap end of 28 gauge wire around oval section of frame starting just below the round loop. Wrap tightly 3-4 times, then trim excess shorter end of wire. Use chain nose pliers to crimp wire tightly to frame.
- Slide a bead onto the wire and hold to the outside of the frame. Wrap wire around the frame desired amount of times. (In the photos above I went around 3 times between each red bead and 4 times between each of the pearls.) Repeat adding beads and wrapping wire around frame until you’ve gone around the entire oval section. End by wrapping tightly 3-4 times, trimming off excess wire and using chain nose pliers to tightly crimp wires to frame.
- To complete earrings, open a loop of an ear wire, slide in small loop of earring frame then close loop of ear wire.

Oh these earrings are soo cool! Love the hammered texture on them.
Thanks, Nan. I think they’ll look even better after I patina them with liver of sulfur. I’ll be sure to share pics.
You do such great videos! I love all your cool tools almost as much as your jewelry. 😀