


Here’s a quick and easy necklace tutorial for you. The texture of the hammered stainless steel links gives it quite a bit of sparkle.
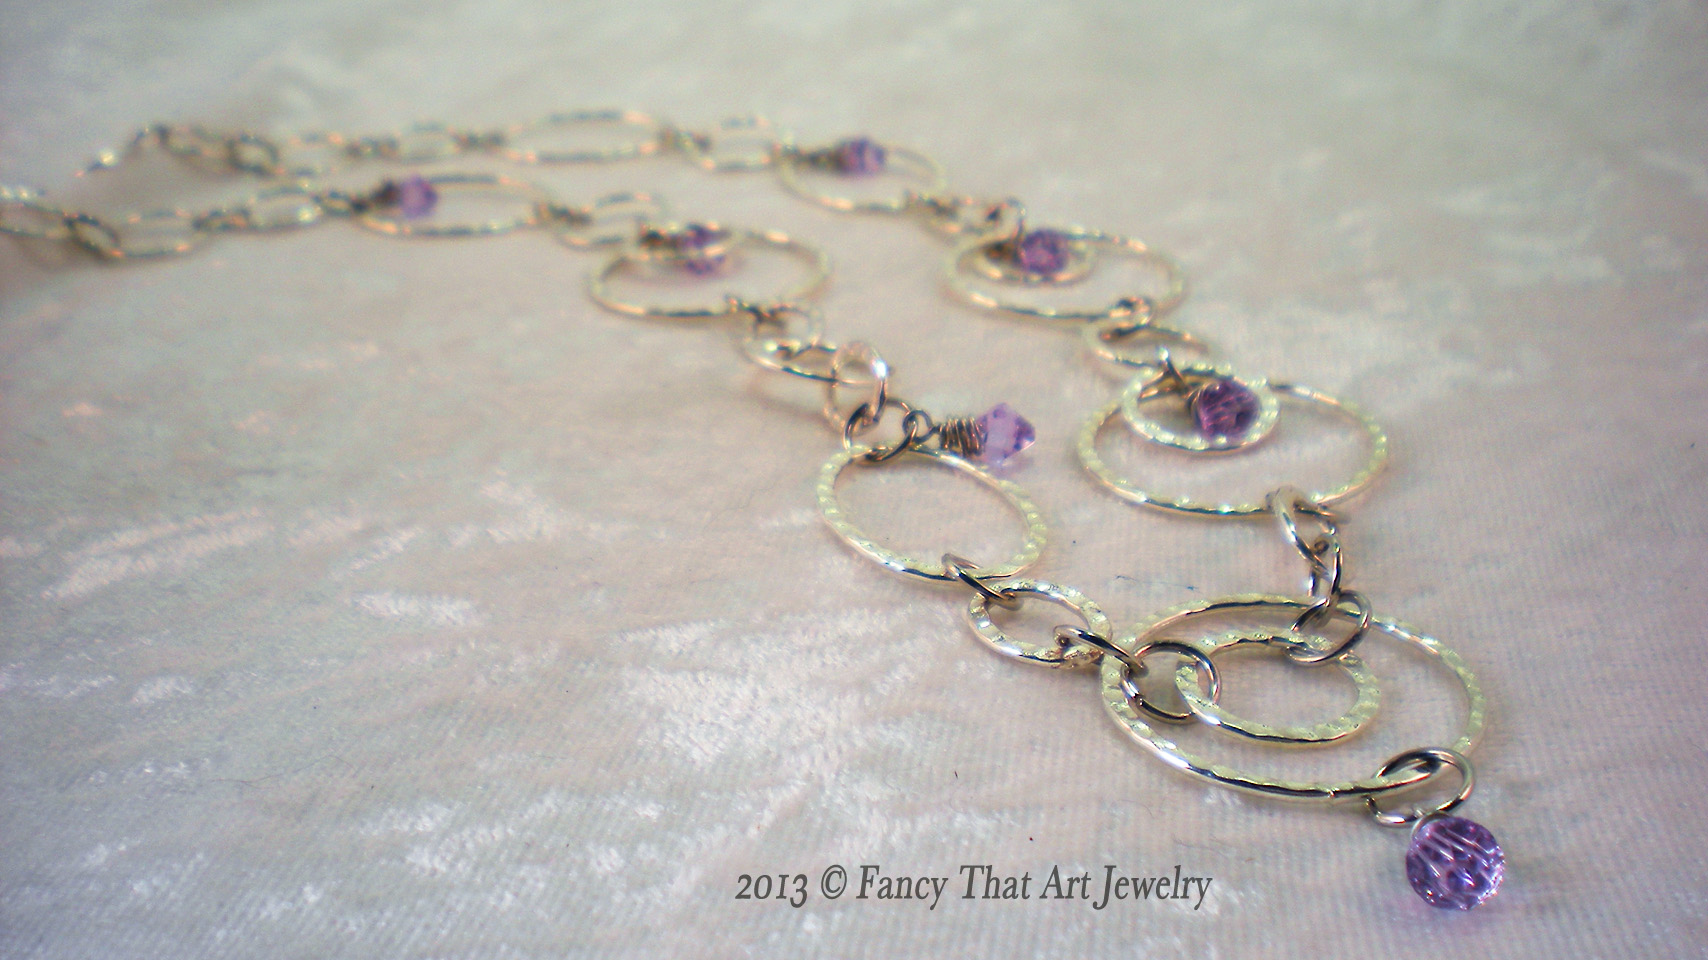
It felt like it needed just a little bit of color, so I wired up a few Swarovski crystal bicones.
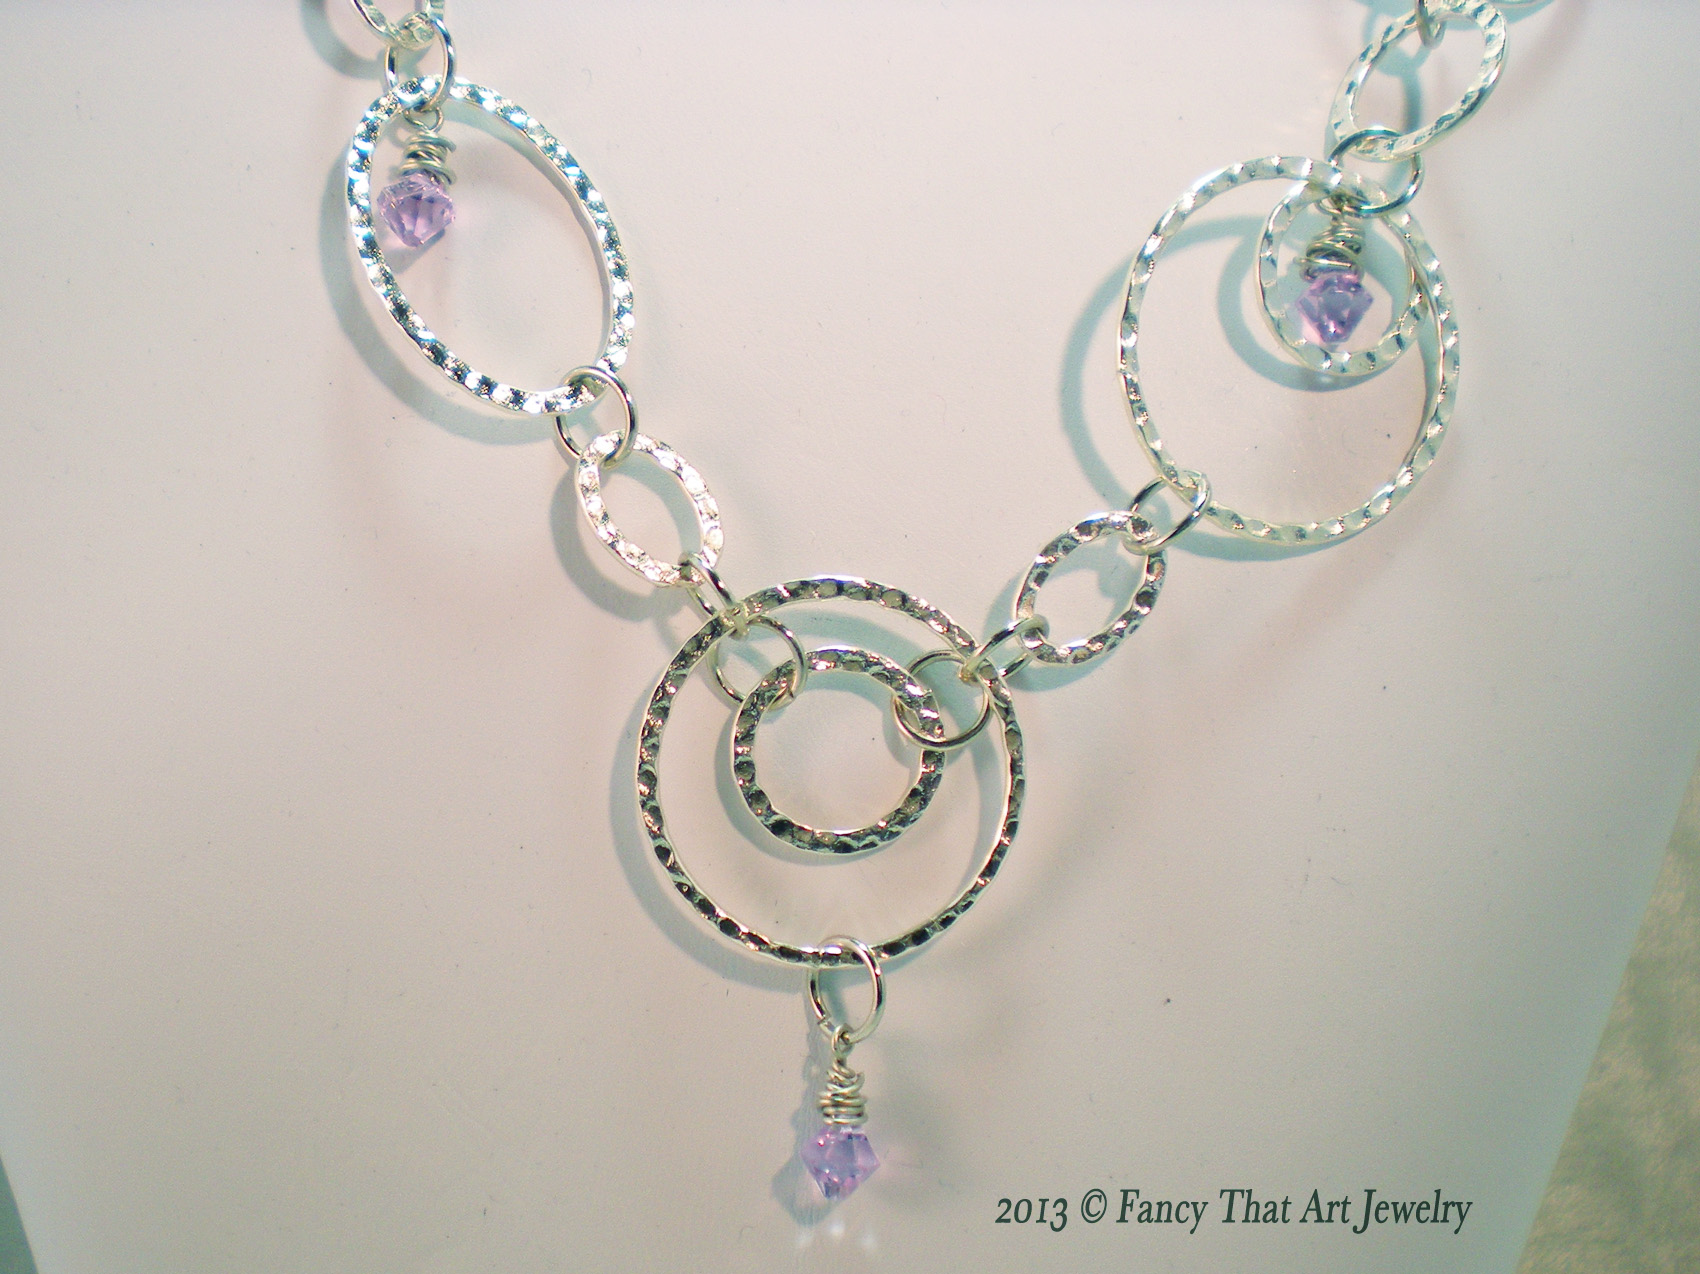
You can choose to make your necklace symmetrical or arrange your links asymmetrically, like I did. Whichever you like better.

The only thing that’s time consuming about this necklace is opening and closing all the jump rings and wire wrapping the crystals; otherwise it’s quite quick.
Here’s where you can watch the video over at my YouTube channel:
Hammered Links Necklace Video Tutorial
Happy Memorial Day and Happy Creating!
Hammered Links Necklace:
Tools & Supplies:
- 4 30mm hammered metal rings
- 4 30mm x 20mm hammered metal ovals
- 12 16mm hammered metal rings
- 12 14mm x 10 mm hammered metal ovals
- approximately 30 7mm jump rings
- 3-4 inch length chunky chain
- lobster clasp
- 7 6mm top drilled Swarovski crystals
- 22 gauge craft wire
- round nose pliers
- 2 pair chain nose pliers
- flush wire cutters
Directions:
To wire wrap crystals:
- Working from the spool of wire slide a piece end of wire into hole of bead, leaving ¼ inch sticking out on one side. Bend both wire ends up at 90-degree angle to hole of bead. Bend wires over top of bead, making a triangle shape. Bend remaining ends of wire up, perpendicular to bead hole. Trim shorter wire to 1/8 inch from bend.
- Bend longer wire at 90° angle. Use round nose pliers to make a loop. Wrap wire around bends and down to cover bead hole. This can be done with neat, tight wraps, or in “messy wraps.” Use wire cutters to trim wire when wraps are complete. Use chain nose pliers to tuck in wire end.
To make necklace:
- Arrange rings and crystals in desired order.
- Attach links and crystals together with jump rings.
- Use a jump ring to attach length of chain to one end of necklace.
- Attach lobster clasp to other end of necklace with a jump ring

That’s sweet! I love the rings in the rings.
Glad you like it. 🙂