


This is a fun, if rather tedious, technique Tim Holtz showed in his March tag of 2012. (Click on any pic to see a larger version.)
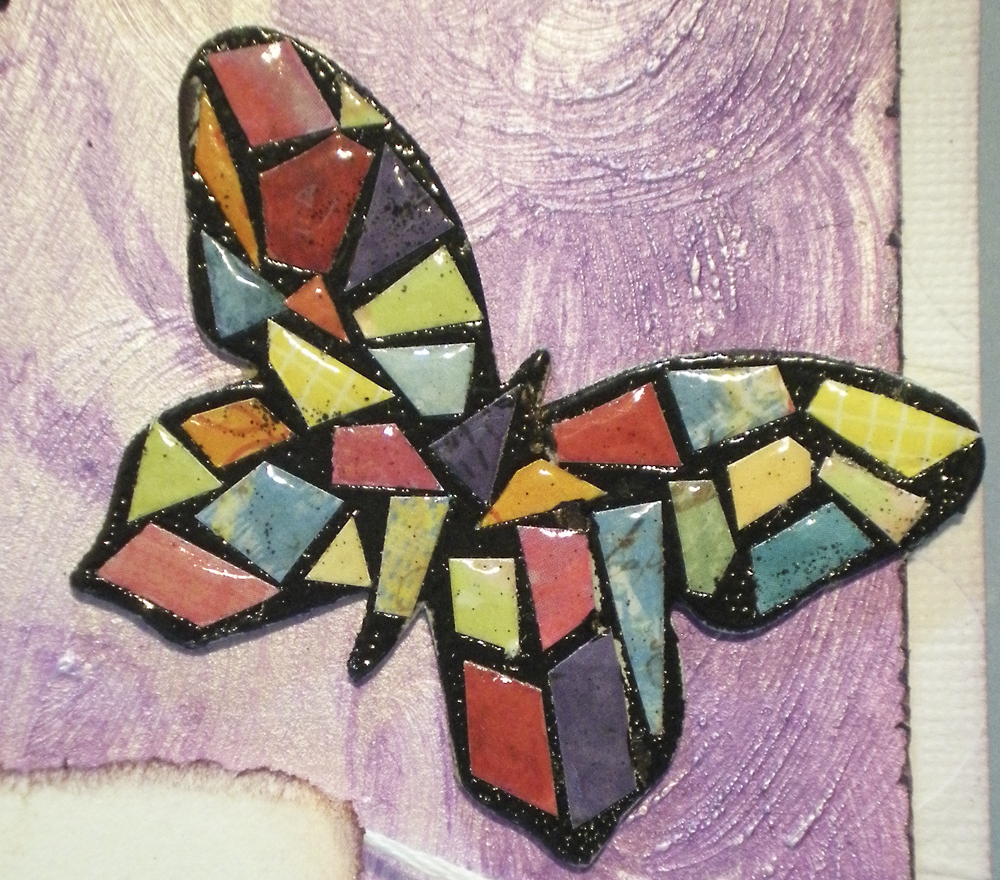
The first step is to cut up all those little bits of paper. Think they’re small enough? Cut ’em all some more… and probably more yet. Make sure you have tweezers… and patience.
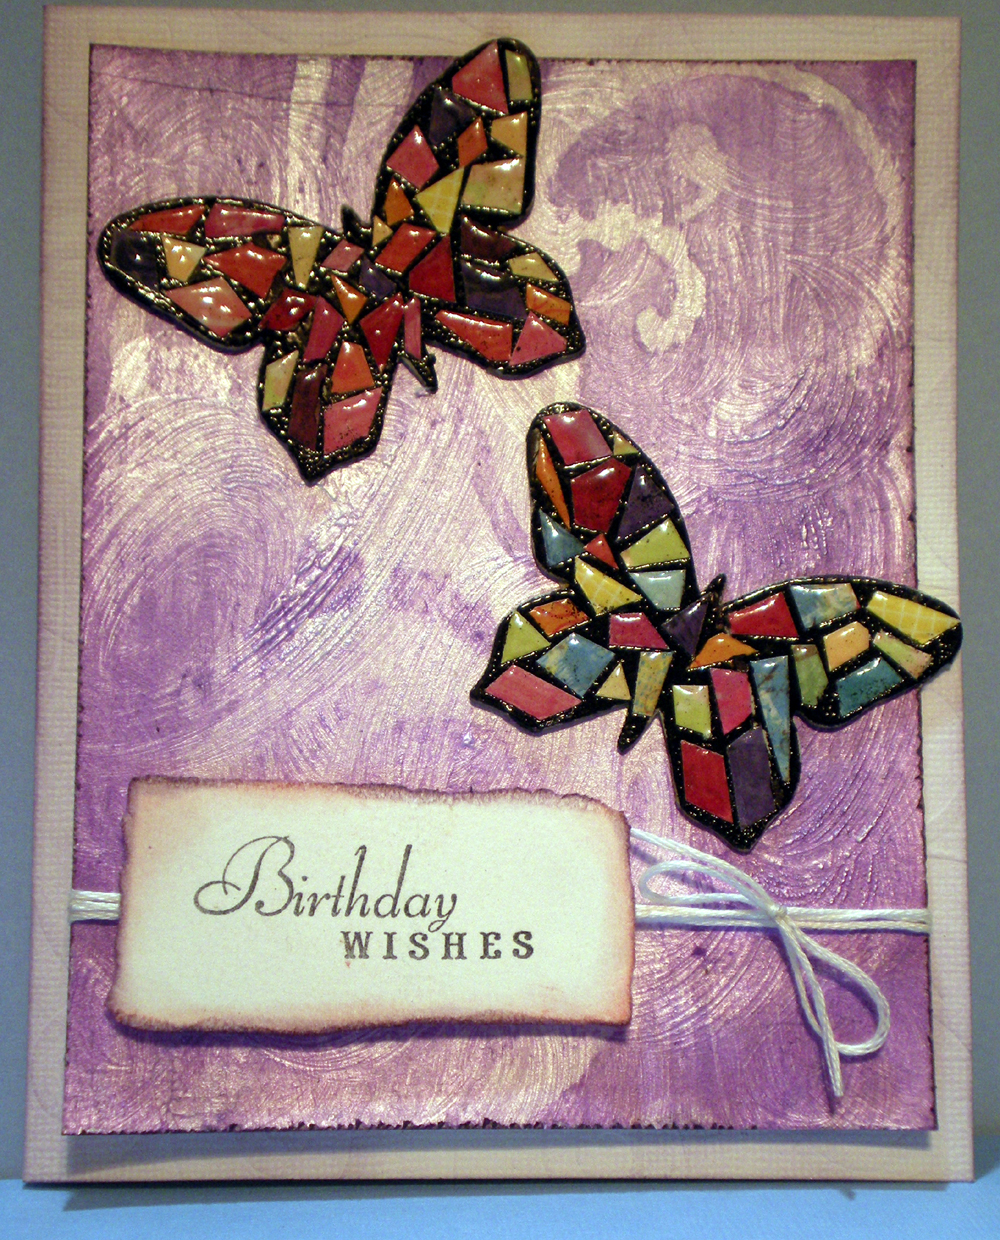 I found some chipboard butterflies and dragonflies that have been in my stash for ages. I didn’t have any Wondertape, so I pulled apart my Xyron mini sticker maker (it’s never big enough for anything I want to use anyhow) and used the adhesive from that.
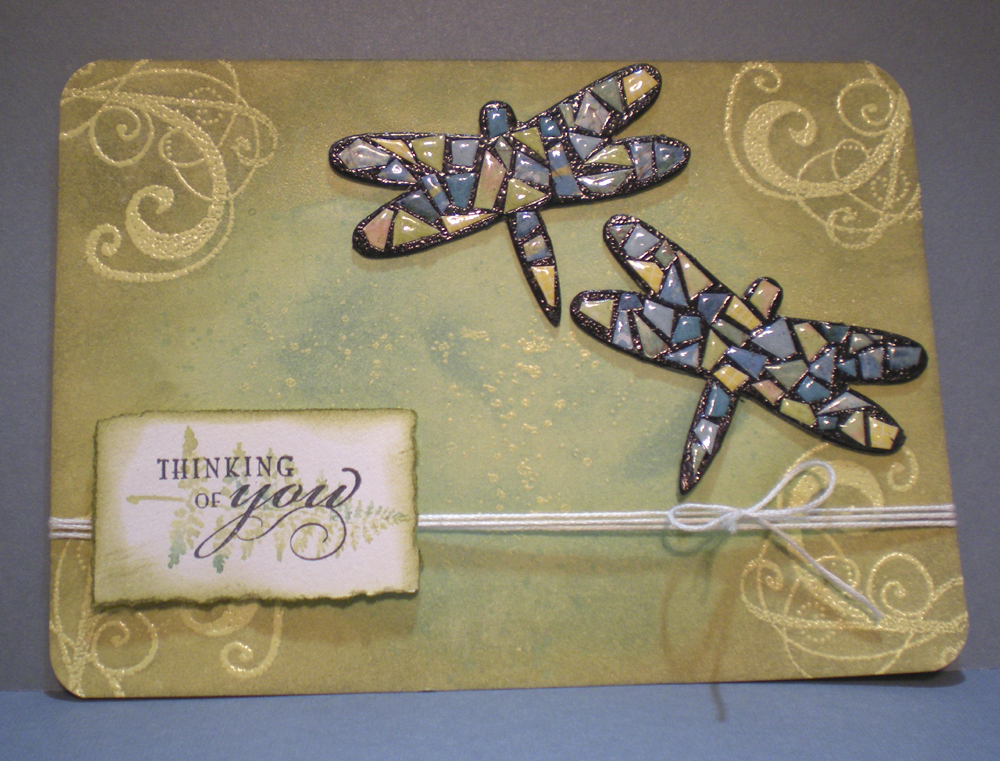
Tim used a grayish embossing powder to give the look of grout, but I decided I wanted more of a stained glass appearance so used black. I’m liking it. 
Both card backgrounds were in my stash of technique experiments. The green one involved inking over a heat embossed design. The purple one used paint over a mask. (Sorry I can’t be more specific than that! It was quite some time ago. I’m pretty sure both techniques can be found in one of Jennifer McGuire’s Thinking Inking classes. Probably weeks two and three, embossing powders and paint dabbers.)

This would be interesting with larger paper scraps as a scrapbook page or card border, but I wouldn’t recommend it for covering too much surface.
K, done that! Happy creating. 🙂

In fact, I like yours better than Tim’s. The black is a better contrast. Very nice.
Thanks! I find myself saying that a lot, “I made one similar to theirs, but I like my colors better.” 🙂