


Here we are with Part Two of our three part series, A Primer on Sewing with Knit Fabrics. If you missed Part One, you can find it here. Part Three is here.
Cutting out knit fabrics
My favorite tool for cutting out garments is a large cutting mat and a rotary cutter. My reasons are a) it’s quick, b) it’s easy and c) I’m lazy. For cutting out knits, though, there’s another reason, d) it’s more accurate.
As you use scissors to lift up the edge of a knit to cut it, it gets slightly distorted. The more drapey the fabric, the more potential it has for getting distorted. A better method is the following:
1. Cut out all your tissue pattern pieces on the cutting line for your size.
2. Lay your fabric (usually folded with selvedges together) on the cutting mat. The grain lines go along the length of the fabric, the stretch always goes around the body.
3. Do NOT have excess fabric draping off the table, this will stretch and distort your pieces.
4. Rather, lay out as many pattern pieces as will fit on the mat, then gently accordion fold or puddle the excess fabric at the end of the mat.
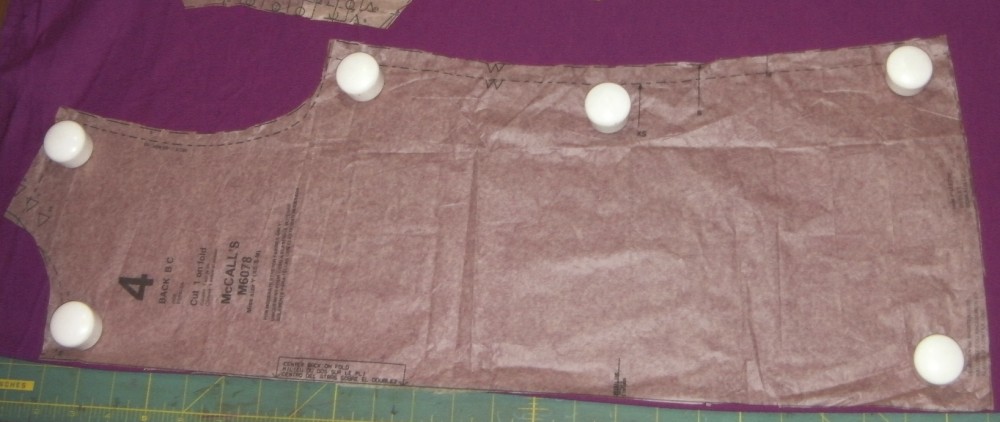
5. Use pattern weights to hold down the corners of the pattern pieces. (If you don’t have pattern weights, you can just use small cans like tuna fish cans or go here to make your own.)
6. Use a straight edge and a rotary cutter to cut the straight lines. Use the rotary cutter to carefully cut any curves. (If you have very tight curves, use a smaller rotary cutter, like a 28 mm.)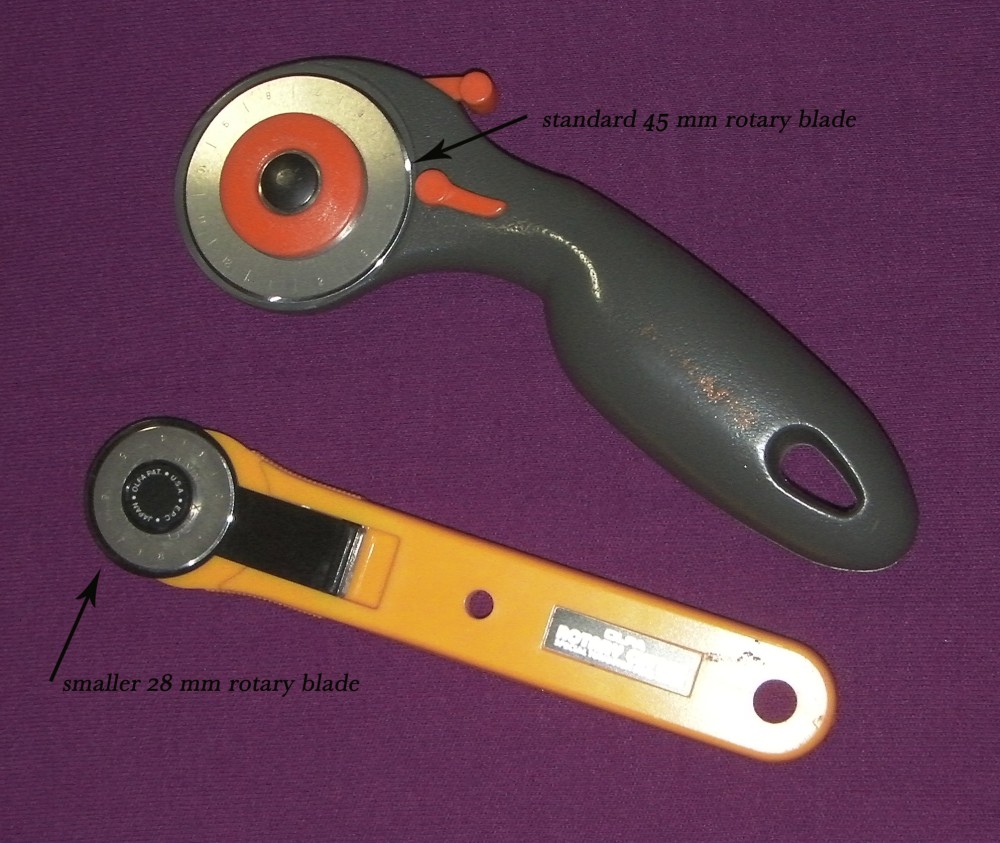
Did you ignore my advice and get that slinky knit anyways?
If you absolutely had to have that slinky knit I warned you about above, here’s how to deal with it for the most success. Follow step one. Before following step two, lay out lightweight paper such as unprinted newsprint, tracing paper or tissue paper on the mat. Lay out your fabric on top of this paper, making the selvedges and fold as even and parallel as humanly possible. (Now you know why it’s called slinky.)
Continue with steps three and four. Instead of using pattern weights for step five, carefully pin through all layers (tissue pattern, both layers of fabric and paper underneath) along all the edges of the patterns. Having your fabric pinned between two layers of paper keeps it from shifting out of shape. The more pins you use here, the easier the next step will be.
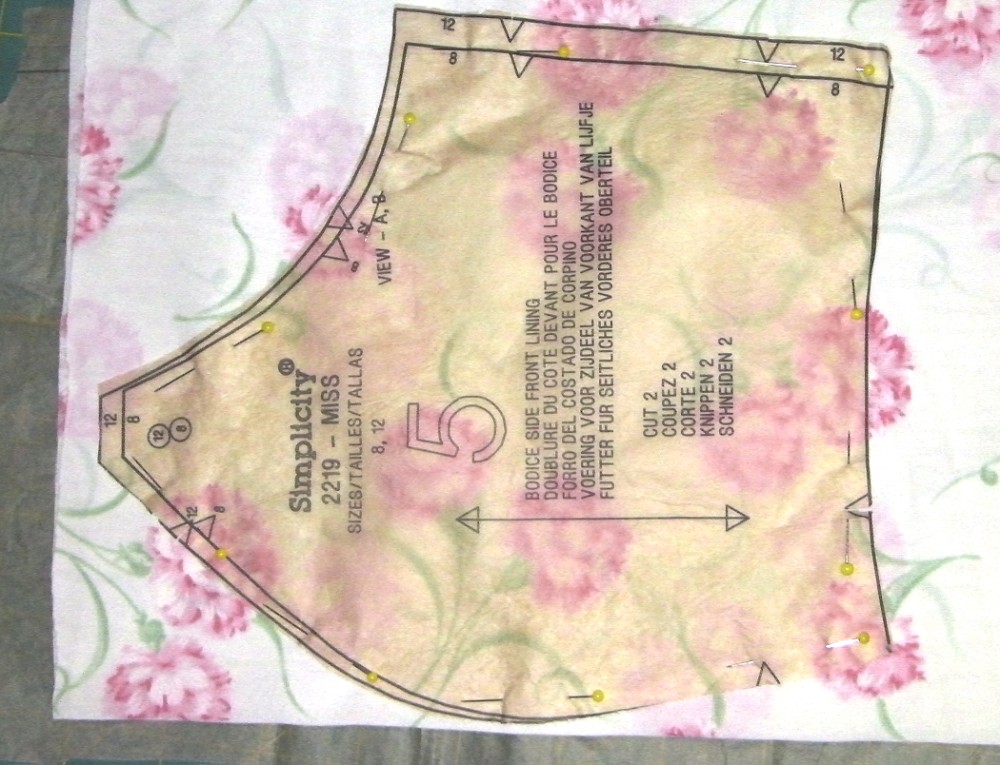
Now you can use either scissors or a rotary cutter to cut out your pattern pieces. (I don’t own any, but I’ve been told that using micro-serrated scissors helps here as well.) Use your favorite method to mark notches, etc. (You might notice from the photo that I like the quick method of clipping into the notches. I usually use a water soluble fabric marker to mark the dots.)
Now, go ahead and cut out your pattern. I’ll wait. 🙂
Next time, Part Three, Needles & Stitches (choosing the right ones can make all the difference.)

Okay, I have to admit you’re making sense. It never dawned on me to use a rotary cutter on fabric patterns. But until DeAnna corrupted me, I didn’t have one.
But–slinky knits? Sandy, I’m 56 years old. I’m not buying any stinky slinky knits. Thanks.
Lol, Robin. The term “slinky” does not refer to how you will look in the clothing (unless you make it three sizes too small!), but rather to its lovely feel and drape in the hand. …And its tendency to slither off the cutting table. Hence, the paper stabilizing technique.
Actually, I would think a draped top out of slinky knit worn under a jacket with nicely tailored slacks or a skirt would be a perfectly appropriate outfit for someone of any age. (Now I’m going to have to go make one just to prove it to you, haha.)
Cutting out clothing with a rotary cutter is the best; you’ll never go back to scissors.
You may be right. I’m trying hard to think of where I’d wear a slinky knit under a jacket with nicely tailored anything. Thinking, thinking. . . .
FINE. ===sigh===
How about a t-shirt? Would you make a t-shirt?
Where do you get pattern weights like those? I’ve searched Google, but can’t find any. Thanks for your tutorials.
Hi Verna,
I’m glad you enjoy the tutorials!
Those pattern weights were a gift from my mother-in-law over 30 years ago, so I have no idea where you could find them. Here are some similar ones with good reviews: https://amzn.to/2GP3YZS Hope this helps, happy creating!