


Many of you have been eagerly awaiting the results of the lavender jacket alterations. I’m here to tell you it has been a complete success. (I’m actually kind of in shock about that, lol.)
Without further ado, here is my lavender jacket, formly known as the-jacket-that-was-loved-but-was three-sizes-too-big:

If any of you are interested in trying this yourselves, here are the steps I took:
- Take measurements from the garment. I measured the front width – armpit to armpit, the back width, armpit to armpit, around the sleeve at the armpit, the widest point of the sleeve (just below the cap), around the armscye and the back neck length.
- Then I took these same measurements from a garment that fits and calculated the difference.
- Carefully take apart the garment, making notes about construction details that you may need when it’s time to put it back together.
- Make a pattern from each of the garment pieces. (I used a 19″ x 24″ pad of tracing paper.)
- Figure the number of seams in each pattern piece and grade down the pattern using the numbers you calculated earlier. For example, the sleeves have only one seam, so two seam allowances. The difference between the two jackets around the sleeve was 3/4″, so I made each seam allowance half that measurement (3/8″) smaller. I tapered this to the original measurement at the cuff. The back has two darts and two side seams, so I divided the difference in the two jackets by four.
- Cut out patterns to your new dimensions and trace these dimensions to your fabric pieces. (Don’t cut your fabric just yet!)
- Baste together your fabric pieces along the new seamlines and try on to check the fit.
- Make any needed fitting adjustments on your patterns and fabric pieces, then sew your garment back together.
- Now you not only have a favorite garment that fits, but you have a pattern to duplicate it any time you want!
I’m really quite thrilled with how this came out. I guess many years of sewing experience has paid off. ***grin***
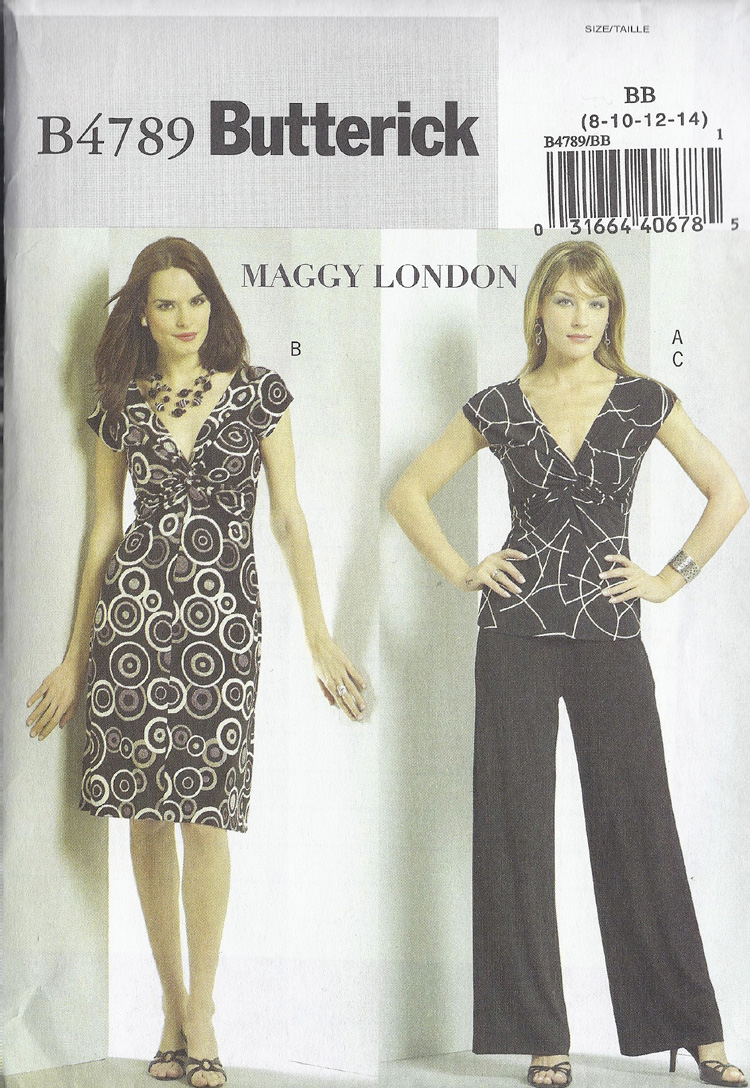
Last week I posted this Maggy London twist top I’d made in the turquiose bamboo knit fabric. I think I’m falling in love with this pattern, it works up so quickly and the top is flattering and easy to wear.
I decided to make another version in a fabric from my stash, a 4-way stretch swimsuit fabric, no less. I love the border print and added the trim along the sleeves just because I had it.

And, finally, YES the Easter dress is done and ready to go. I don’t think I’ll make this pattern again, Empire waists really aren’t my thing. I would have made it a bit longer, too. But, all in all, I’m pleased with it. I picked up a bunch of beads this week at Joann’s to make a necklace to go with it. We’ll see if it gets done by Sunday . . .


Those are GREAT, Sandy! I LOVE the jacket. Is that a zipper front?
All of the pieces turned out really well. Do you have a nice big floppy hat to wear with the dress? Do y’all wear hats? I wish people wore hats down here (in Texas)–besides the backwards ball caps, I mean.
Hi Robin, thanks! Yes, it is a zipper front.
I LIKE the hat idea, I’ll have to look for one while I’m shopping today. 🙂 We don’t see many hats around here except for dew-rags and baseball caps. When I was in college I wore all kinds of funky hats, dunno why I stopped.
I hope you and yours have a wonderful Resurrection Sunday!
Great job with the jacket, easter dress and twist top. Wish I could sew like you! Patsy from HeARTworks