


A Valentine’s card seems appropriate for my first post in February. This one is a lot of fun, combining many simple, yet beautiful techniques.
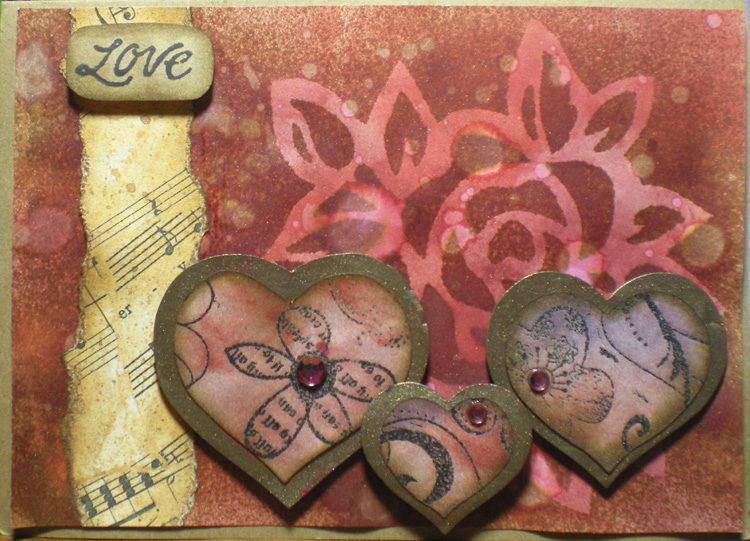
Believe it or not, this lovely background starts with a sheet of plain white cardstock. First, apply a mask to your background. I used a stencil that had been hanging around for ages and sprayed the back with spray adhesive. (Check the instructions first, many spray adhesives will become a tacky removable adhesive if applied according to the directions.)
Next, you’re going to make your own custom pearlized mist. In a Mini Mister combine one dropper of Distress Reinker (I used Vintage Photo) and one scoop (use a craft stick) of Perfect Pearls (I used Heirloom Gold.) Fill the rest of the mister with water and replace the cap, shake well.
Now mist over your cardstock, covering completely. You’ll get a gorgeous pearly shimmer. Blot up the excess ink with a paper towel and remove the mask. You can use a heat tool to speed up drying, but make sure to remove your mask first.
Ink up entire card, including the masked area with distress inks (I used Worn Lipstick, Fired Brick and Aged Mahogany.) Ink the edges of the card with browns (Vintage Photo and Walnut Stain.)
Here’s how to make those cool, blotchy spots (it’s SO easy!) Spritz a little water into your hand, then flick the water onto the card with your fingers. Here’s the important part: Let the water droplets sit on the paper for 10 secondsand then blot up with a paper towel. Now you have cool faux bleach spots! (This works best with distress inks, they play nicely with water, not all inks do.)
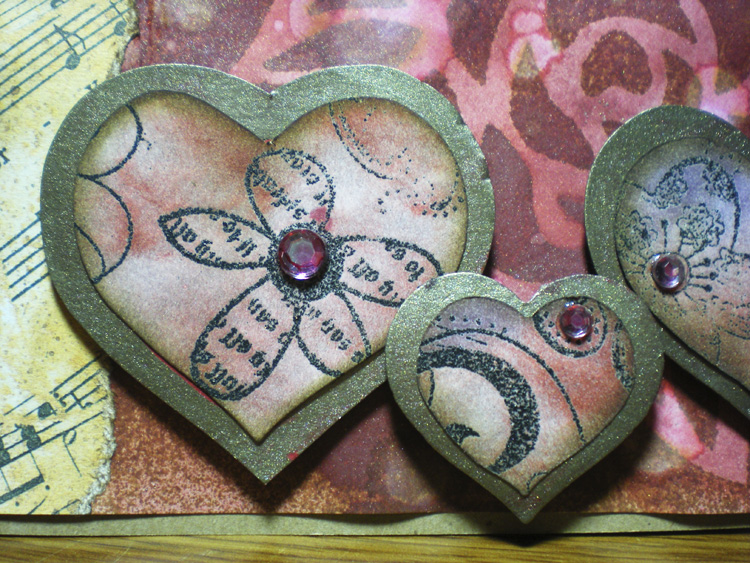
The hearts were made by stamping a variety of flower and scroll stamps onto white cardstock with Clear Embossing Ink, then embossing with Black Soot Distress Embossing Powder. After the embossing powder cools, color the paper with a variety of distress inks. I used Dusty Concord, Worn Lipstick and Fired Brick. I used the Sizzix Heart Set red die to cut several hearts from this paper. Ink the edges of all the hearts with Vintage Photo.
The gold hearts were cut with the same die, but they were painted with perfect pearls. Again, SO easy! Use a paintbrush to mix a small amount of perfect pearls (Heirloom Gold is what I used here) with a few drops water until you have a paint-like consistency. Use this to paint the outer edges of your larger hearts. Sparkly. 🙂
Of course, you need to add some bling! I only buy gems in clear, and then color them to my hearts contnet (pun intended) with alcohol inks. These were colored with Cranberry. Perfect!
To finish it up, add a strip of torn music paper inked with Vintage photo and a stamped sentiment.
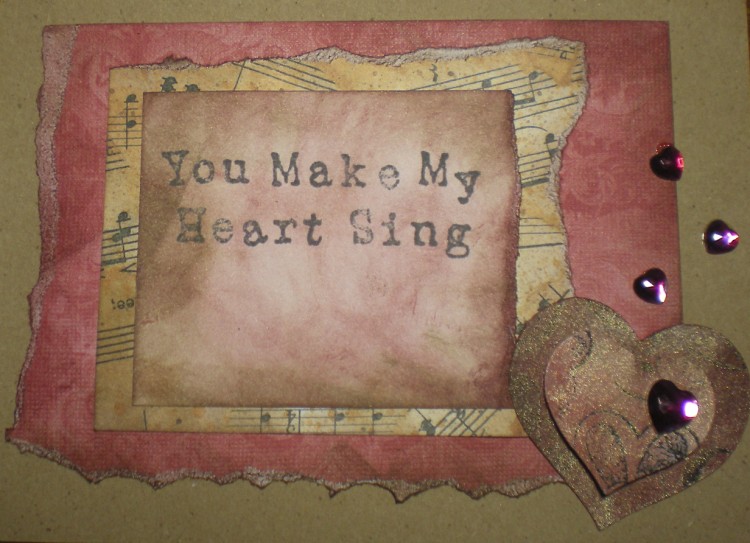
Oh, and here’s the inside (composed mostly of leftover scraps on my table.)

That is so sweet! You make the cutest stuff.
Thank you! Glad you like it.
It’s my hope that folks will be encouraged to try some of these techniques themselves. It’s fun stuff!